Give your guests a convenient and self-serve way to manage and redeem their passes, memberships and gift cards, by enabling online accounts in your progressive checkouts.
Using ROLLER’s online accounts feature, you can reduce operating costs and save your venue time, as guests now have the option to view their passes, memberships and gift cards all in one place, as well as being able to upgrade and reactivate their memberships, manage their bookings, parties and more!
This article will walk through how you can enable and configure online accounts from Venue Manager.
Pro feature
Save time and reduce operating costs by encouraging guests to create an online account with your venue. To unlock this feature with a Pro plan and above, contact your customer success manager or the support team.
When to use
Online accounts are a great option if you want to:
Give your guests control over their own bookings.
Reduce the time your staff and guests spend on the phone confirming booking details.
Reduce operating costs by moving to a lower-touch customer service model.
Venues must be using progressive checkouts to enable online accounts. Learn more
How it works
Enable online accounts from Venue Manager, and then choose if you want to auto-invite guests to create an online account after they complete a purchase.
Choose a primary checkout as a default, for when guests are directed to a checkout to renew a membership or manage a booking.
Set booking management rules. For example, configure how long in advance a guest can make a change to their party booking.
Configure and manage how refunds will work.
Enable online accounts
To enable online accounts in your progressive checkouts, follow the steps below.
From Venue Manager, go to Apps > Progressive checkout > Settings.
Select the Online accounts tab.
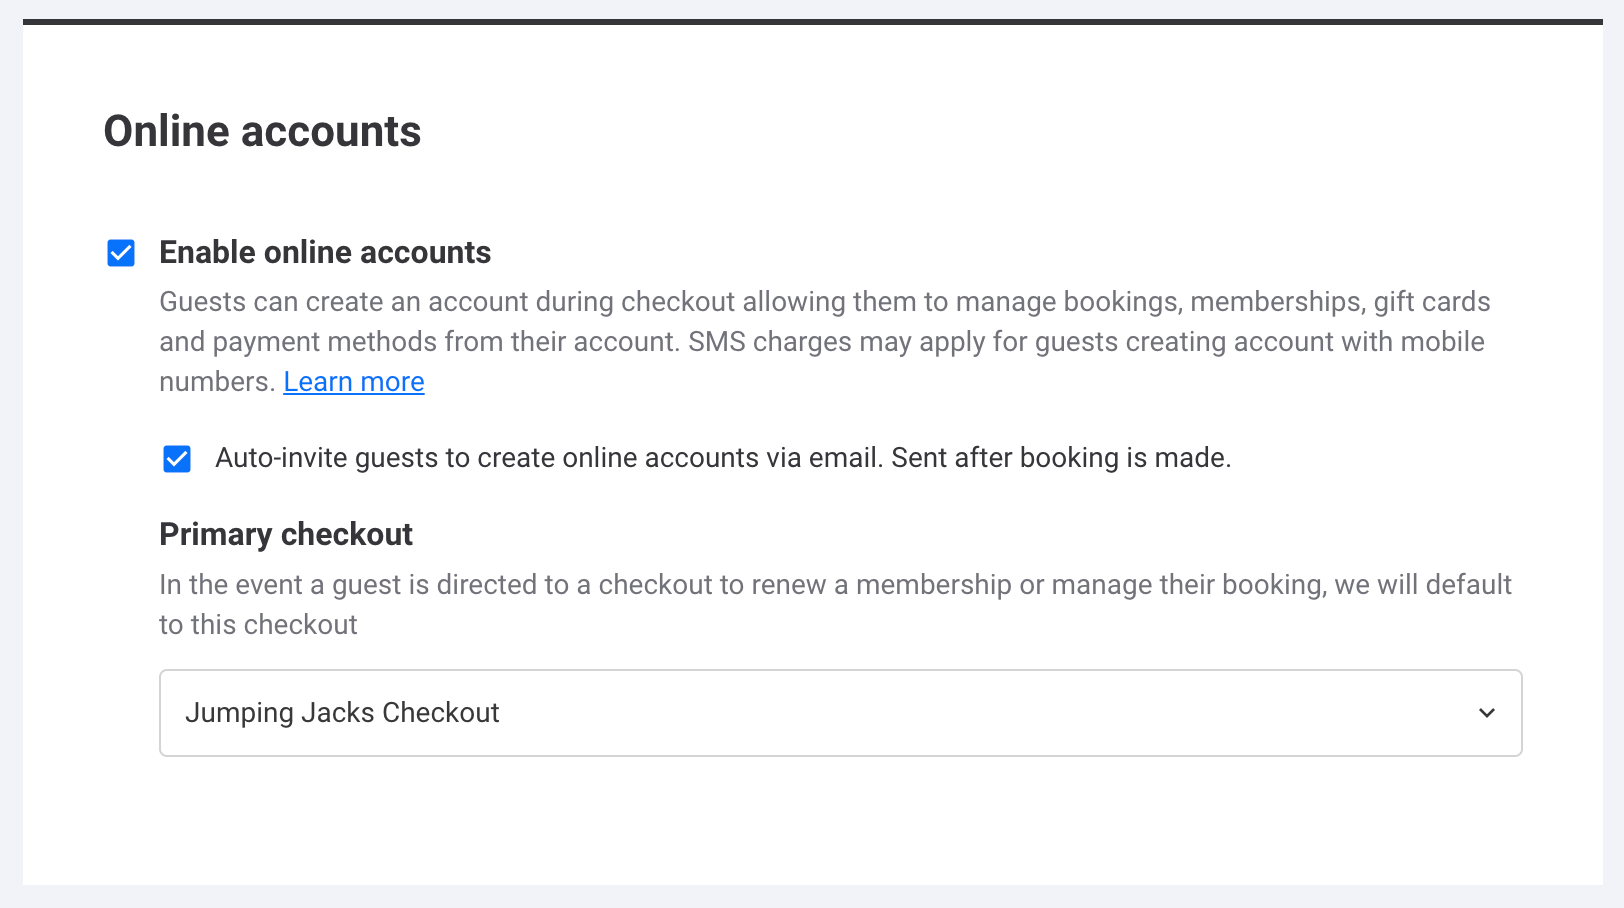
Select Enable online accounts.
Select Auto-invite guests to create online accounts via email if you’d like to automatically invite your guests to create an online account after they’ve completed a purchase. This option is selected by default for all new venues.
Select your Primary checkout. This is the checkout your guests will be directed to when they want to renew or redeem a membership, or add more tickets to their booking.
The Primary checkout is used when guests access online accounts from outside of any checkout (e.g., from an email). If they access their online account from within a different checkout session, they will remain in that same checkout.
This feature is a global checkout setting, and once enabled will be available in all your progressive checkouts.
When this feature is enabled:
Guests can create an online account with your venue.
Guests can log in securely using email, mobile or their preferred social account.
Guests can view their passes, memberships and gift cards in one place, and quickly and seamlessly redeem online and at POS.
Guests can quickly and conveniently manage their memberships and bookings once booking management rules have been configured. For example, they can upgrade their memberships from their online account, or change the date and time of their session passes.
Send guests directly to the online accounts login page
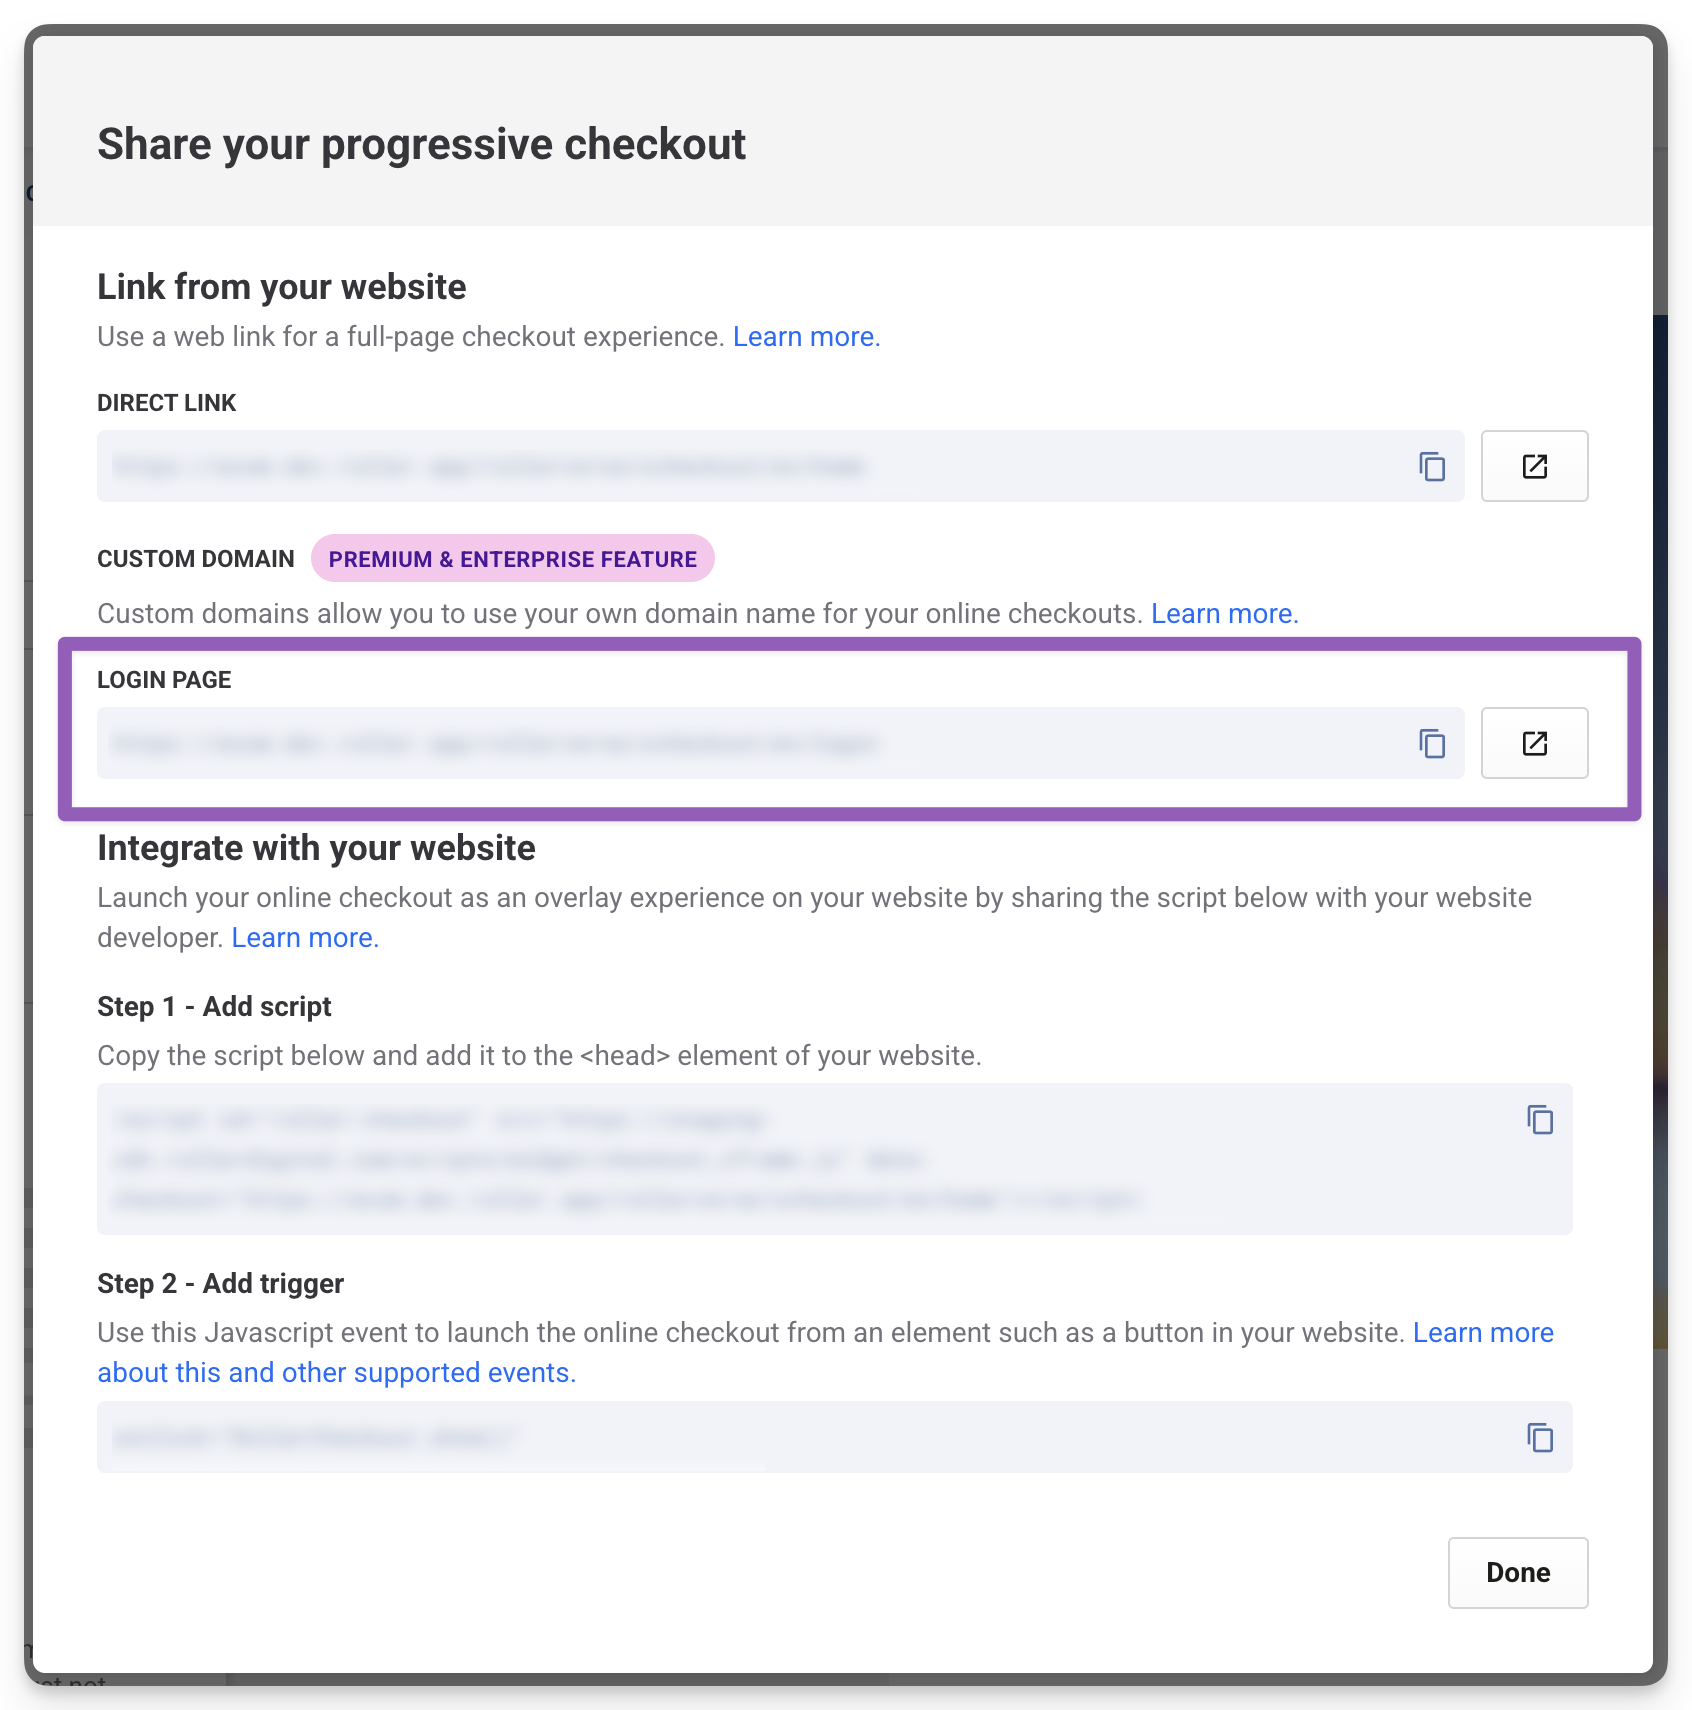
To encourage your guests to use their online accounts, and to make the login experience as easy as possible for your guests, you can add a direct link to the login page on your website. Guests click your "log in now" button to launch the login page. Follow the steps below.
From Venue Manager, go to Apps > Progressive checkouts > All checkouts.
Select your checkout, which will take you to the Basics tab.
In the top-right corner of the page, select Share.
Copy the link under Login page and add this to your website "log in now" button.
Allow guests to manage their own bookings
Give your guests the ability to manage their own bookings via their online account, by configuring booking management rules with parameters set by your venue.
From the Online accounts tab, you can configure the following rules:
Allow guests to re-schedule bookings: When this option is selected, you can specify how long before a booking your guests are able to make rescheduling changes.
For example, you may allow guests to reschedule up to 1 day before the booking date. You can also set this block-out period in the number of hours before a booking, by selecting the drop down and changing from days to hours.Allow guests to add products & tickets to bookings: When this option is selected, you can specify how long before a booking your guests are able to add more tickets or additional products to that booking.
For example, you may allow guests to add additional products and tickets to their booking up to 1 day before the booking date. You can also set this block-out period in the number of hours before a booking, by selecting the drop down and changing from days to hours.Allow guests to remove products from bookings: When this option is selected, you can specify how long before a booking your guests are able to remove tickets and add-ons from that booking.
For example, you may allow guests to remove products from their booking up to 1 day before the booking date. You can also set this block-out period in the number of hours before a booking, by selecting the drop down and changing from days to hours.
These rules are a global checkout setting, and once enabled will be applied in all your progressive checkouts.
If you don’t want to give your guests the option to self-manage their bookings, you have the flexibility to not set any rules or you can choose which ones you want to enable and which ones you don’t.
Set a custom message for guests managing bookings
Some venues might need guests to follow specific steps when managing bookings—like calling the venue directly for certain changes.
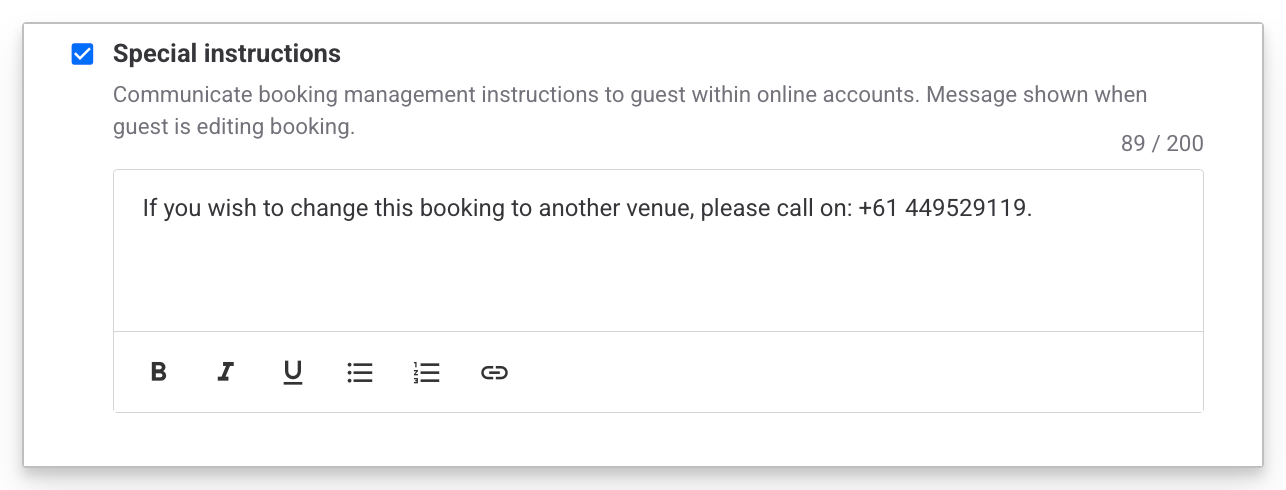
For scenarios like this, you can add a custom message. This message appears in the guest’s online account on the booking confirmation screen and when they edit their booking.
To add a custom message:
Select the checkbox Special instructions.
Enter the message into the text field.
Select Save.
Set booking management rules
To set your booking management rules, follow the steps below.
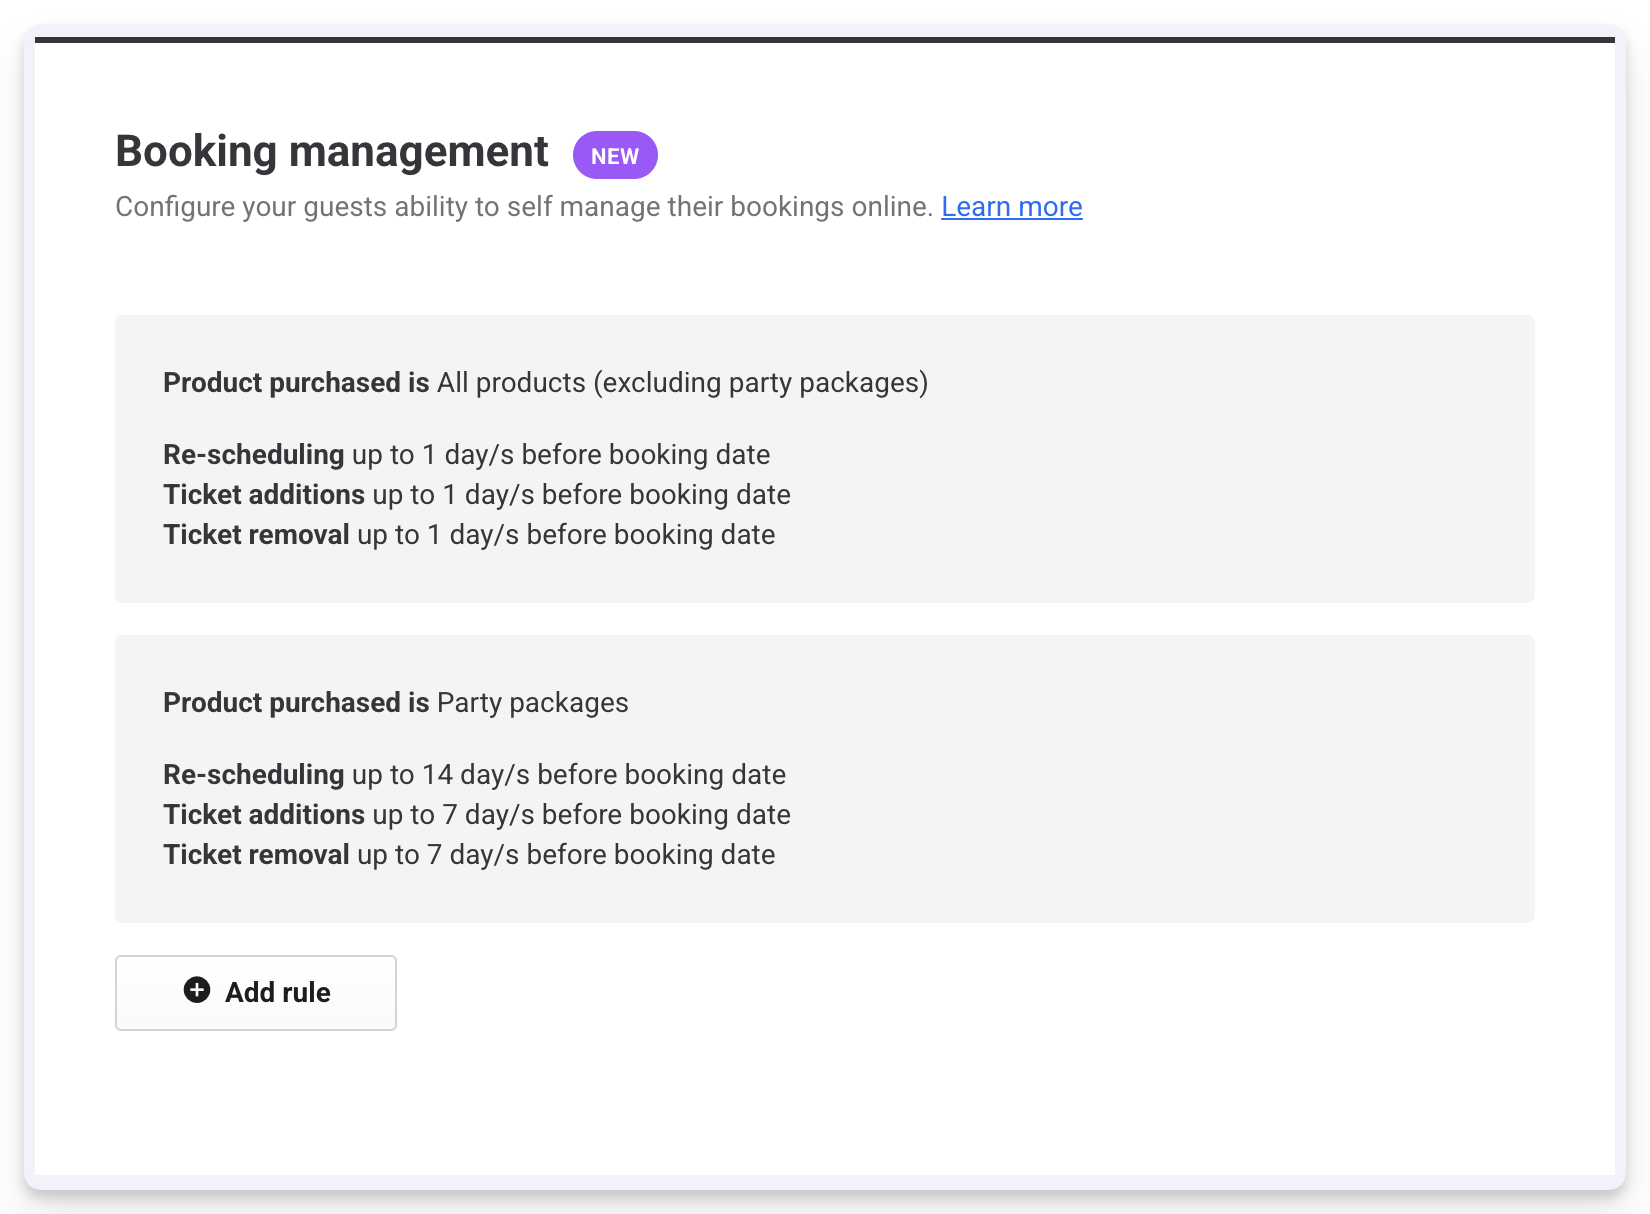
Under Booking management, select Add rule.
Select the products that will be effected by this rule. You have the option to choose Select products, All products (excluding party packages) and Party packages.
Next, set your booking management rules. You can allow guests to reschedule their bookings, add products and tickets to their bookings and remove products and tickets from their bookings. You can configure some or all of these rules depending on how much control you'd like to give your guests.
Once your rule is set up, select Add rule and then Save.
Follow this process for each booking management rule you'd like to create. For example, you might have one rule for session passes and another for party packages.

Rules and exceptions for booking management
There are some rules and exceptions that are always in effect for booking management. These have been outlined below.
Rules | Products |
|---|---|
These product types can be edited when you've configured your booking management rules | Session passes Standard passes (but only if Pass is valid from date of purchase and Pass is valid from date of redemption has NOT been set. This is because their validity is not tied to a date originally chosen by the guest) Packages Party packages Add ons and stock (but only if the products listed above are in the booking alongside the add ons and stock) |
These product types cannot be edited regardless of other items in the booking | Recurring passes Gift cards Wallets Cashless cards Memberships (recurring and once-off payment types) |
These product types cannot be added to a booking that's being edited | Gift cards Memberships Party packages |
These booking types cannot be edited | Products with recurring payments (eg memberships) Membership only bookings Add-on only bookings Stock only bookings Bookings with outstanding payment owing (excl. deposits, as you can edit bookings with deposits only) |
When editing a booking, guests cannot redeem additional discounts, gift cards or memberships. Existing discounts or memberships will continue to apply, but will be re-validated against the adjusted booking. For example, if a guest tries to adjust their booking outside of a discount's validity period, the discount will no longer apply to the booking.
Manage credit and refunds
When guests make changes to their bookings, for example, they remove a product, you may have a scenario where guests require a refund as the change has resulted in credit owing to the guest.
You can view credit owing to a guest from Venue Manager (this does not display in the guest's online account). Follow the steps below.
Go to Bookings > All bookings.
Search for the booking that requires a refund.
The booking balance will show as Overpaid with the required refund amount. You can then refund the guest when they contact your venue.
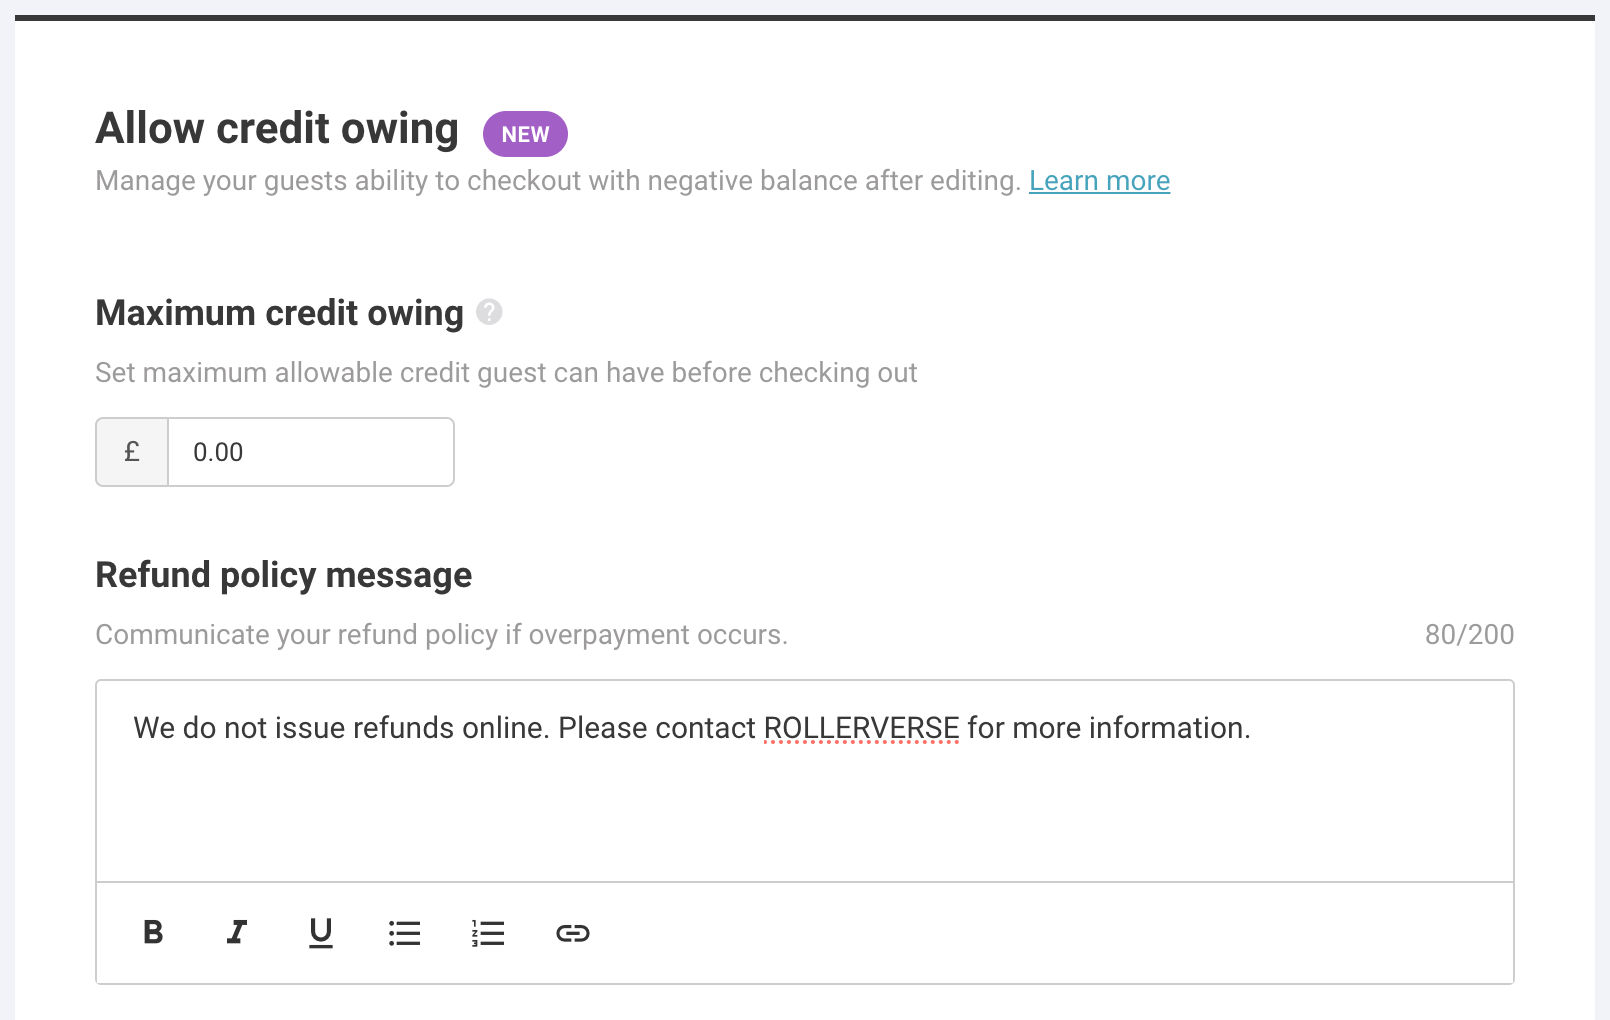
From the Online accounts tab, you can configure how you want your checkouts to manage credit and refunds by following the steps below.
From the Allow credit owing section, set a Maximum credit owing amount in the space provided. This restricts how much credit can be owed to a guest before they’re allowed to check out.
If you don’t want to allow any credit owing, keep the maximum credit amount at $0.00.Include your Refund policy message.
This message is important because ROLLER does not issue refunds via online accounts. You can use this space to let guests know what your venue’s policy is if overpayment occurs (credit is owed to the guest). You can override the default message by adding in wording of your own.
If a guest makes any changes to their booking that results in credit owing to the guest, it’s a venue’s responsibility to handle the refund process.