Provide a modern guest experience and increase online conversions with ROLLER’s progressive checkouts.
Progressive checkouts, which include online checkouts and mobile food & beverage checkouts, take the guest experience to a whole new level, increase conversion rates and reduce cart abandonment by making the online purchasing process as smooth and intuitive as possible. Mobile optimized and with the choice of multiple payment options, progressive checkouts give your guests a seamless booking experience, all in just a few clicks!
Results from our customers show a 10% increase in conversion rates!
Improve your sales and the guest experience
We’ve designed and built the checkout experience with several key goals in mind:
Boosting conversion rates and average transaction value by optimizing for mobile and adopting best practice conversion patterns. Learn more
Greater flexibility in checkout configuration, providing you with more dynamic ways to display and promote your experiences. Learn more
Providing return guest functionality, such as online accounts that enable guests to manage their bookings, memberships, waivers and payment methods. Learn more
Enabling mobile food and beverage ordering, alleviating staffing challenges and making it more efficient to manage food and beverage services at your venue. Available on Premium and Enterprise plans.
Progressive checkouts are available on all ROLLER subscription plans, but your venue must be using ROLLER Payments. If you’re not currently using ROLLER Payments and want to get started, contact your customer success manager or the support team.
Key features of progressive checkouts
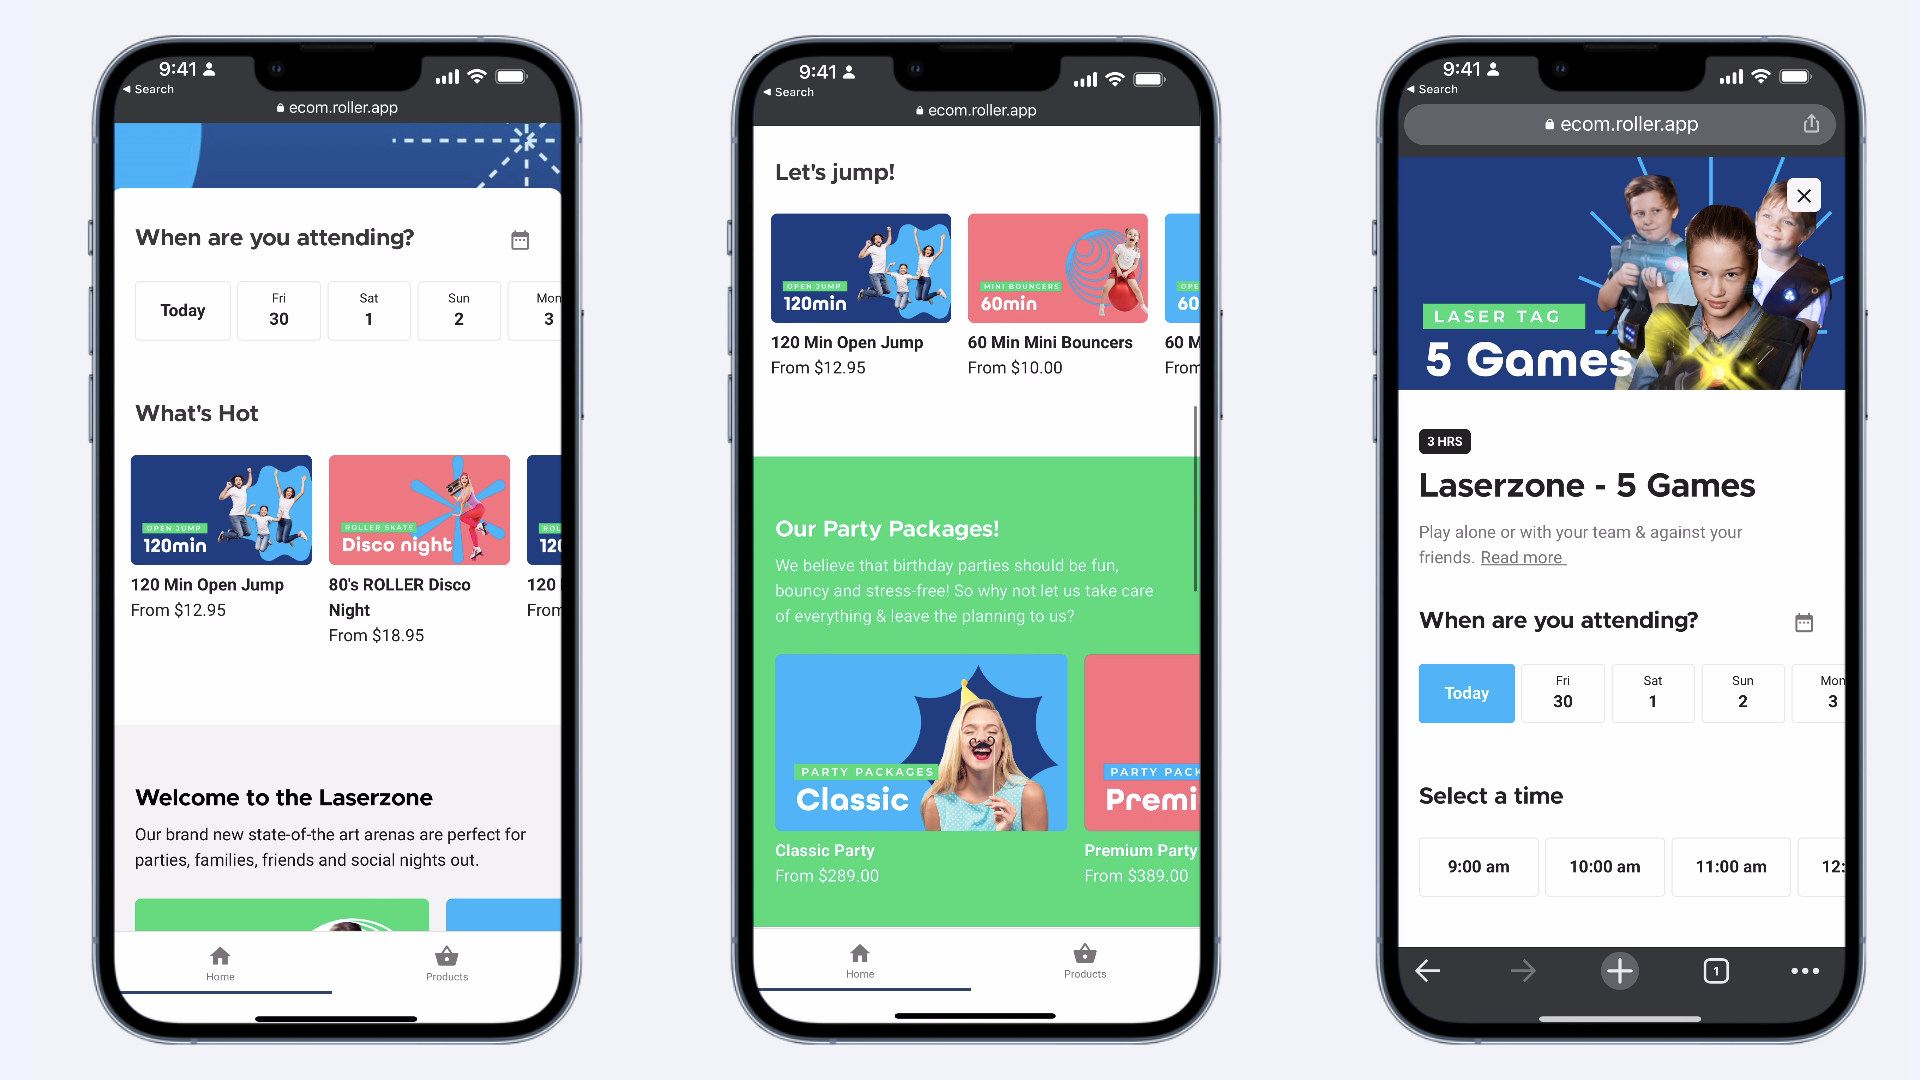
Mobile optimized design: A mobile-first design given that over 80% of guest traffic is via mobile.
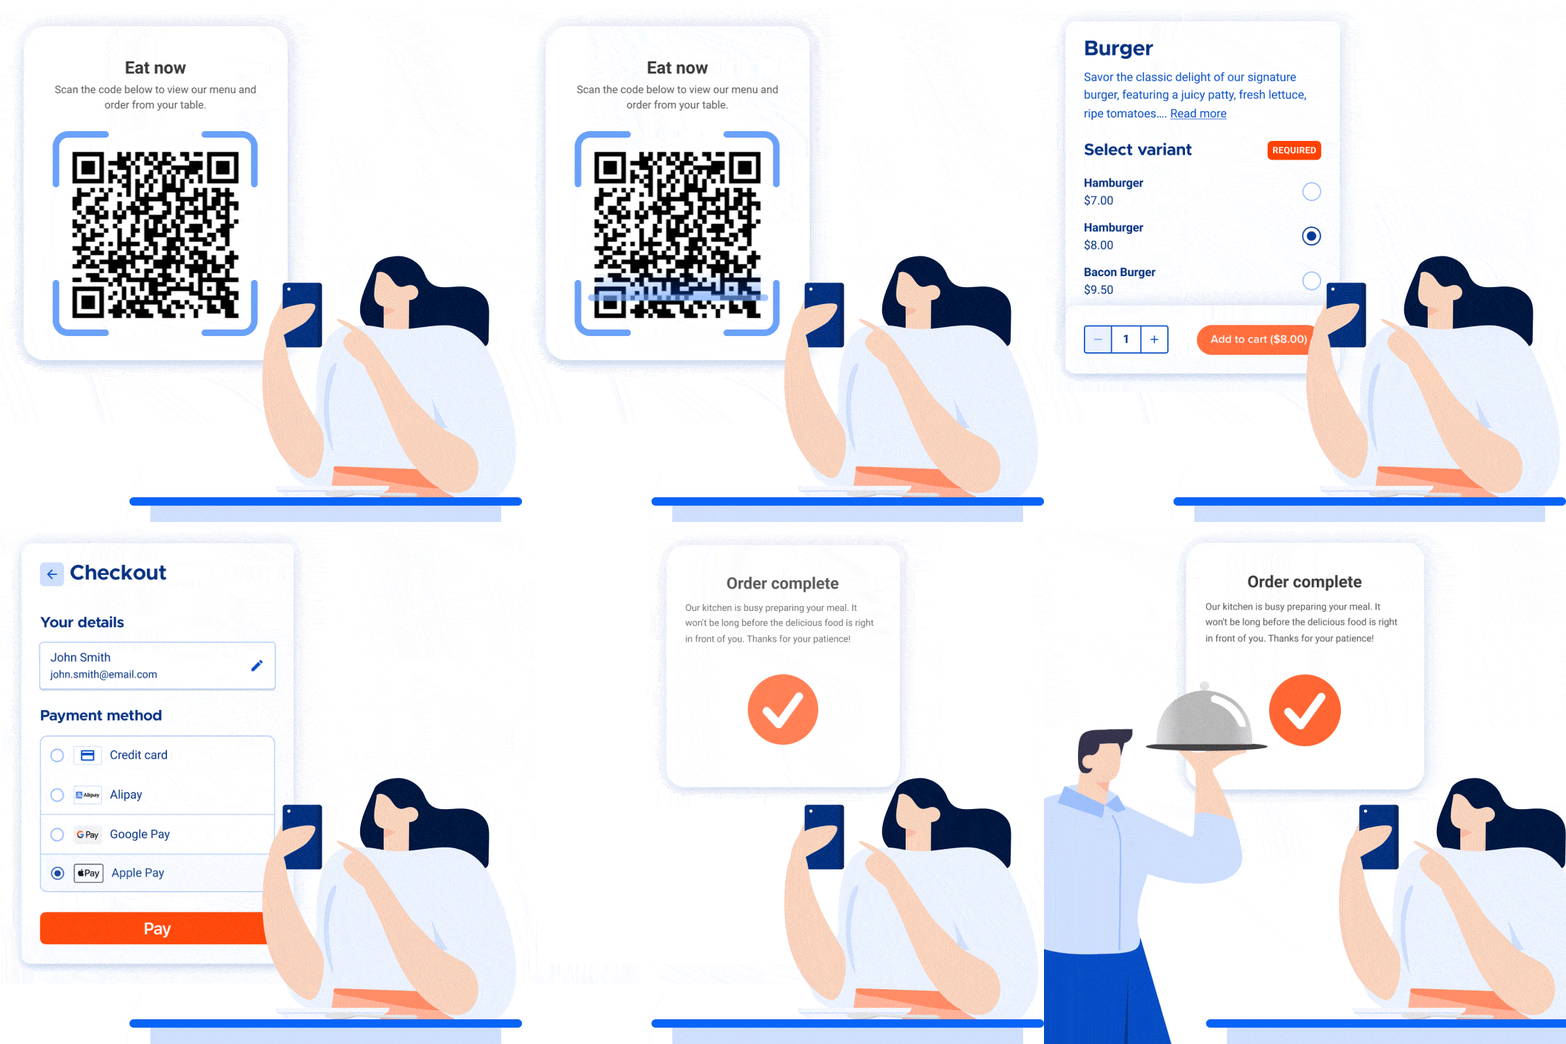
Mobile food and beverage ordering (Premium and Enterprise plans): Guests can relax and place their orders when they want, using their mobiles, without having to wait in queues to be served. Contact your customer success manager to have mobile food and beverage enabled.
Online accounts and booking management: Guests logged into their online account can effortlessly self-manage bookings, eliminating the need for staff intervention.
Upsell any product type at checkout: Add-ons and upsells are a great way to encourage cross-selling or upselling opportunities and increase your guests average order value.
Digital wallet memberships and passes: Improve the guest redemption experience at your venue by enabling guests to redeem their memberships and passes via their smartphone’s digital wallet app.
Tracking online guest behavior and conversion rates: You can easily track and send events to connected tools such as Google Analytics, Meta Pixel, Tik Tok Pixel and Google Tag Manager, making it easy to share marketing data with the platforms you’re working with.
Support for custom online checkout domains: You can host ROLLER checkouts on custom domains such as tickets.trampolinepark.com to optimize conversion and tracking data capture. This feature is available on a Premium plan.
More control over your checkout: Progressive checkouts provide you with greater flexibility and much more control over your checkout design and configuration based on your business's particular needs, including more dynamic ways to display and promote your products and offerings.
You have control over the following design and configuration features:
A full-page checkout experience
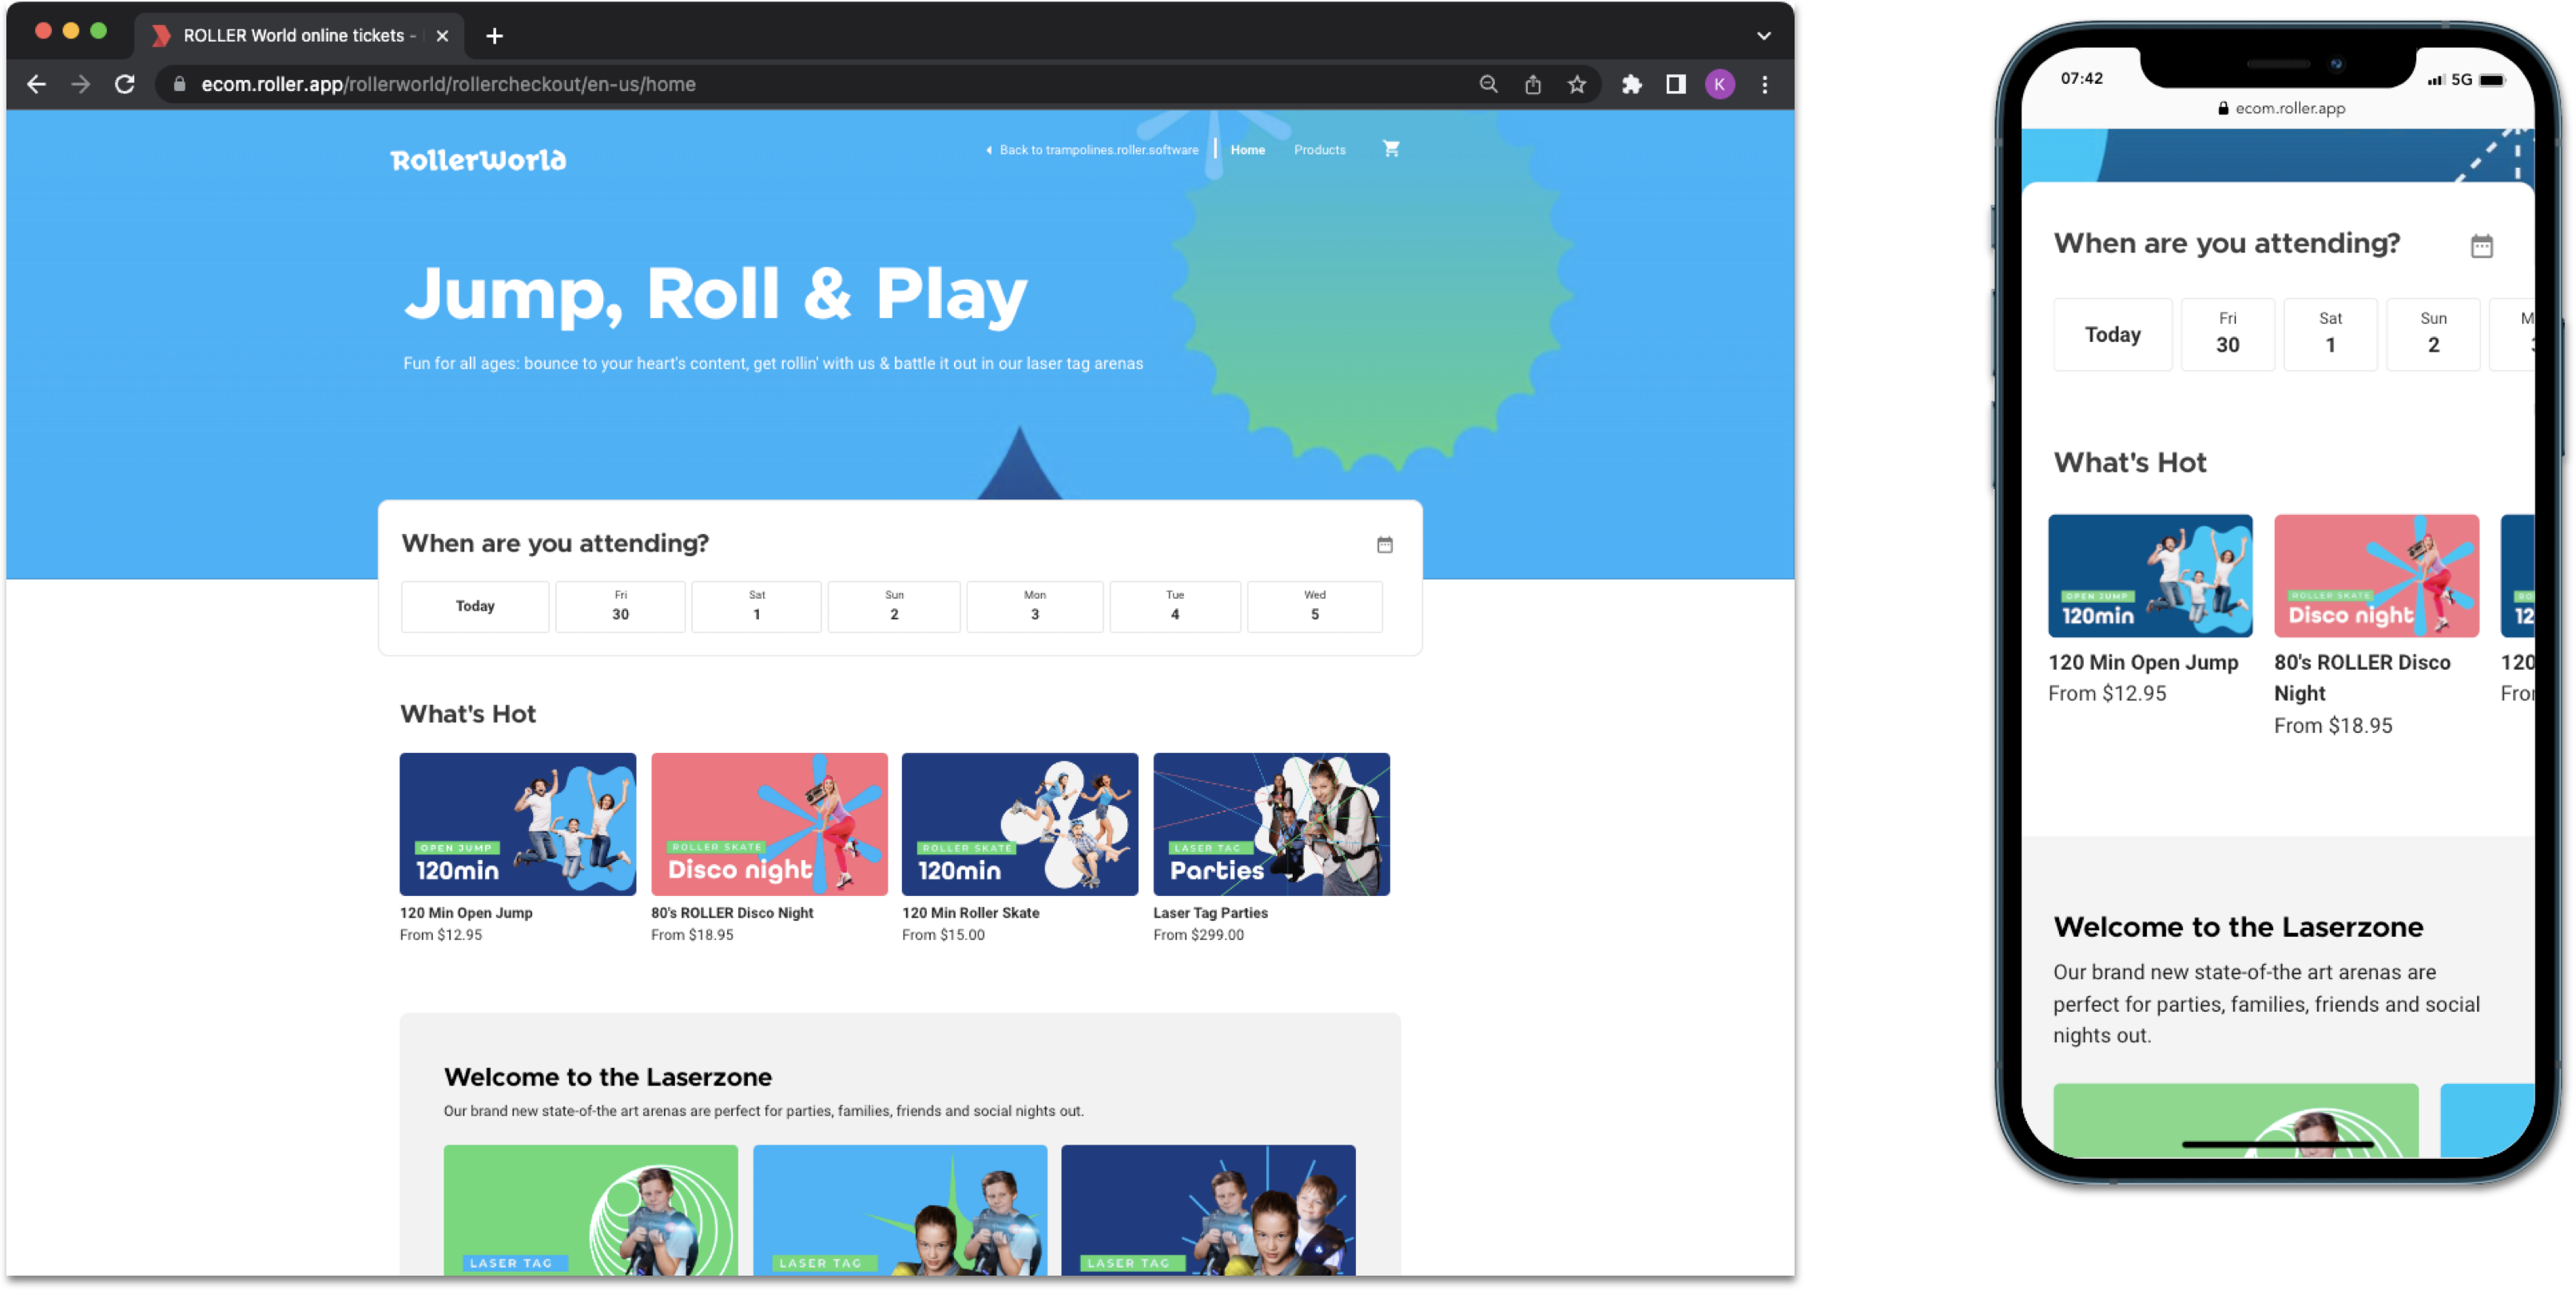
A home page can act as the starting point for your checkout and provides a full-page checkout experience for your guests. You can also toggle off the home page and start the full-page experience on your checkout products page.
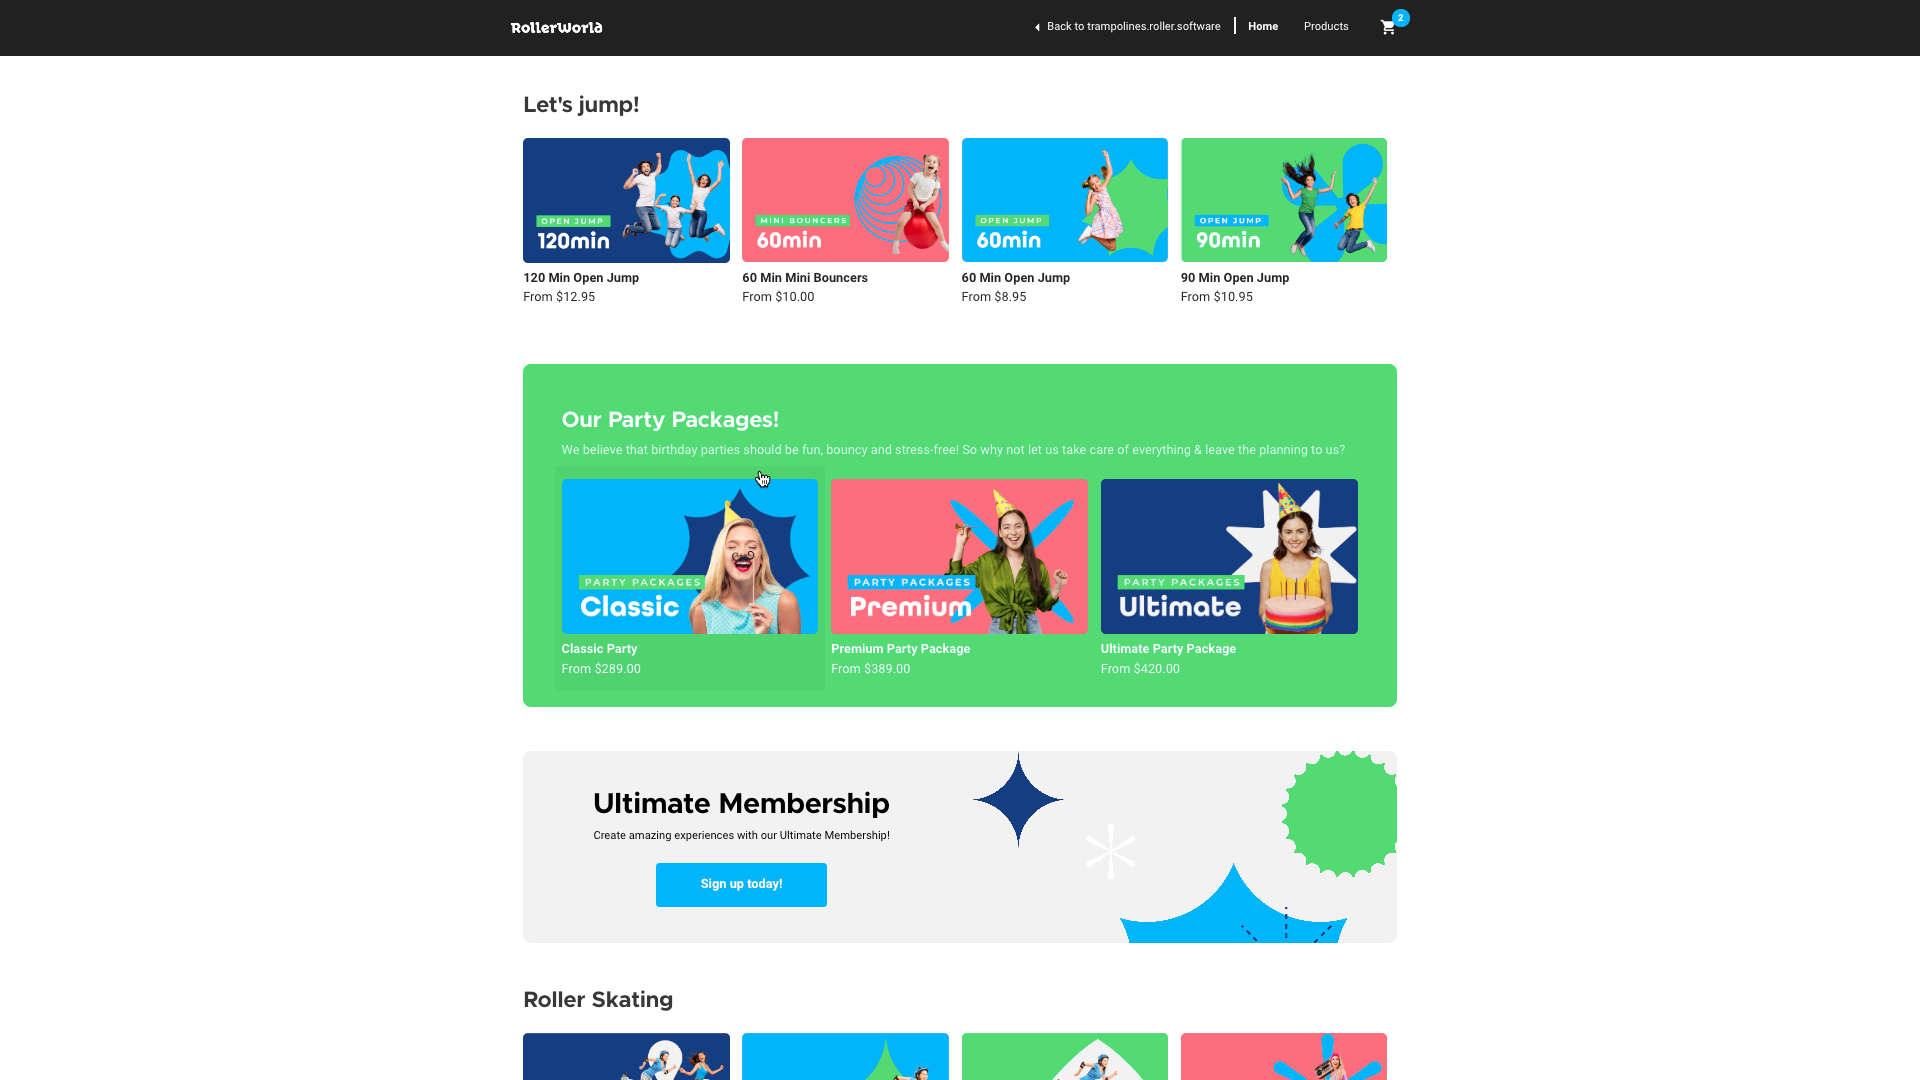
Home page widgets
Home page widgets allow you to dynamically control the products and offerings that you promote on your checkout home page. They allow you to showcase a group of product offerings using categories and can have clear call-to-actions to products in your checkout or external web pages such as upsell items, memberships, parties, discounts, food & beverage and more.
An overlay checkout experience
If you already have a website that gets a lot of guest traffic, or are currently using the legacy embedded checkout, this option may be a better fit for you. This allows you to integrate your checkout with your website and launch it as an overlay experience on your website. You can also link to specific products on your checkout from different pages in your website, removing the need to maintain multiple checkouts.
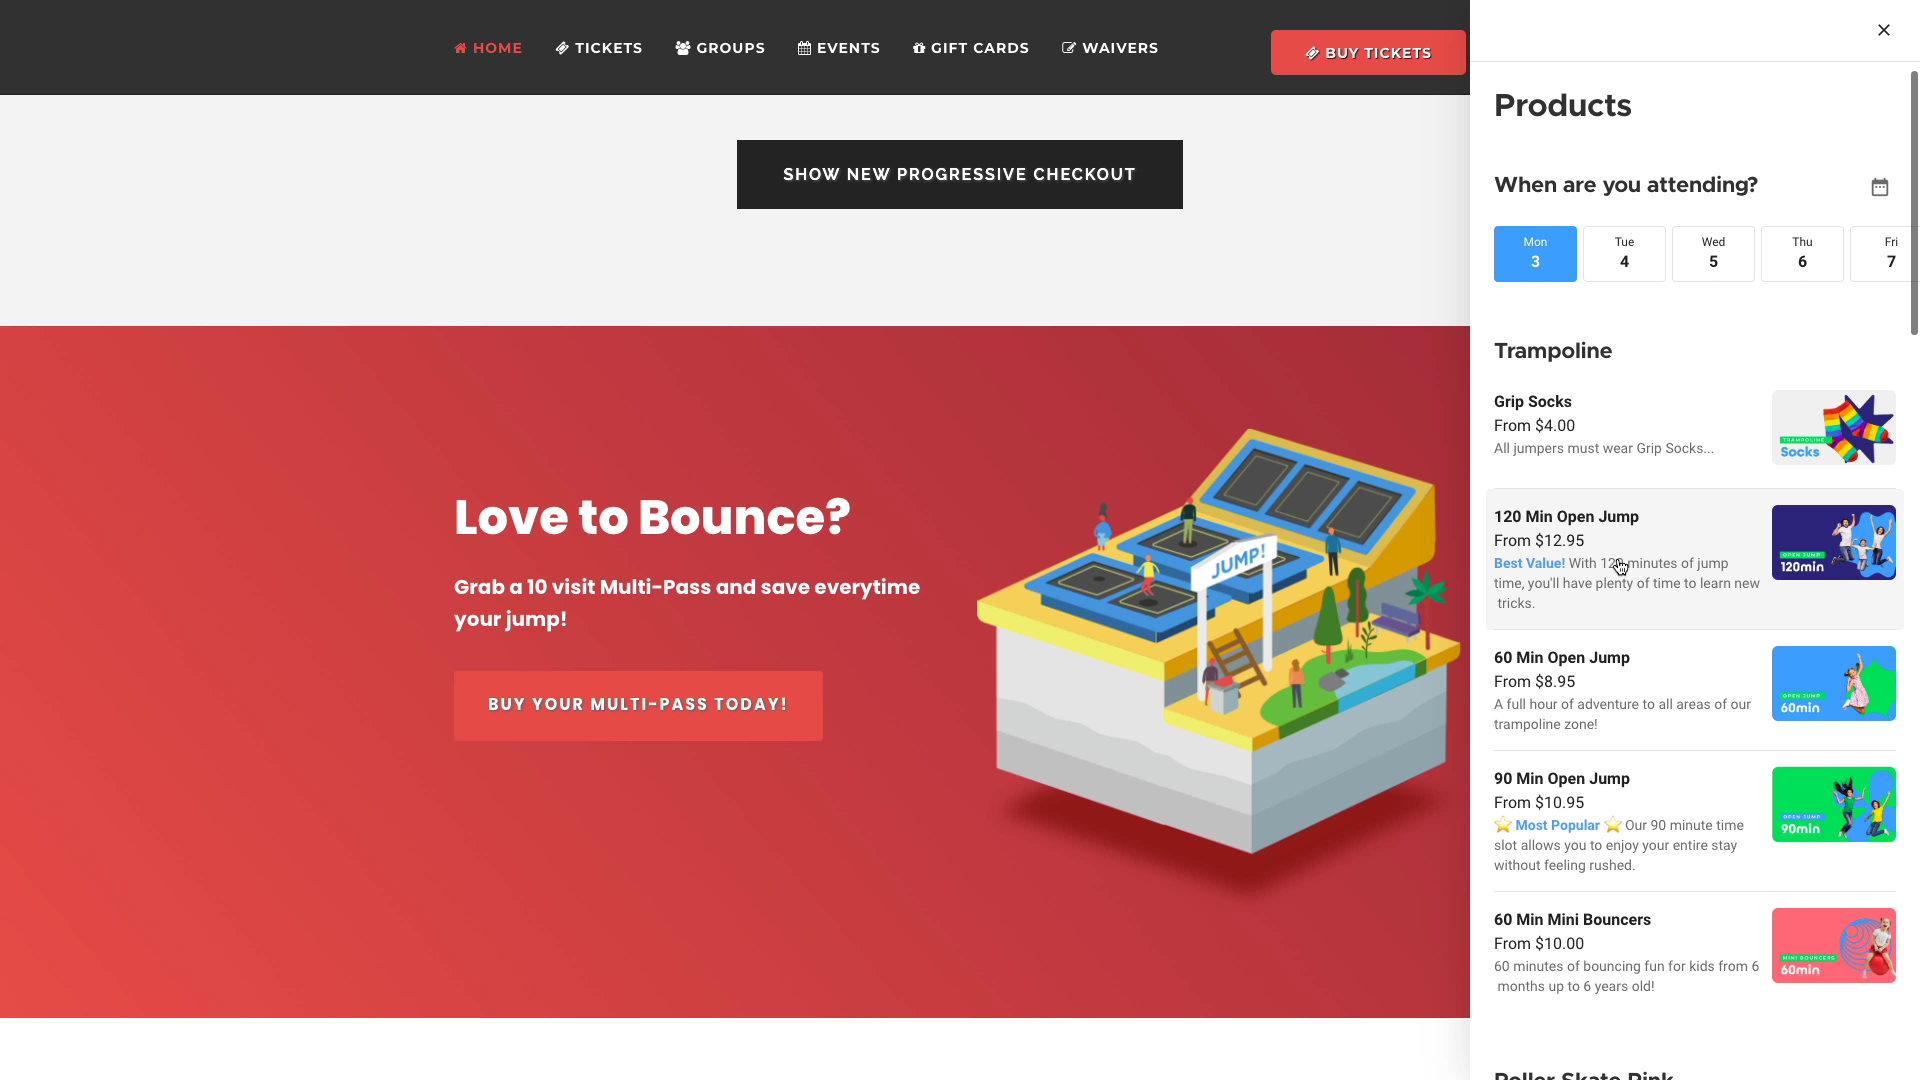
Categories on your products page
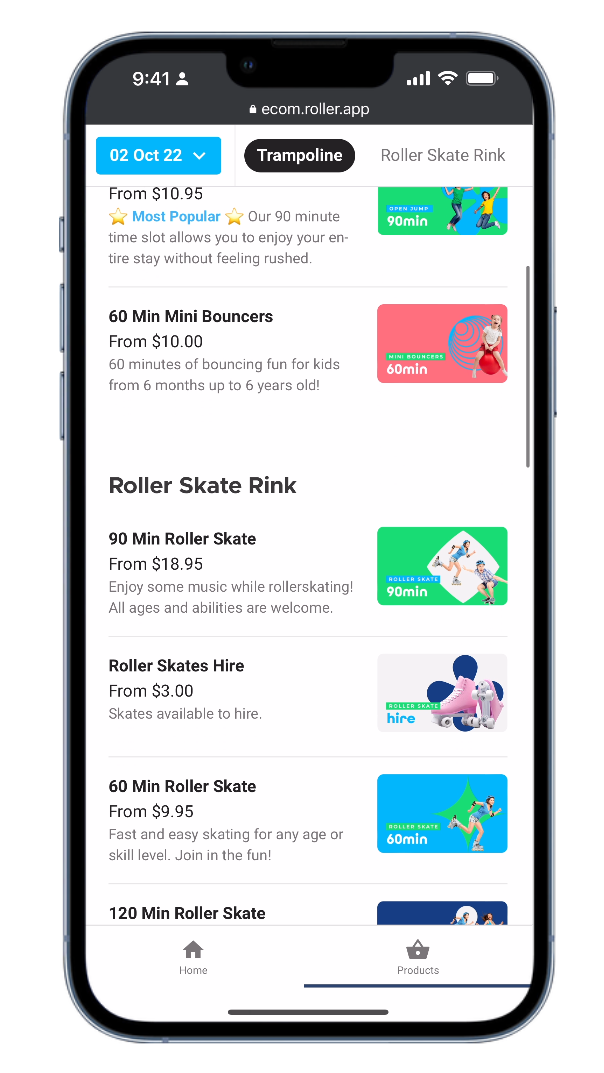
You can control how your products display to guests on your products page including grouping your products into categories. Once you’ve set up your product categories, when you add a new product to a category, it automatically shows up in the checkout, making it really easy to set up and manage your checkout.
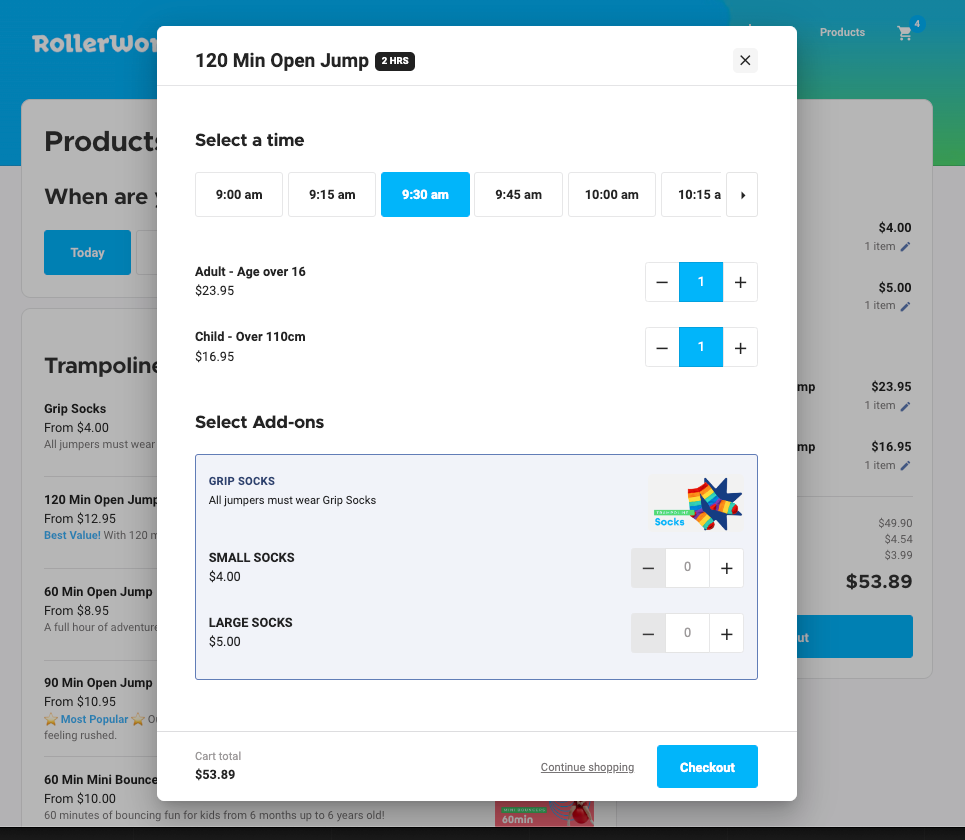
Contextual upsell add-on items
You can configure add-ons to be shown with the product that the guest chooses, on a dedicated page before checkout, or in both positions in your checkout. Any existing product in ROLLER (except party packages) can be added as an upsell item.
Appearance
You have several options to set the look and feel of your checkout, how your products appear in the checkout and other options for customizing your products, details and payment pages.
Best practices
To get the most out of your checkouts, we’ll walk through some best practices below.
Create one default checkout for easier booking management
When planning your checkout, it’s best practice to create one default checkout for easier booking management and cross-selling opportunities. This checkout should include all the products you intend to sell online.
Having this default checkout is optimal, because if guests have to edit or manage their bookings through the online accounts feature, they’ll be able to access a single checkout with all product options available to them. Having one default checkout also allows for better cross-selling opportunities. You can't cross-sell items on different checkouts in one transaction, so keeping all products together on one checkout is the best way to encourage higher spend per guest.
Use the overlay checkout on your website and full-page checkout for socials/marketing campaigns
Using the overlay checkout on your website is the best approach to maximize guest engagement and revenue generation because you can integrate this checkout experience seamlessly with your website.
The overlay experience is a great choice for the following reasons:
Guests stay on your website, reducing the likelihood of cart abandonment.
Guests can easily navigate between your website and the checkout, without losing the items in their cart, again, reducing the likelihood of cart abandonment.
Guests can quickly navigate to specific products or sections in your checkout, making the checkout experience as seamless as possible and reducing the time it takes to make a purchase.
You can have one overlay checkout per page on your website, so guests can browse and add products to their cart from as many web pages as you choose. You can include multiple (and easy-to-find) CTAs for different products or categories of products throughout your website. For example:
A Buy now! button on your home page that links to all products in your checkout.
A Book a party today! button on your parties page that links directly to the parties section of your checkout — no need for guests to scroll and find what they want, easy!
A Buy a gift card button that links directly to a specific gift card product.
To learn how to configure the overlay checkout, read the guides Share your online checkout and Add the overlay checkout experience to your website.
But, to really maximize your conversion rates, we recommend using a combination of the overlay checkout on your website, and then sharing a direct link to your full-page checkout from your socials or any marketing campaigns you're running.
To learn more about the full-page checkout experience, read the guide Add the full-page experience to your website and social pages.
Add-ons/Upsells
Now more than ever, venues are looking to increase their average order value (AOV) at checkout. You can now include any product type as an add-on (excluding party packages) when using progressive checkouts. For example:
When a guest purchases a 30-minute laser tag session, you can now upsell a session-based gun upgrade.
Alternatively, if you have other activities on either side of the guest’s 60-minute jump, those activity sessions can be upsold at the checkout!
These checkout upsells will increase the average value of each guests’ shopping cart, meaning an increase in online checkout revenue for your venue!
Venues that have configured upsells have seen an average checkout revenue increase of 3%! Some venues have even seen an increase of up to 10% — earning more than $USD45,000 in a single month, all from upsells!
We recommend configuring your add-ons to appear on a dedicated page before the checkout page. This is a great option if you want to showcase high-value upsells, like memberships.
To learn more, read the guide Create your online checkout and navigate to the Add-ons section.
Structure and presentation
A streamlined and well-organized checkout can drive purchase conversion rates. Guests are more likely to complete their purchase if they can easily find the products they want to buy because the process is quick and easy!
When creating an online checkout, from the Products tab, you can structure your products page for easy navigation and choose which products and add-ons are available for guests to purchase. Don't forget to include detailed product descriptions so your guests know exactly what they're buying, include engaging images and reduce any unnecessary steps to increase conversion rates.
To learn more, read the guide Create your online checkout.
How do I get started?
Take a look at the following guides for online checkouts:
Check out the videos on our Academy to learn how to prepare for, create and share your progressive checkout.
Take a look at these guides for mobile food and beverage ordering (Premium & Enterprise plans) :
Create your food & beverage checkout for mobile food & beverage ordering
From QR code to production areas with mobile food & beverage ordering
Manage menu availability using operating hours and stock periods
If you're on an Enterprise or Premium plan, contact your customer success manager to have mobile food and beverage ordering enabled.