Get your printer working again when a test print from a print station in Venue Manager fails. This guide covers the two test print errors and the fixes to try, in order. It assumes the printer was set up using the guide Configure printers for cloud printing.
This guide covers cloud printing. If you print through ROLLER Connect, see the guide ROLLER Connect: Receipt printing troubleshooting.
Check printer is connected to the network
Print a self-test sheet to ensure your printer is turned on and connected to the local area network.
Turn off the printer.
Press and hold the Feed button.
Power on the printer while holding Feed.
Wait for printing to start, then release Feed.
After the first page prints, press Feed once more to complete.
The self-test page will display the printer's IP parameters, including the current printer IP address. If the IP address is 0.0.0.0, the printer couldn't establish a network connection. Check the Ethernet cable connection or try a different Ethernet port on your router.
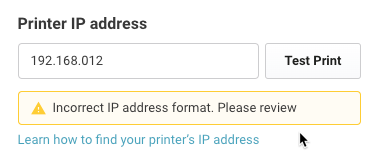
Error message: Incorrect IP address format. Please review
If you're getting this message, it means the static IP printer address you have set for the printer is not entered in the correct format in its print station.
Troubleshooting steps
Check printer's static IP address in Venue Manager (Settings > Devices).
Confirm printer's static IP address with EpsonNet Config utility.
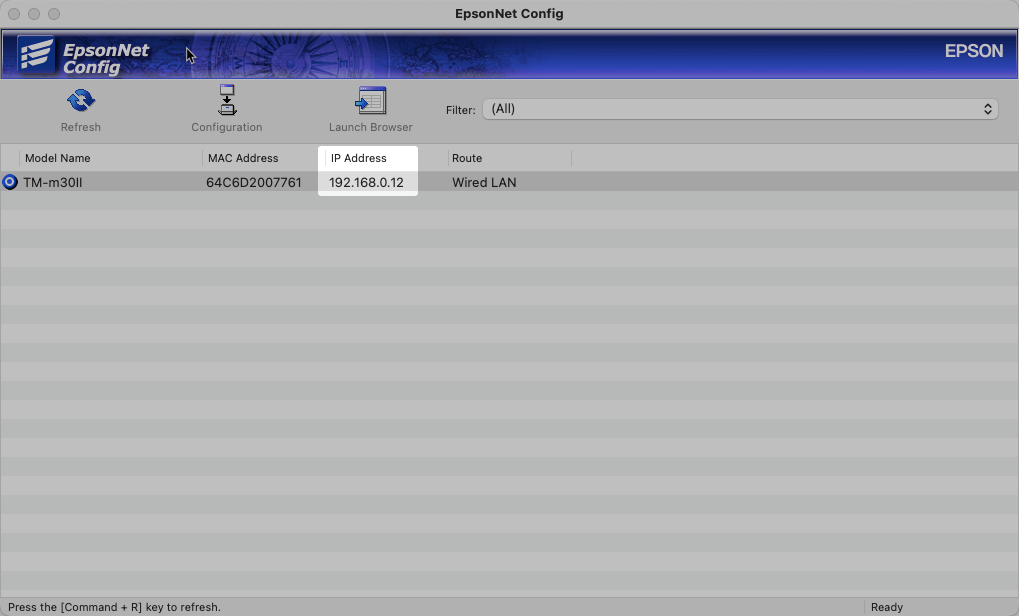
Update print station's IP address to match the printer's exactly.
Ensure no extra characters, spaces or typos in the IP address (format: xxx.xxx.xxx.xxx).
Test print in the print station.
If resolved, you'll see a green Printer is ready to use message. Select Save.
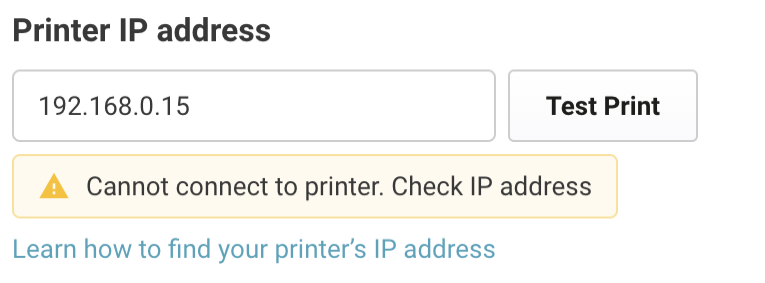
Error message: Cannot connect to printer. Check IP address
This error indicates that the print station is not connecting to its printer via the web browser.
Each POS computer needs its own copy of the printer's SSL certificate. A successful test print only proves the connection from the computer you ran it on. If a printer works from one computer but not another, go to Step 7 on the computer that isn't printing.
Step 1: Clear the browser cache and restart the printer and POS computer
Turn the printer off, wait 10 seconds, then turn it back on.
Clear the Chrome browser cache and close the browser.
Restart the POS computer.
Go to the print station in Venue Manager (Settings > Devices) and retry Test print.
If the issue persists, continue to Step 2.
Step 2: Check the printer's static IP address matches its print station
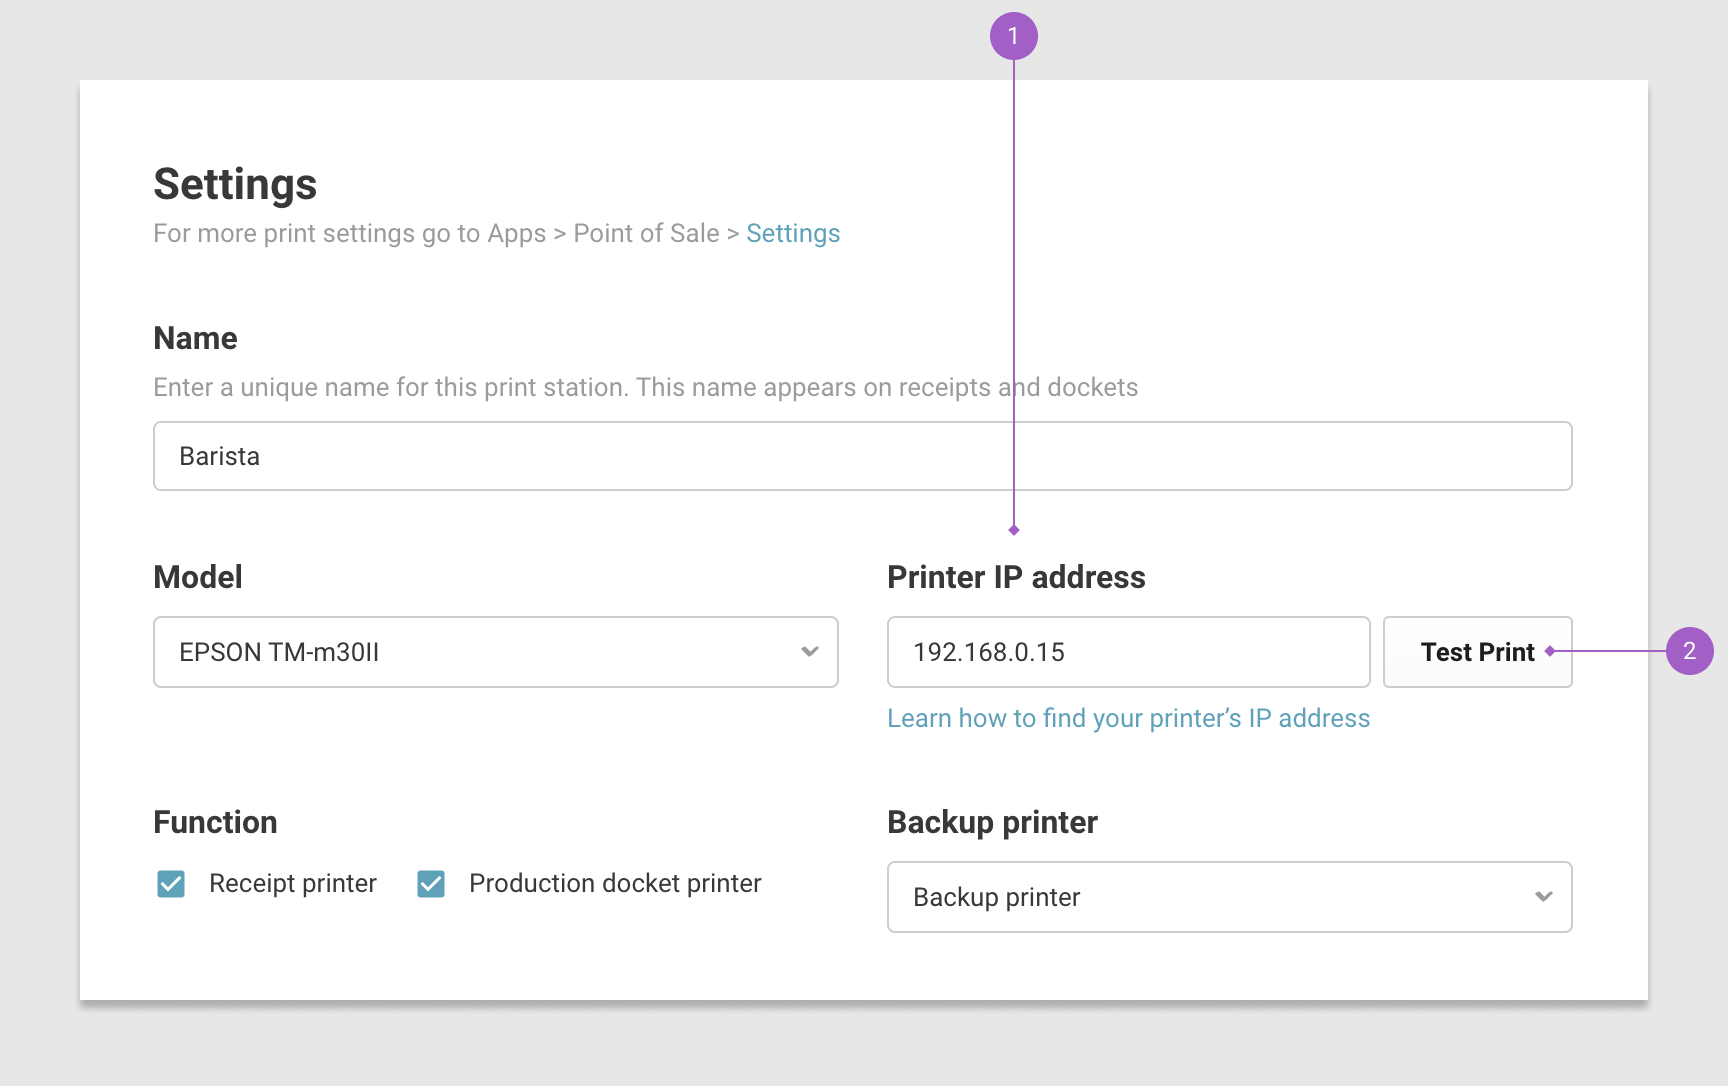
Ensure the printer's static IP address matches what you entered in Venue Manager's print station.
Use EpsonNet Config utility to confirm the printer's unique, static IP address.
From the printer's print station in Venue Manager (Settings > Devices), check the static IP address.
If they don't match, update the print station with the correct IP.
Check the printer and the POS computer are on the same network. Their IP addresses usually share the first three groups of numbers (eg 192.168.1.20 and 192.168.1.35). If they don't, connect the POS computer to the printer's network.
If the printer's IP address changed after a restart or a network change, set it back to a static IP address. To learn how, see the guide Configure printers for cloud printing.
Check no other device on your network uses the printer's IP address. Your IT team can check this for you.
Perform a Test print. If it works, you'll see a green "Printer is ready to use" message. Save the changes.
 If the issue persists, continue to Step 3.
Step 3: Allow local network access in Chrome
From POS in Google Chrome, select the settings icon to the left of the address.
Set Apps on device to Allow. In older versions of Chrome, this setting is Local network access.
Reload POS.
Repeat steps 1 to 3 in Venue Manager.
Go to the print station in Venue Manager (Settings > Devices) and select Test print again.
If you don't see either setting, clear Chrome's cache and cookies, reopen POS and Venue Manager, and select Allow when Chrome asks for access.
Step 4: Verify the connection is trusted
Open the Chrome web browser on the POS device computer.
Enter the printer's static IP address after https:// in the address bar and select Enter.
Cancel the printer's web configuration sign-in pop-up.
If it's a trusted connection, you'll see the Chrome browser secure icon in the address bar.
If it's not trusted (Not secure in the address bar), check it's not a caching issue:
Clear the browser cache on the problematic POS computer.
Close the browser and restart the computer.
Open the web browser, enter the printer's IP after https://, and cancel the sign-in pop-up.
If you see the secure icon now, it's a trusted connection.
Proceed to test print from the print station.
If resolved, a green message confirms the printer is ready, and a test sheet prints.
If the issue persists, continue to Step 5.
Step 5: Confirm the static IP address for the SSL certificate
Launch EpsonNet Config utility on the POS device computer.
Select Refresh to list connected printers.
Highlight the problematic printer and select Configuration.
From the Device Properties window:
Go to Certificate [1] and note the SSL certificate's IP address (Common Name [2]).
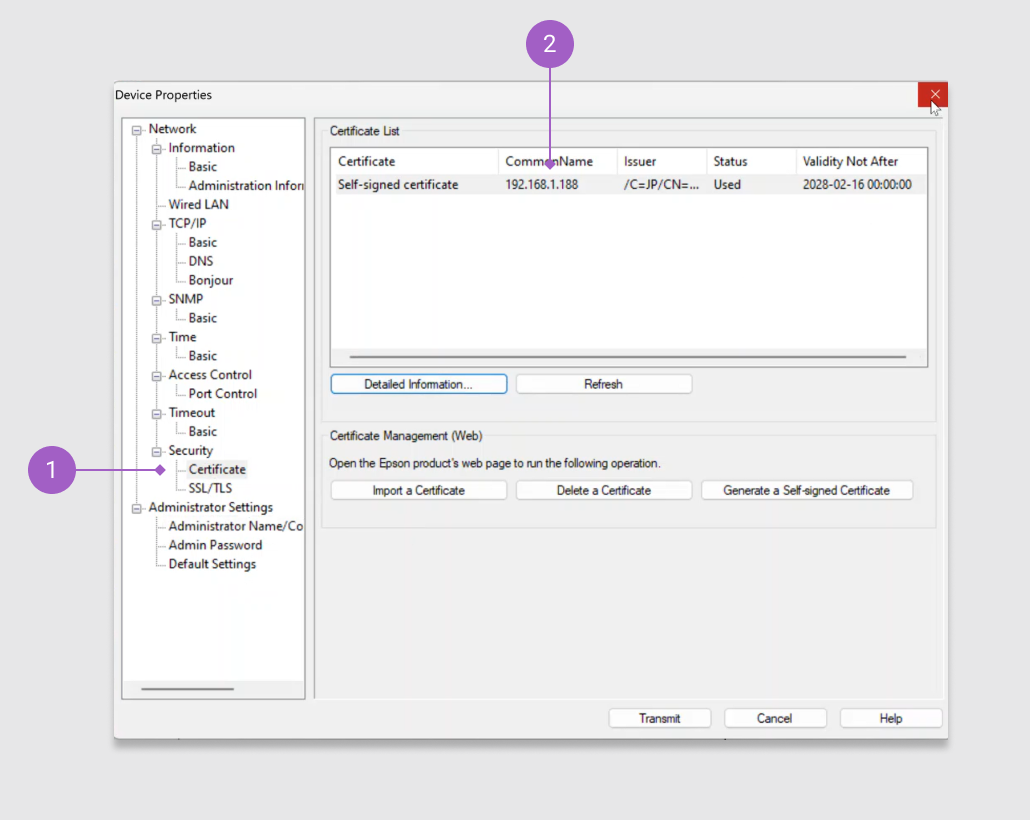
If the printer's IP address doesn't match the SSL certificate, it can be easier to manually change the printer's IP to match the certificate. This way, you won't have to go through the process of generating, exporting, and importing the certificate again. Here's how:
Select the printer in EpsonNet Config utility.
Select Configuration.
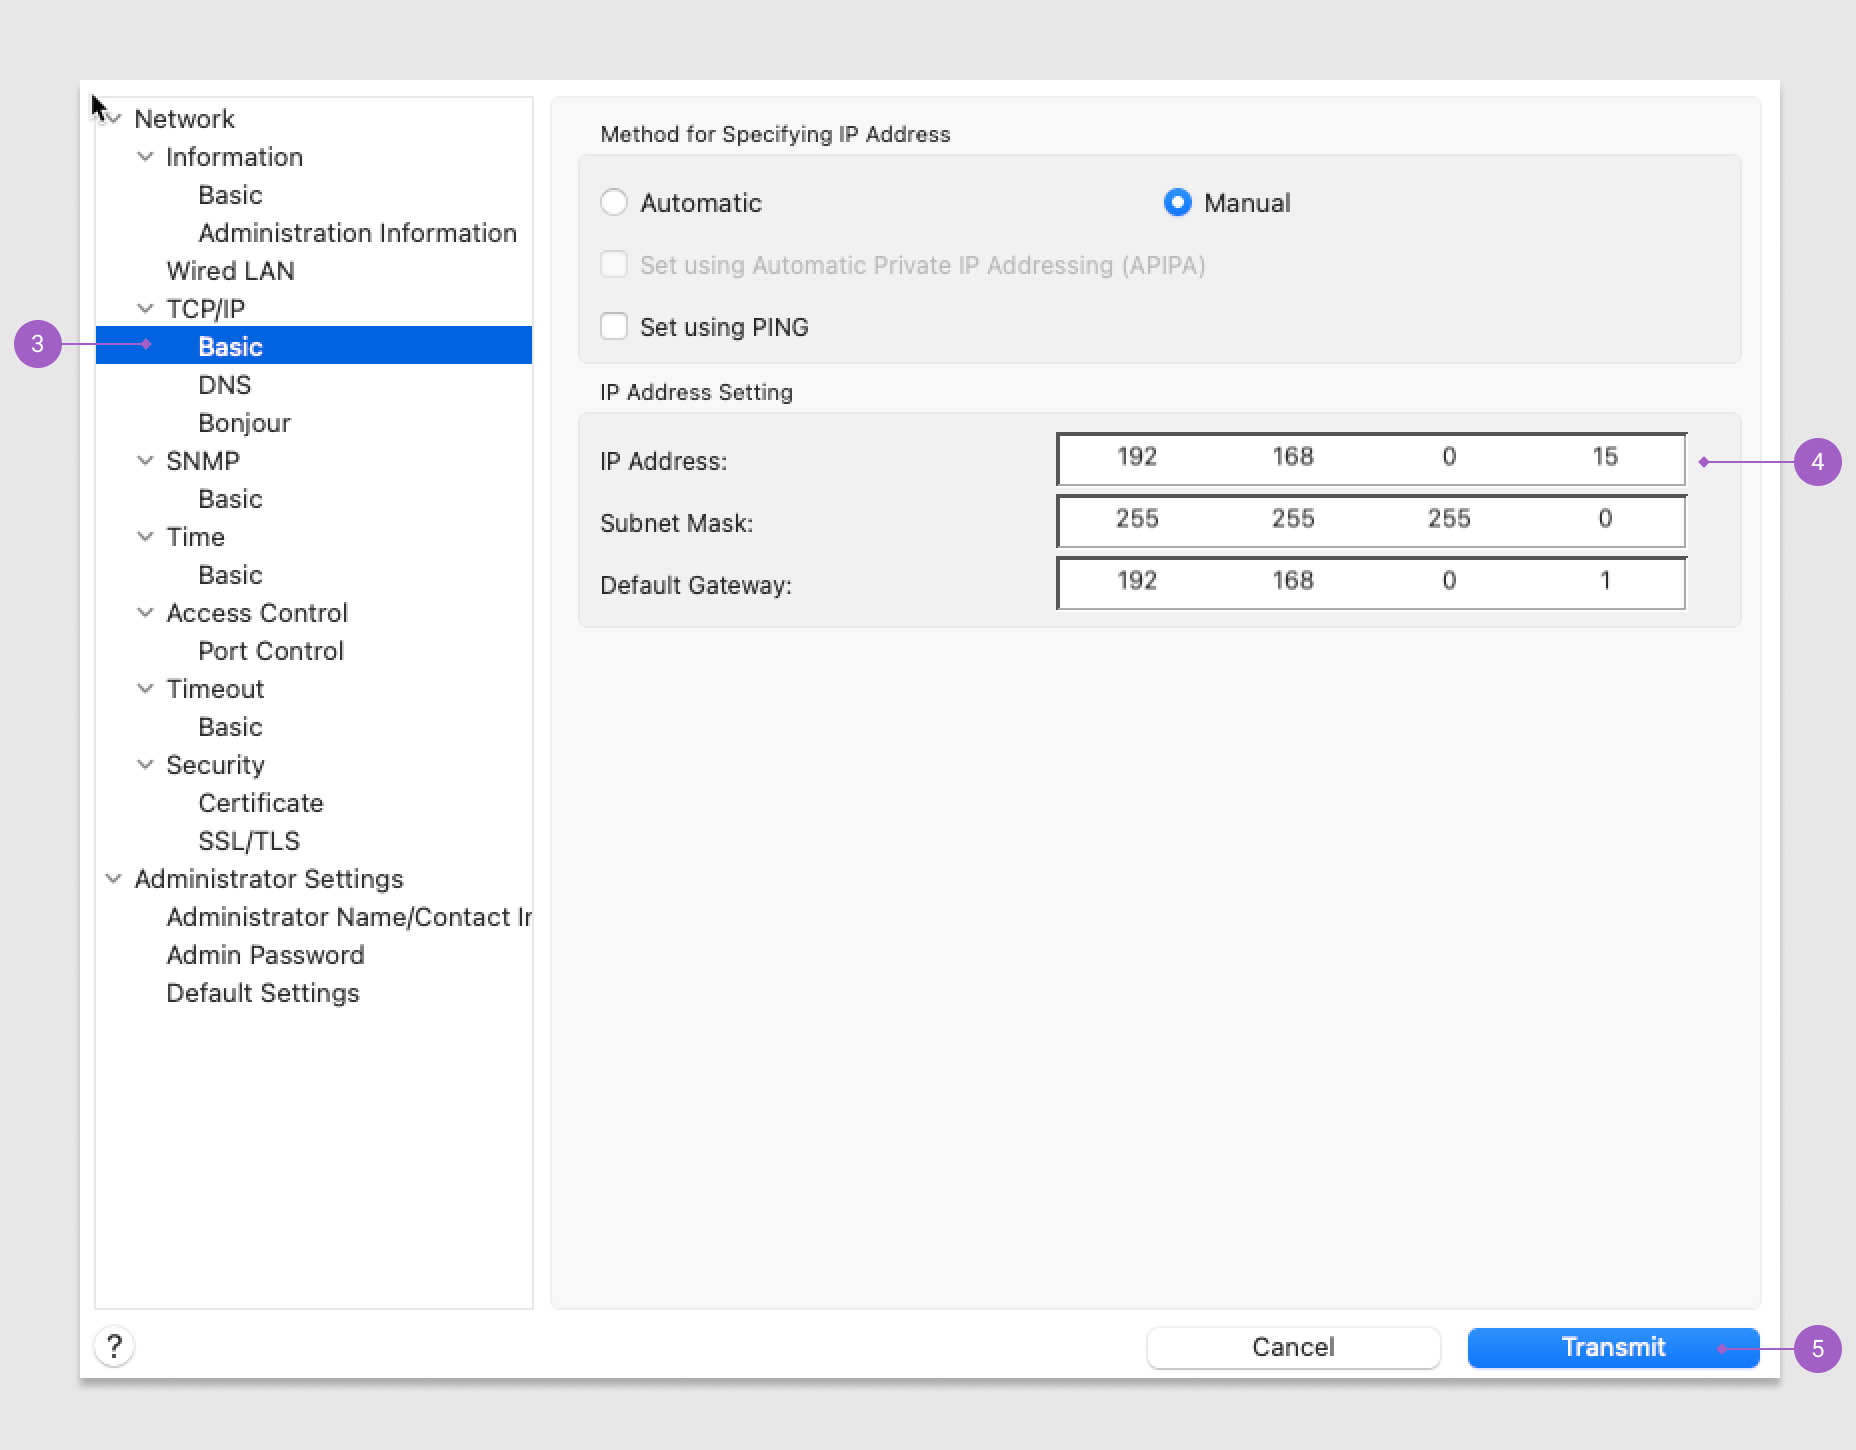
In the left menu, go to TCP/IP > Basic [3].
Manual should be selected as the method for specifying an IP address.
Before you change the printer's IP address, check no other device on your network uses the certificate's IP address. Your IT team can check this for you.
Manually type the SSL certificate's IP address in the IP Address fields [4].
Select Transmit to update the printer's IP address [5].
After completion, refresh the printer list to see the updated IP.
Update the printer's IP address in Venue Manager:
From Venue Manager, go to Settings > Devices.
Select the print station.
Update the Printer IP address to match the printer's static IP and SSL certificate.
Perform a Test print.
If resolved, a green message confirms the printer is ready, and a test sheet prints. Select Save.
If the issue persists, continue to Step 6.
Step 6: Check ePOS is turned on for the printer
If ePOS is turned off on the printer, POS can't connect to it, and importing the certificate again won't help.
From the printer's web configuration page, go to ePOS-Print and check Enable is selected.
Go to ePOS-Device and check Enable is selected.
If you changed either setting, select Send. The printer restarts.
Retry Test print in the print station.
If the printer can't create a certificate in Step 7, ask your IT team to update the printer's firmware.
For the full steps, including the TM-T88VII, see Step 2 in the guide Configure printers for cloud printing.
If the issue persists, continue to Step 7.
Step 7: Re-export and re-import the SSL certificate on each POS computer
If you still face trust issues with the web browser connection, and the print station cannot connect to the printer, it could mean that the SSL certificate on the problematic POS device doesn't match the latest one generated by the printer.
To resolve this, you should try the process of re-exporting and re-importing the SSL certificate. The steps outlined here use the Chrome browser.
Repeat these steps on every POS computer that prints to this printer. You need a Windows administrator account on each computer to import the certificate.
Open the printer's web configuration page:
From the POS device, enter the printer's static IP address after https:// in a Chrome browser's address bar.
Alternatively, launch EpsonNet Config, refresh the printer list, select the printer, then choose Launch browser.
Select Cancel in the web configuration sign-in pop-up.
Re-export the SSL certificate:
Select Not secure in the address bar.
Select Certificate is not valid from the drop-down menu.
The Certificate viewer window opens.
Select the Details tab.
Select Export.
Save the file to your POS computer in a place you can easily find it again (eg desktop).
Re-import the SSL certificate:
From the Windows taskbar on the POS computer, search for Manage computer certificates.
The Certificates - Local Computer folder opens for your computer.
From the Certificates - Local Computer folder, go to Trusted Root Certification Authorities > Certificates.
Right-click the Certificates folder and select Import.
Follow the instructions in the Certificate Import Wizard. Make sure Local Machine is selected for the root certificate store.
Once imported, clear your cache, quit the browser window and restart the POS computer. If you don't complete this step, Chrome caching issues may cause the certificate to be invalid.
Open a new browser window to verify the connection is trusted:
Type the printer IP address in the browser's address bar after https://.
If the secure icon appears in the address bar, the certificate is valid and trusted.
Confirm the IP address in the certificate is the same as the printer's IP address and what's been entered in its print station in Venue Manager.
Perform a test print from the printer's print station in Venue Manager.
If the issue is resolved, you'll see a green message saying the printer is ready to use.
Check printing is working
Once a fix works, check every computer that uses the printer, not just the one you tested from.
From Venue Manager, go to Settings > Devices, select the print station and select Test print. Check you see Printer is ready to use.
On each POS computer that uses the printer, reprint a past receipt from POS and check it prints.
Still can't print?
Printer hardware and network problems (eg the printer can't be found on the network, or an IP address conflict) need your IT team, because the ROLLER support team doesn't troubleshoot these.
For anything else, have this ready:
the printer model and serial number
the printer's IP address
the exact error message from the test print
which POS computers are affected
the steps you've already tried
Contact your customer success manager or the support team.
FAQs
Why does printing work on one POS computer but not another?
Each POS computer needs its own copy of the printer's SSL certificate. A computer without it can't connect to the printer, even when the test print passes on another computer. Import the certificate on that computer, as in Step 7 earlier in this guide.
Why did printing stop after we changed our network or router?
A new network usually gives your printers and POS computers new IP addresses, so the IP address in each print station no longer matches its printer. Set each printer's static IP address again and update its print station, as in Step 2 earlier in this guide. If the new IP address doesn't match the printer's certificate, follow Step 5. Make sure the old network is fully offline, so the two networks don't clash. Your IT team can help with the network.