Adding a form to a product lets you collect additional guest information during online checkout. The form can also be included in order confirmation emails so guests can complete it after purchase.
To add a form to a product, you first need to create the form.
How it works
To collect information using a form:
Create a form.
Attach the form to a product.
Guests complete the form during checkout or from their order confirmation email.
Staff can view responses in Venue Manager or POS.
Add a form to a product
https://rollerdigital.wistia.com/medias/29rr7gsgx4
You can link a form to a product once you've created a form. Follow the instructions below to add a form to a product:
From Venue Manager, go to Products > All products. Select the product you want to attach your form to.
Scroll to Additional options.
Select Forms.
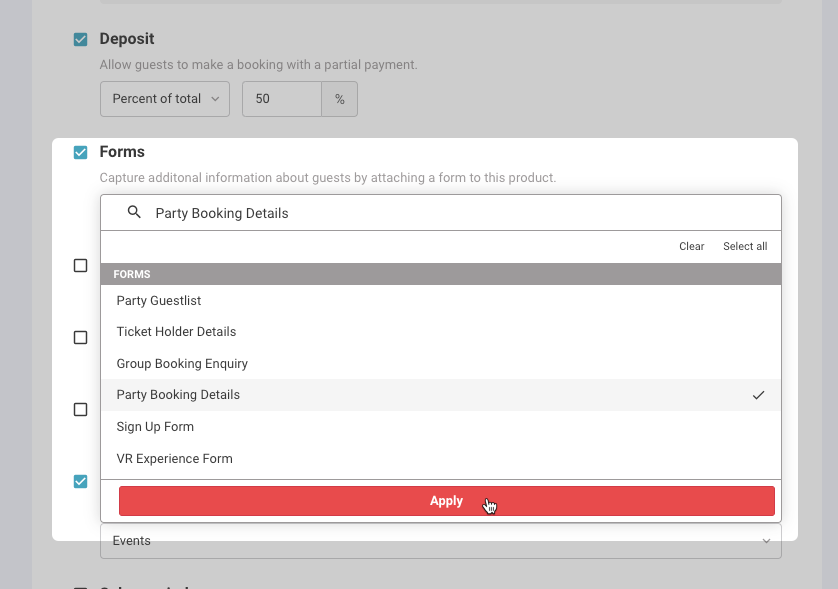
Select the form or forms you want to link to the product from the drop-down menu. To remove a form, choose it from the drop-down menu and uncheck the box next to its name.
Select Apply.
Select Save.
Forms cannot be added to: stock, add-on or gift card product types. If you edit a form already attached to a product, the changes will be updated immediately wherever the form is displayed.
Guests complete the form during checkout
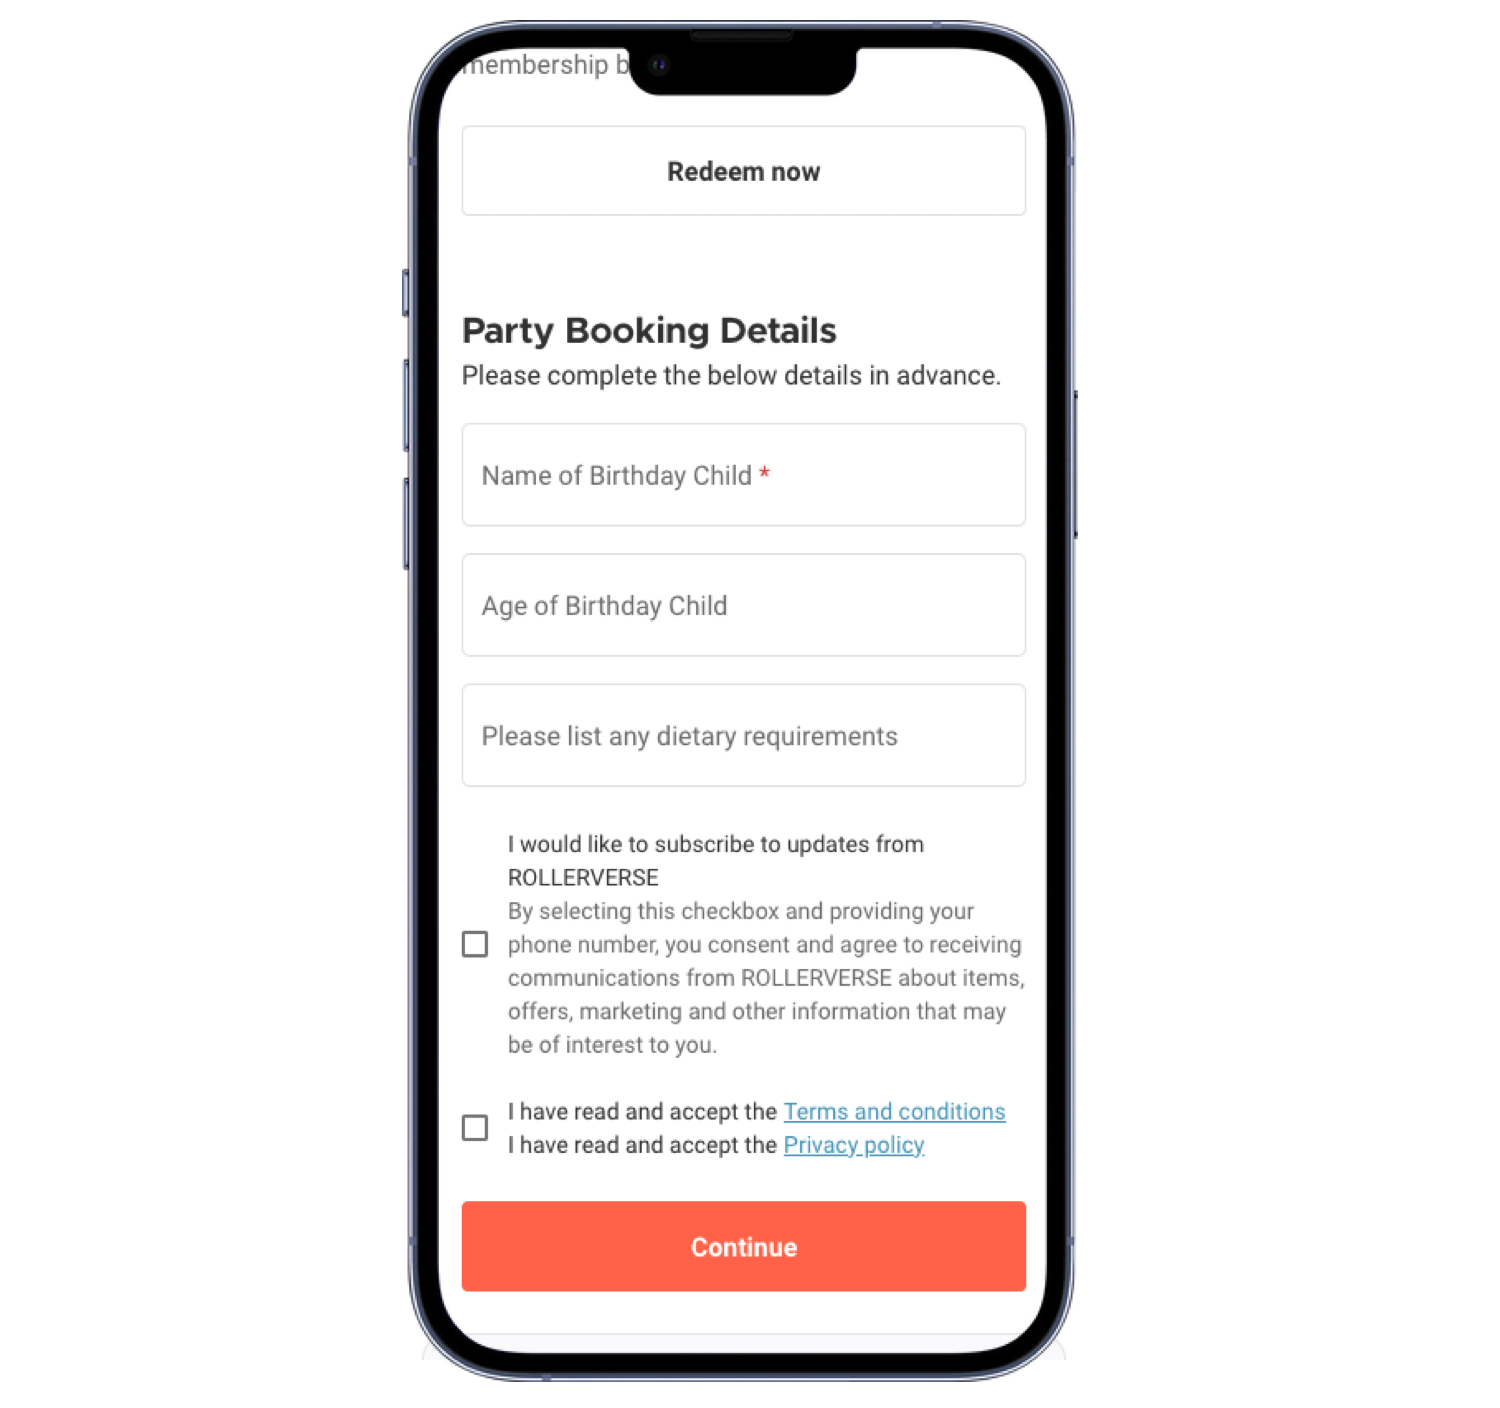
When a guest adds the product to their cart during checkout, the form appears before the purchase is completed. Guests must complete the form before finalizing their order.
Order confirmation emails
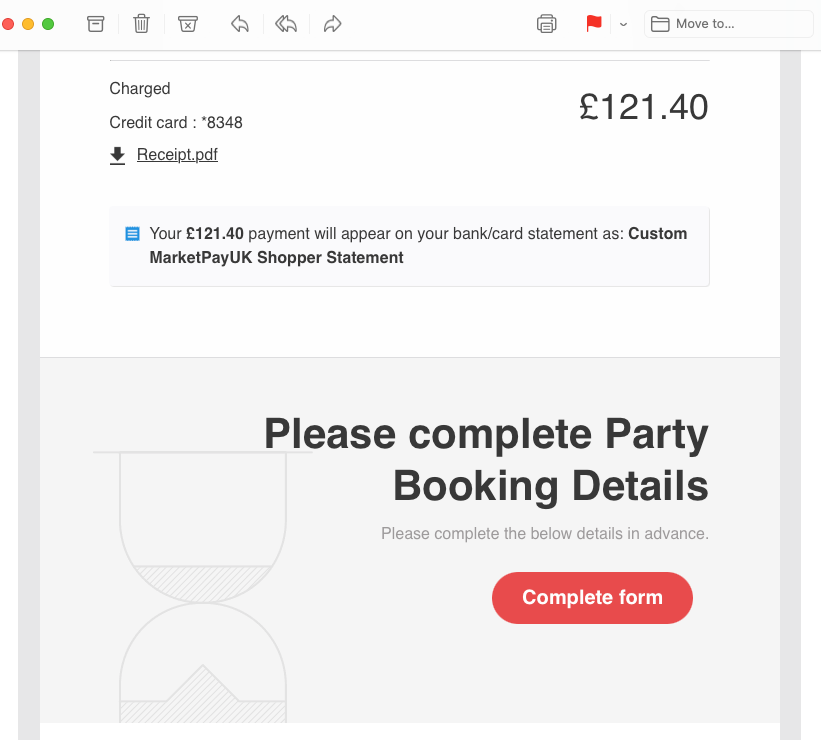
If order confirmation emails are enabled in the form settings, the confirmation email includes a link to the form associated with the product. To display the form in confirmation emails, make sure the form panel is enabled in the email template.
View form responses in Venue Manager & POS
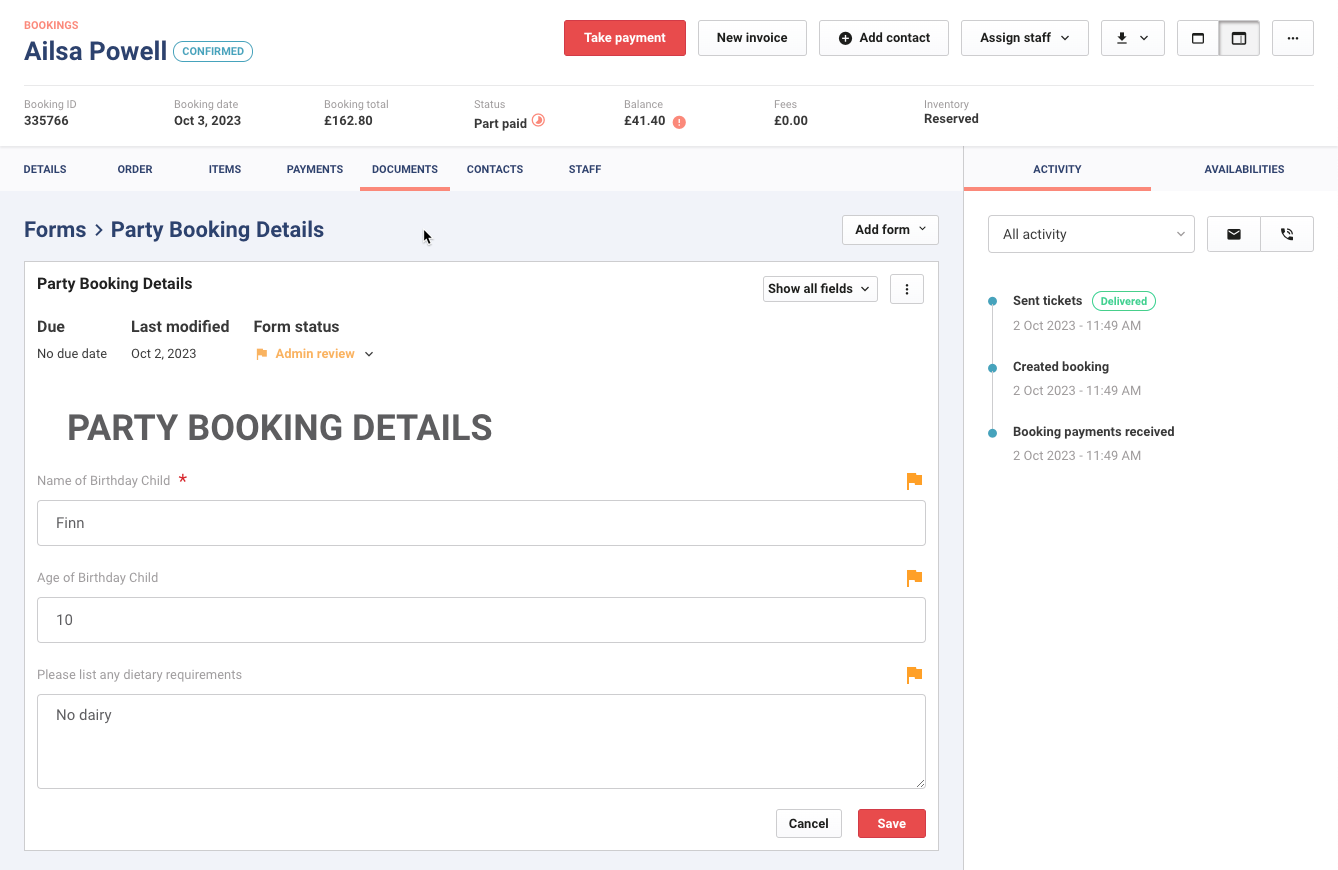
Staff can view form responses when confirming online bookings in Venue Manager or when redeeming tickets in POS.
From Venue Manager:
Search for and select the booking.
Go to the Documents tab.
Select the form to view or modify responses.
Search for and select the booking.
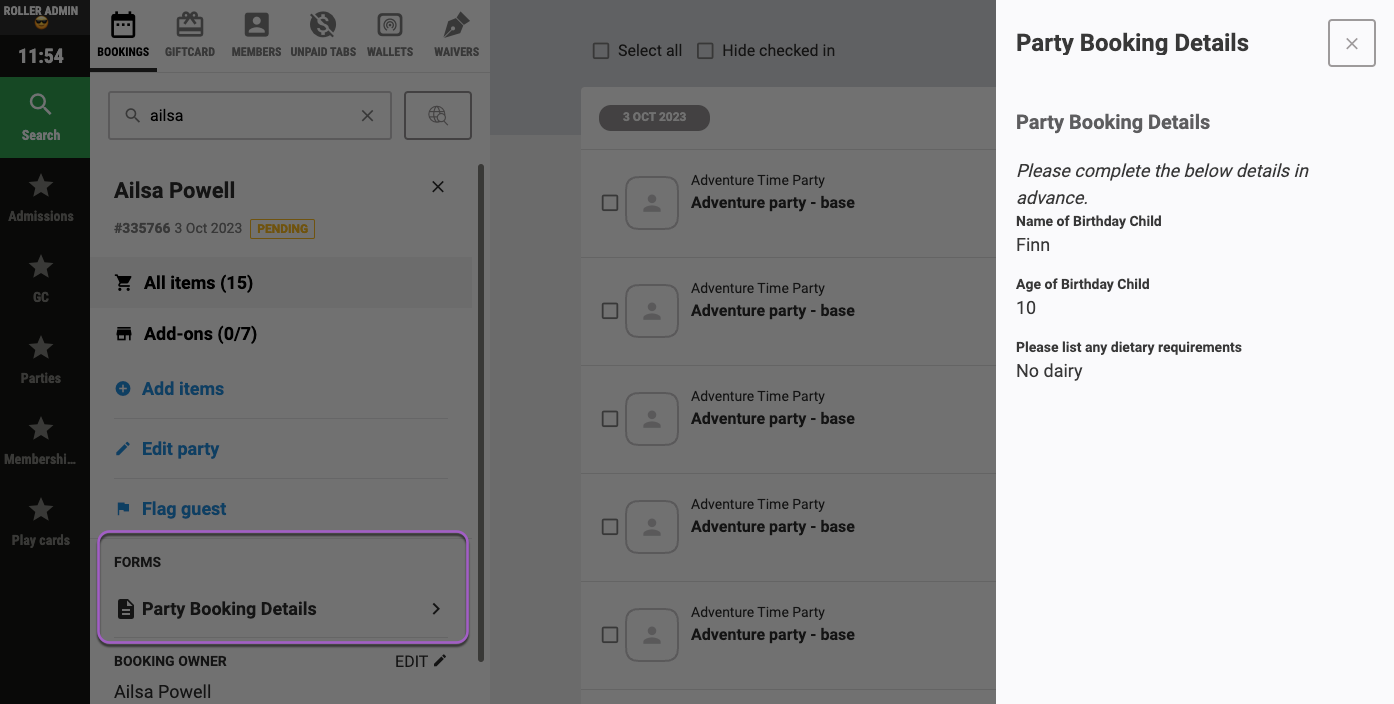
From POS, search for and select the booking. Scroll down to Forms, then select the form title (eg Party Booking Details) to open and view form details.