Custom forms in ROLLER make collecting additional guest information or inquiries easy. You can use them to create website inquiry forms, include them in online checkouts and order confirmation emails, and customize the ROLLER waiver form.
Once guests complete the form, you can view and edit their responses in Venue Manager when confirming bookings or in POS when serving guests in person. These forms personalize interactions and improve the guest experience.
This guide shows how to create custom forms for guest data in ROLLER.
Lite and Pro feature
On the Lite plan, you can create and manage one form. Contact your customer success manager or support team to create more forms with a Pro plan or higher.
When to use
You can use and share forms to collect additional guest data in several ways.
Use | Description |
|---|---|
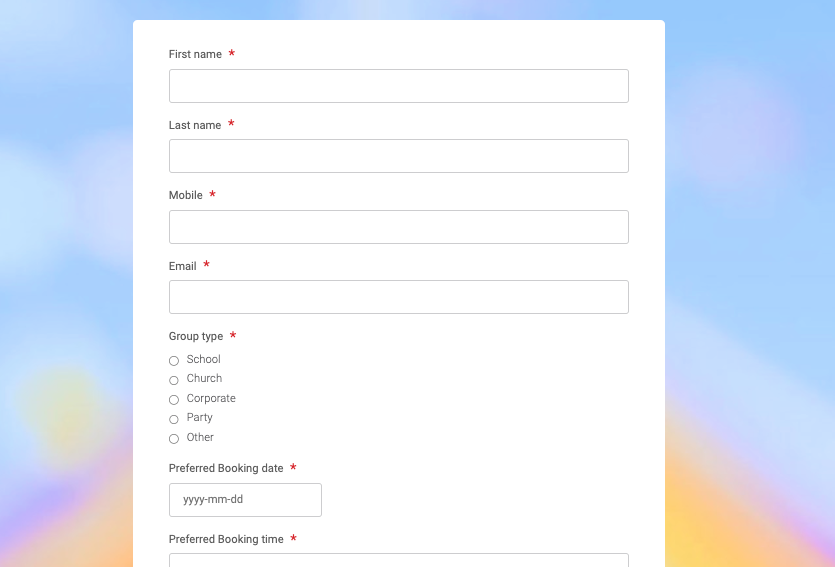
Website inquiries (eg large group bookings) | Guests fill out the form on your website, such as for large group booking inquiries or catering preferences. Example: A school group uses a website form to request a booking and add catering preferences.
|
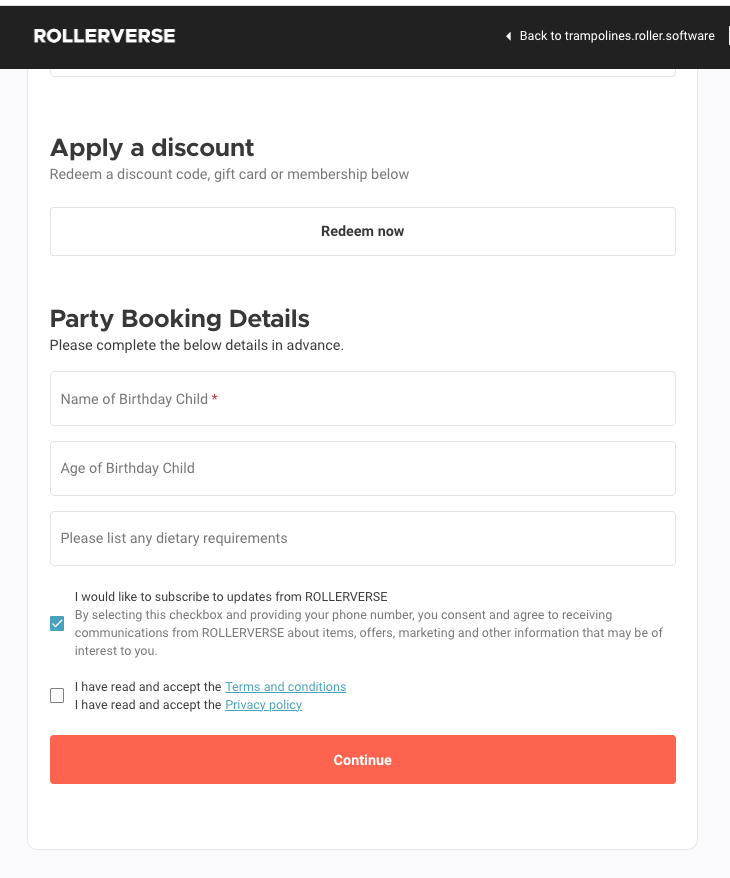
Online checkout fields to collect additional details | Guests complete additional form fields after adding a relevant product to the cart and prior to purchasing it. Example: A party booking product asks for the party name, age group, and dietary requirements before checkout.
You must select the form type for online checkout in the form's settings. You must also add the form to relevant products for it to display in the online checkout. Read on to learn more.
|
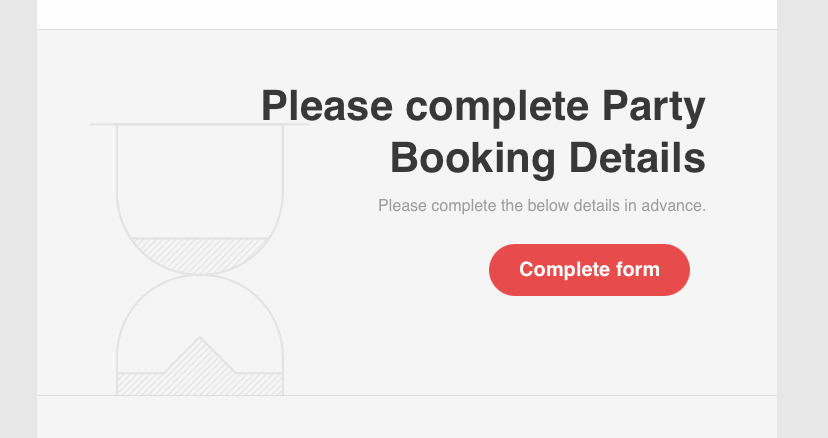
Link from order confirmation emails | Guests select a link from order confirmation emails to complete a request for more information, such as additional party booking details. Example: After booking, the guest receives a link to provide final guest numbers and food selections.
|
Customized waiver form | Include extra fields, such as a driver's license field, in the standard ROLLER waiver form during the signing process. Example: A venue adds a driver’s license field for karting guests.
|
Guest booking in Venue Manager | Add a form to a guest's booking in Venue Manager to gather extra details when confirming bookings, such as for large group bookings or parties. Once added, you can also email the guest a link to the form from the booking to complete at their convenience, or edit the details yourself from within Venue Manager. Example: Staff add a form to a birthday booking to collect the child’s name and guest count. |
The form builder
The form builder in ROLLER consists of three main tabs.
Build: Create form fields, customize settings, layout, content, and specify the form type for where it should appear (eg online checkout or order confirmation emails, loading the standard waiver form fields to modify).
Design: Preview the form's appearance and make styling adjustments.
Publish: Obtain the form's URL or embed code for adding it to your website or social media for inquiry forms.
Build: Add fields
Follow these steps to build a custom form from scratch for a website inquiry, a product purchased in the online checkout, or order confirmation emails.
Example: For a party booking form, you might add First name, Last name, Email, and Mobile as predefined inputs, then add custom fields such as Party name, Birthday child’s age, and Dietary requirements.
If you want to modify the standard ROLLER waiver, you must first set the form type to "Waiver" to load the standard waiver fields for editing. See the section Customize global form settings below to learn how. Then follow the instructions here to add new fields or modify existing fields.
From the Build tab, select Add fields.
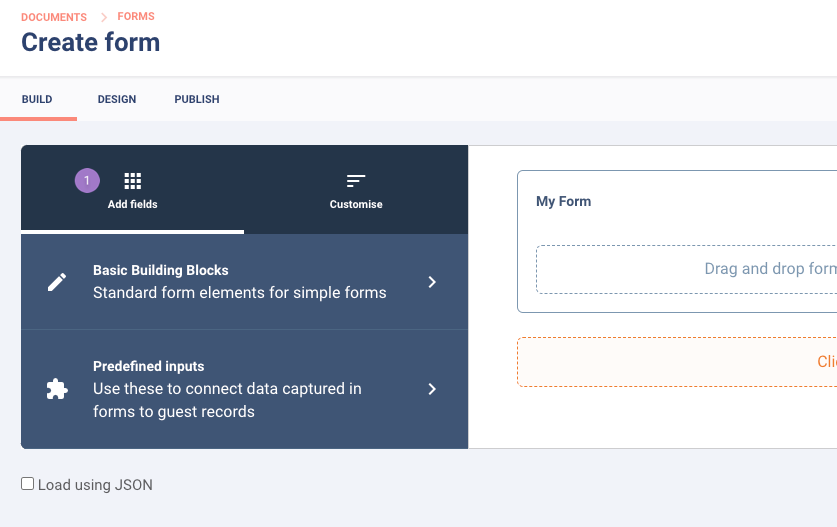
Select the field type to add: Basic building blocks or Predefined inputs.
You can add fields from both types to a single form.
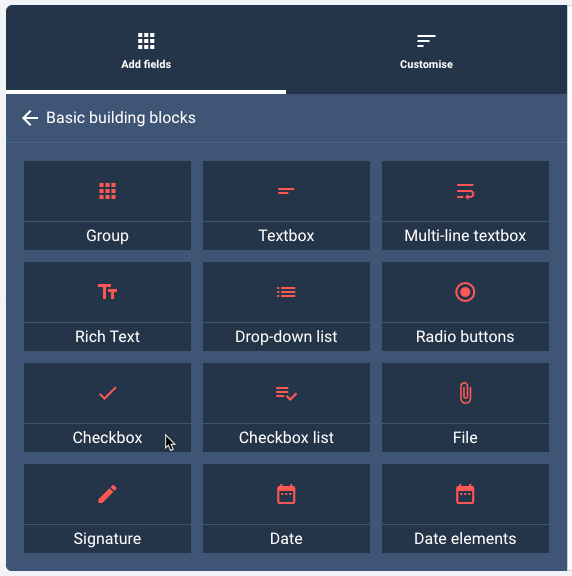
Basic building blocks consist of standard form elements for simple forms.
Predefined inputs are used to link information to an existing guest record in ROLLER or create a new guest record with the captured data.
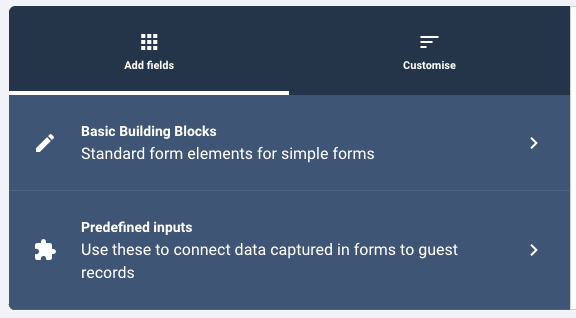 Basic building blocks
 Predefined inputs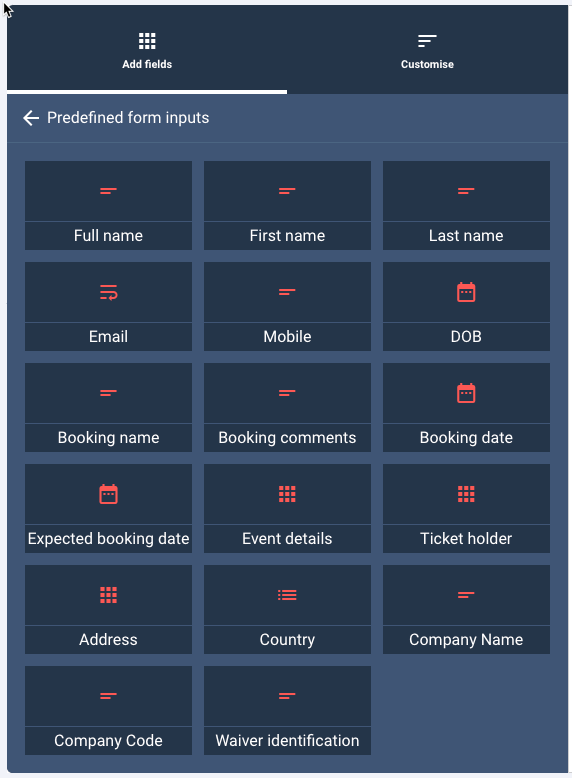
Select the fields you want to add to your form. They appear on the right in the order you add them.
Rearrange the order of the fields by dragging and dropping them as needed.
[Optional] Use the Group basic building block to organize related fields.
Select Group from the Basic building blocks tab to add a group element to the form.
Drag and drop relevant form fields into the group.
The "Ticket holder" field is for guests to add ticket holder names during online checkout. It's only in online checkout forms and won't appear in other forms. Read on to learn more.
Customize global form settings
After you've finalized the fields and layout for your form, from the Build tab, go to Customize. From here you have several options to customize the form including selecting the form type.
General
Change the Name of the form (this is not a guest-facing name)
Set a guest-facing Title and Description for the form (optional)
Set a Closing date for the form (optional)
Form type
Set the Type of form (required) from the drop-down. You have 3 options.
Form Type | Description |
|---|---|
Inquiry (goes to inbox/activity center) | Automatically send guest inquiry submissions as notifications to the activity center. You can then convert guest submissions into bookings.
|
Online checkout (link from order confirmation emails) | Collect extra information from guests during online checkout and/or from order confirmation emails.
|
Waiver | Modify the standard waiver form to collect additional details.
|
Examples
Use Inquiry for a website contact form for group bookings or catering requests.
Use Online checkout additional details when you want guests to provide extra booking details during checkout or after booking from a confirmation email.
Use Waiver when you need to add extra questions to the standard waiver, such as an emergency contact or driver’s license number.
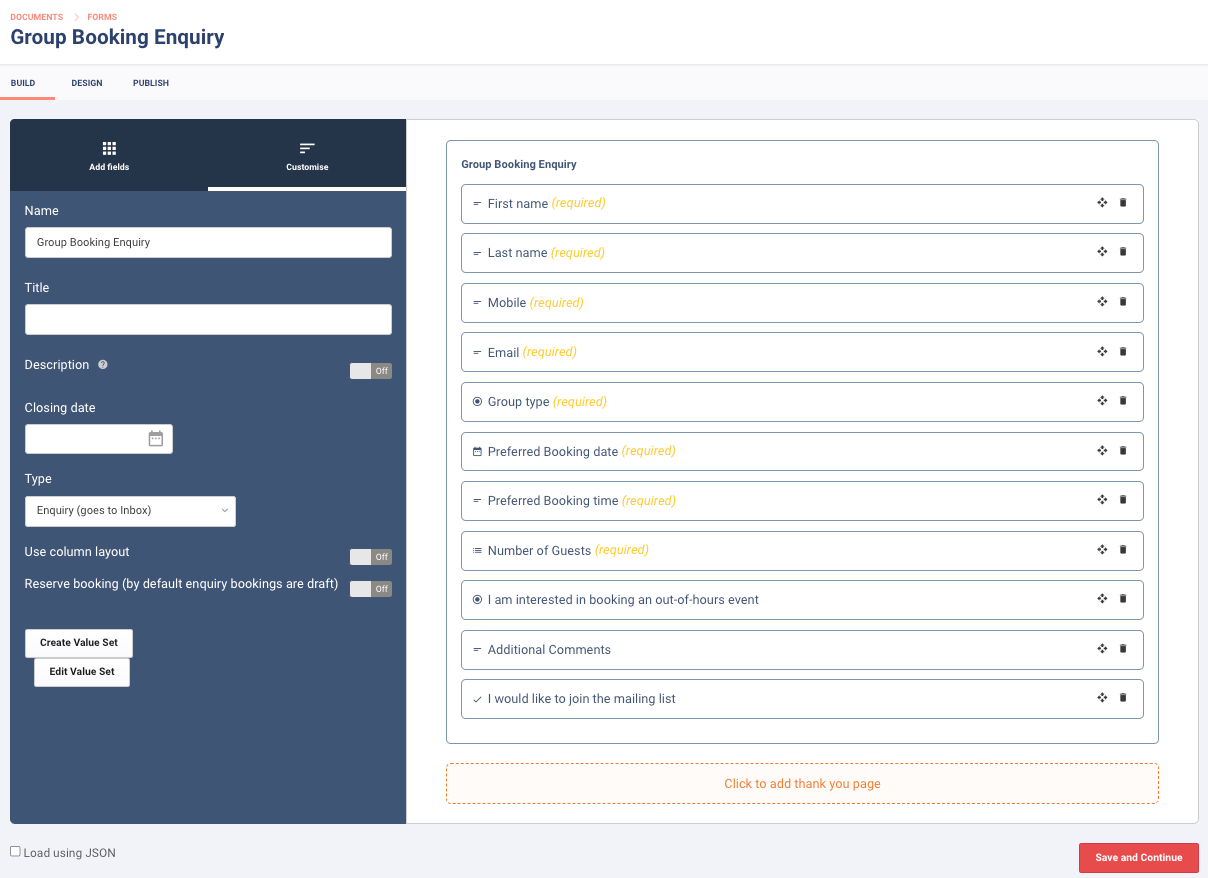
Customize individual form fields
You can also customize individual form fields, such as making a field required for guests to complete.
Select a field that you've added to your form on the right. The Customize tab opens at the question settings available for the field.
Review the options available below.
Settings | Description |
|---|---|
Required | Make the field mandatory for guests to complete |
Description or instruction text for the field | Additional guidance for a form |
Max length | The maximum amount of characters that can be entered or uploaded |
Placeholder text | Example text that appears in the text box |
Accepts multiple answers | Allows for more than one answer to be selected (multi-select checkboxes) |
Admin only | The field is only accessible by staff in Venue Manager |
Page (waiver kiosk only) | In the Waiver Kiosk, form questions can appear one after the other using different page numbers |
Databinding | Bind the question response to an attribute (eg First Name) to create or map to existing users |
Conditional | Only show this question based on a particular response to another question |
Customize value sets (options for guests to choose from)
A value set consists of a list of options for guests to choose from as a response to a question. To create a value set:
Select the form, then select Customize.
Select Create value set (or Edit value set if you want to edit an existing value set).
Give your value set a Name.
Select the plus button to add answer options.
Select the Delete button (trash icon) if you want to remove any options.
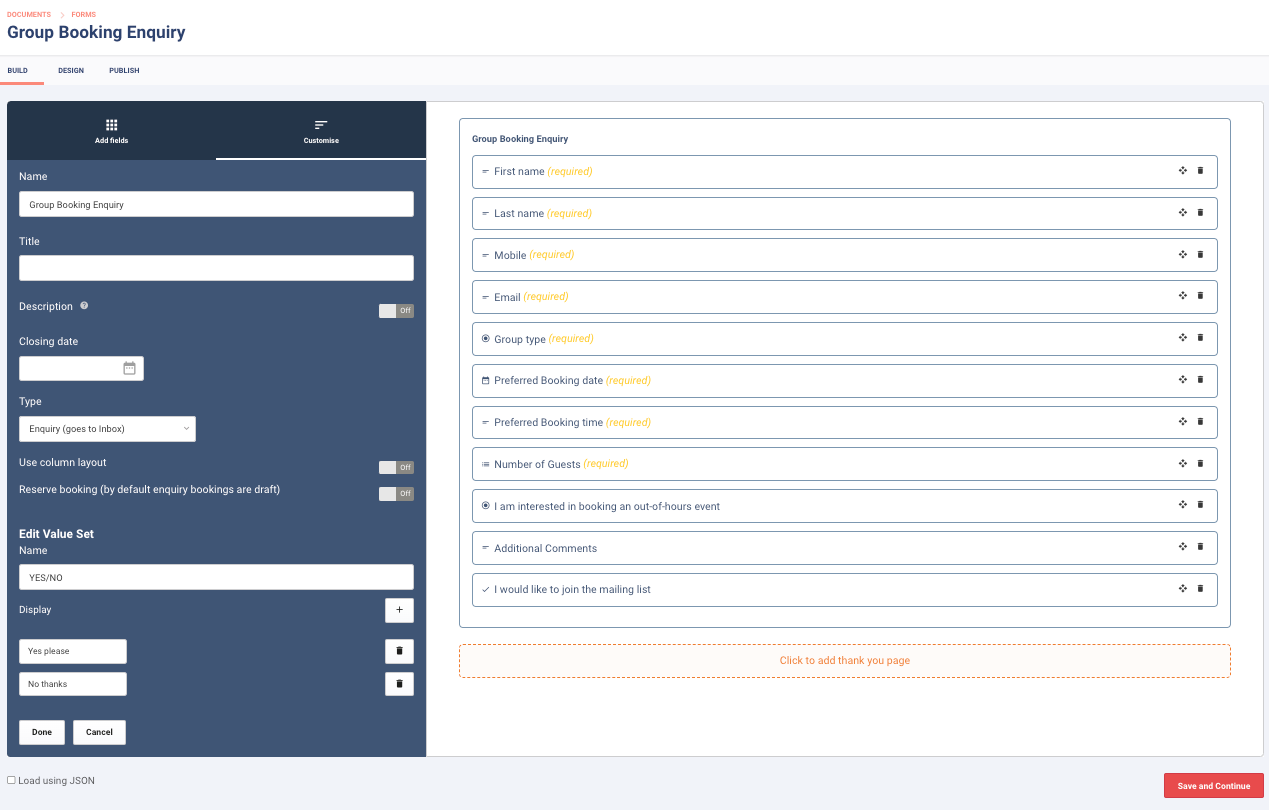
When you've added all options, select Done.
If you haven't already, add the field for the value set from basic building blocks or predefined inputs
Select the field in the form.
Select the value set from the drop-down menu.
You can make the value set required for guests to respond to and/or multi-select (guests can select multiple options).
Select Save and continue.
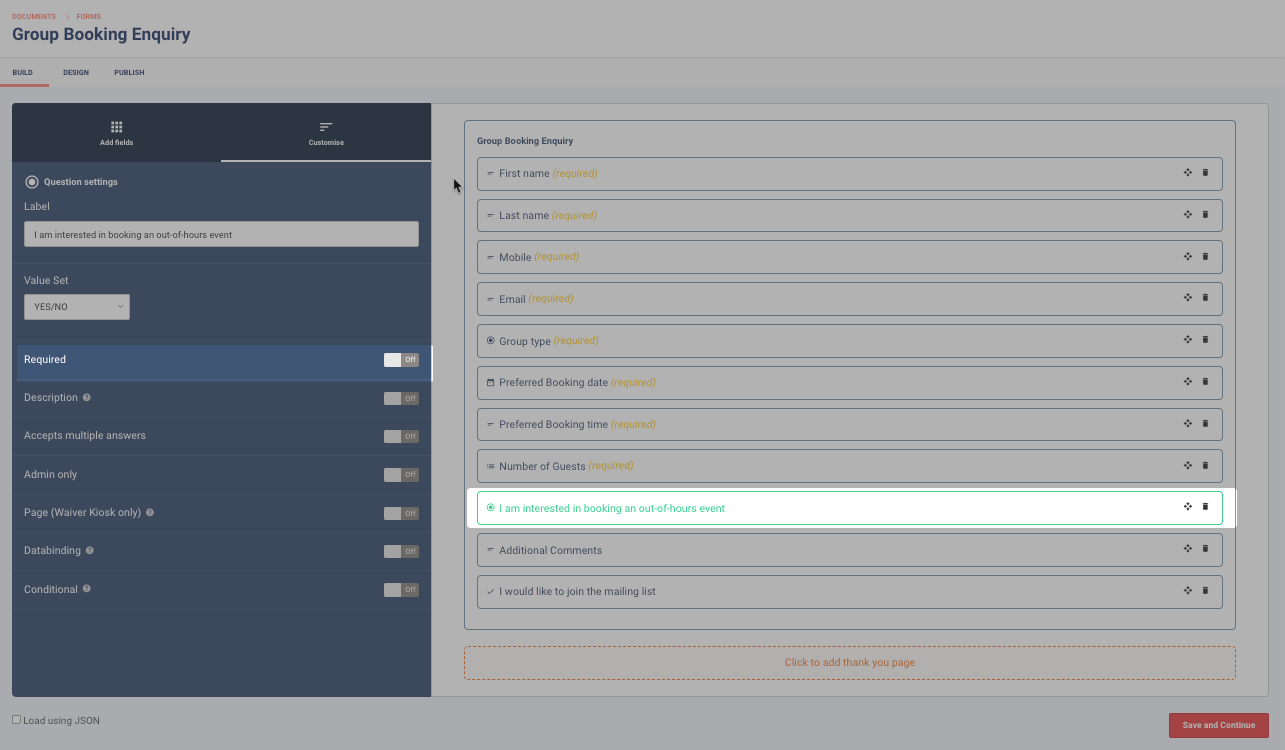
Example: Create a value set called Food preferences with options such as Vegetarian, Vegan, Gluten-free, and No preference. Then add it to a party or event booking form so guests can choose their preferences.
Customized grouped fields
Select the group on the right to customize its settings.
Name: Guest facing name for the group
Description: Description or instruction text for the group
Conditional: Only show this group when a field has or does not have a predefined response
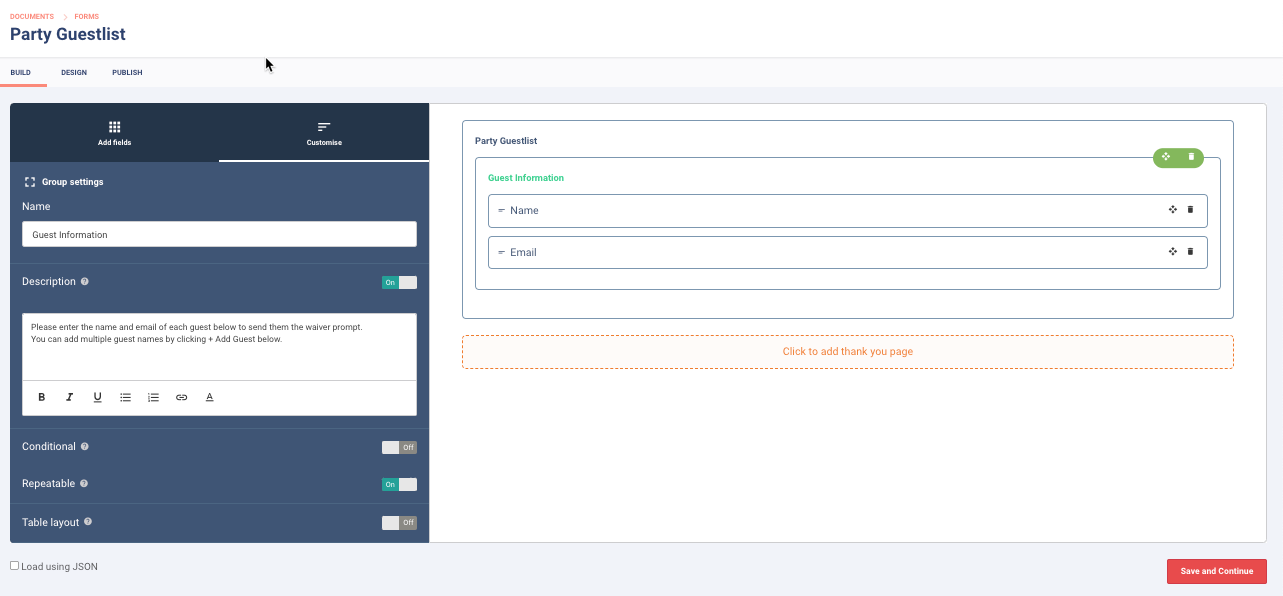
Repeatable: An Add button is added to the group in the guest-facing form. Guests select the Add button to duplicate the fields to enter multiple details. For example, names of ticket holders or guests attending a party.
Example: For a school group booking, create a repeatable group for Participant details so staff or guests can add multiple names and ages in the same form.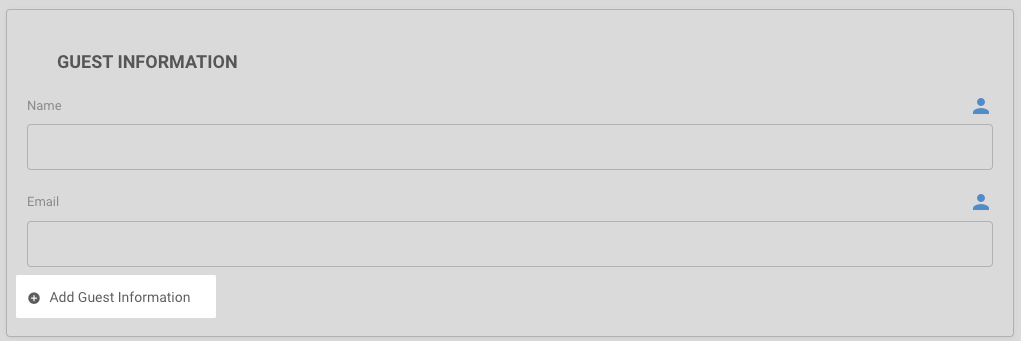
Design: Preview and edit styling
Select the Design tab at the top of the form builder to preview what your form looks like and make any styling changes.
Publish: Share form on your website
Website inquiries
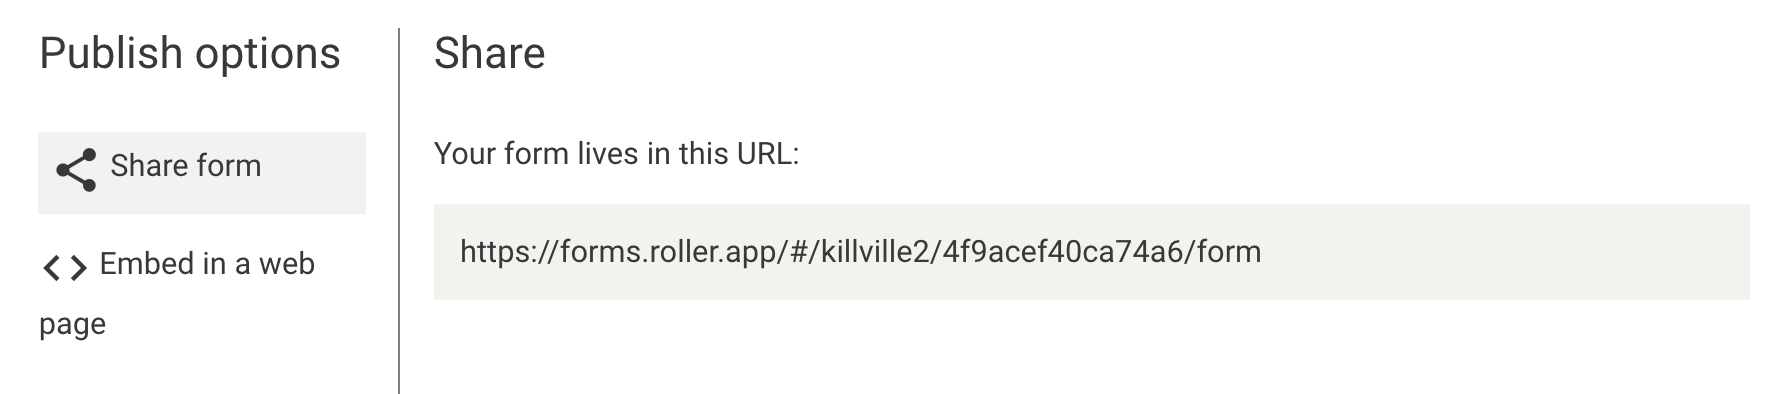
From the Publish tab, you can copy a link to the form to add to your website. Or you can copy the code to embed the form in a web page.
Select Share form to copy its unique URL to add to your website or an email for guests to complete.
Select Embed in a web page to copy the HTML code to put where the form should appear on your website.
Online checkout and order confirmation emails
If you want guests to complete the form before purchasing a product in the online checkout, or from a link in booking confirmation emails, you'll need to add the form to the relevant products. Learn more
Customized waivers
To make sure the customized waiver form shows up in the online waiver and/or waiver kiosk, make sure you enable these options in waiver settings. Learn more