Keep your forms accurate and up to date so you're always collecting the right information from guests.
This guide covers how to edit, duplicate and delete forms in Venue Manager, and how to update fields using the form builder.
Before you edit
Changes to a form can affect how data appears in exports and historical responses.
Adding fields
Adding new fields won’t impact existing submissions, but past responses won’t include the new fields.Removing fields
Deleting a form field removes it from future exports, even if it was previously completed.Value sets
Avoid removing options from drop-down or multiple-choice fields if they’ve already been selected in past responses.
Edit your form
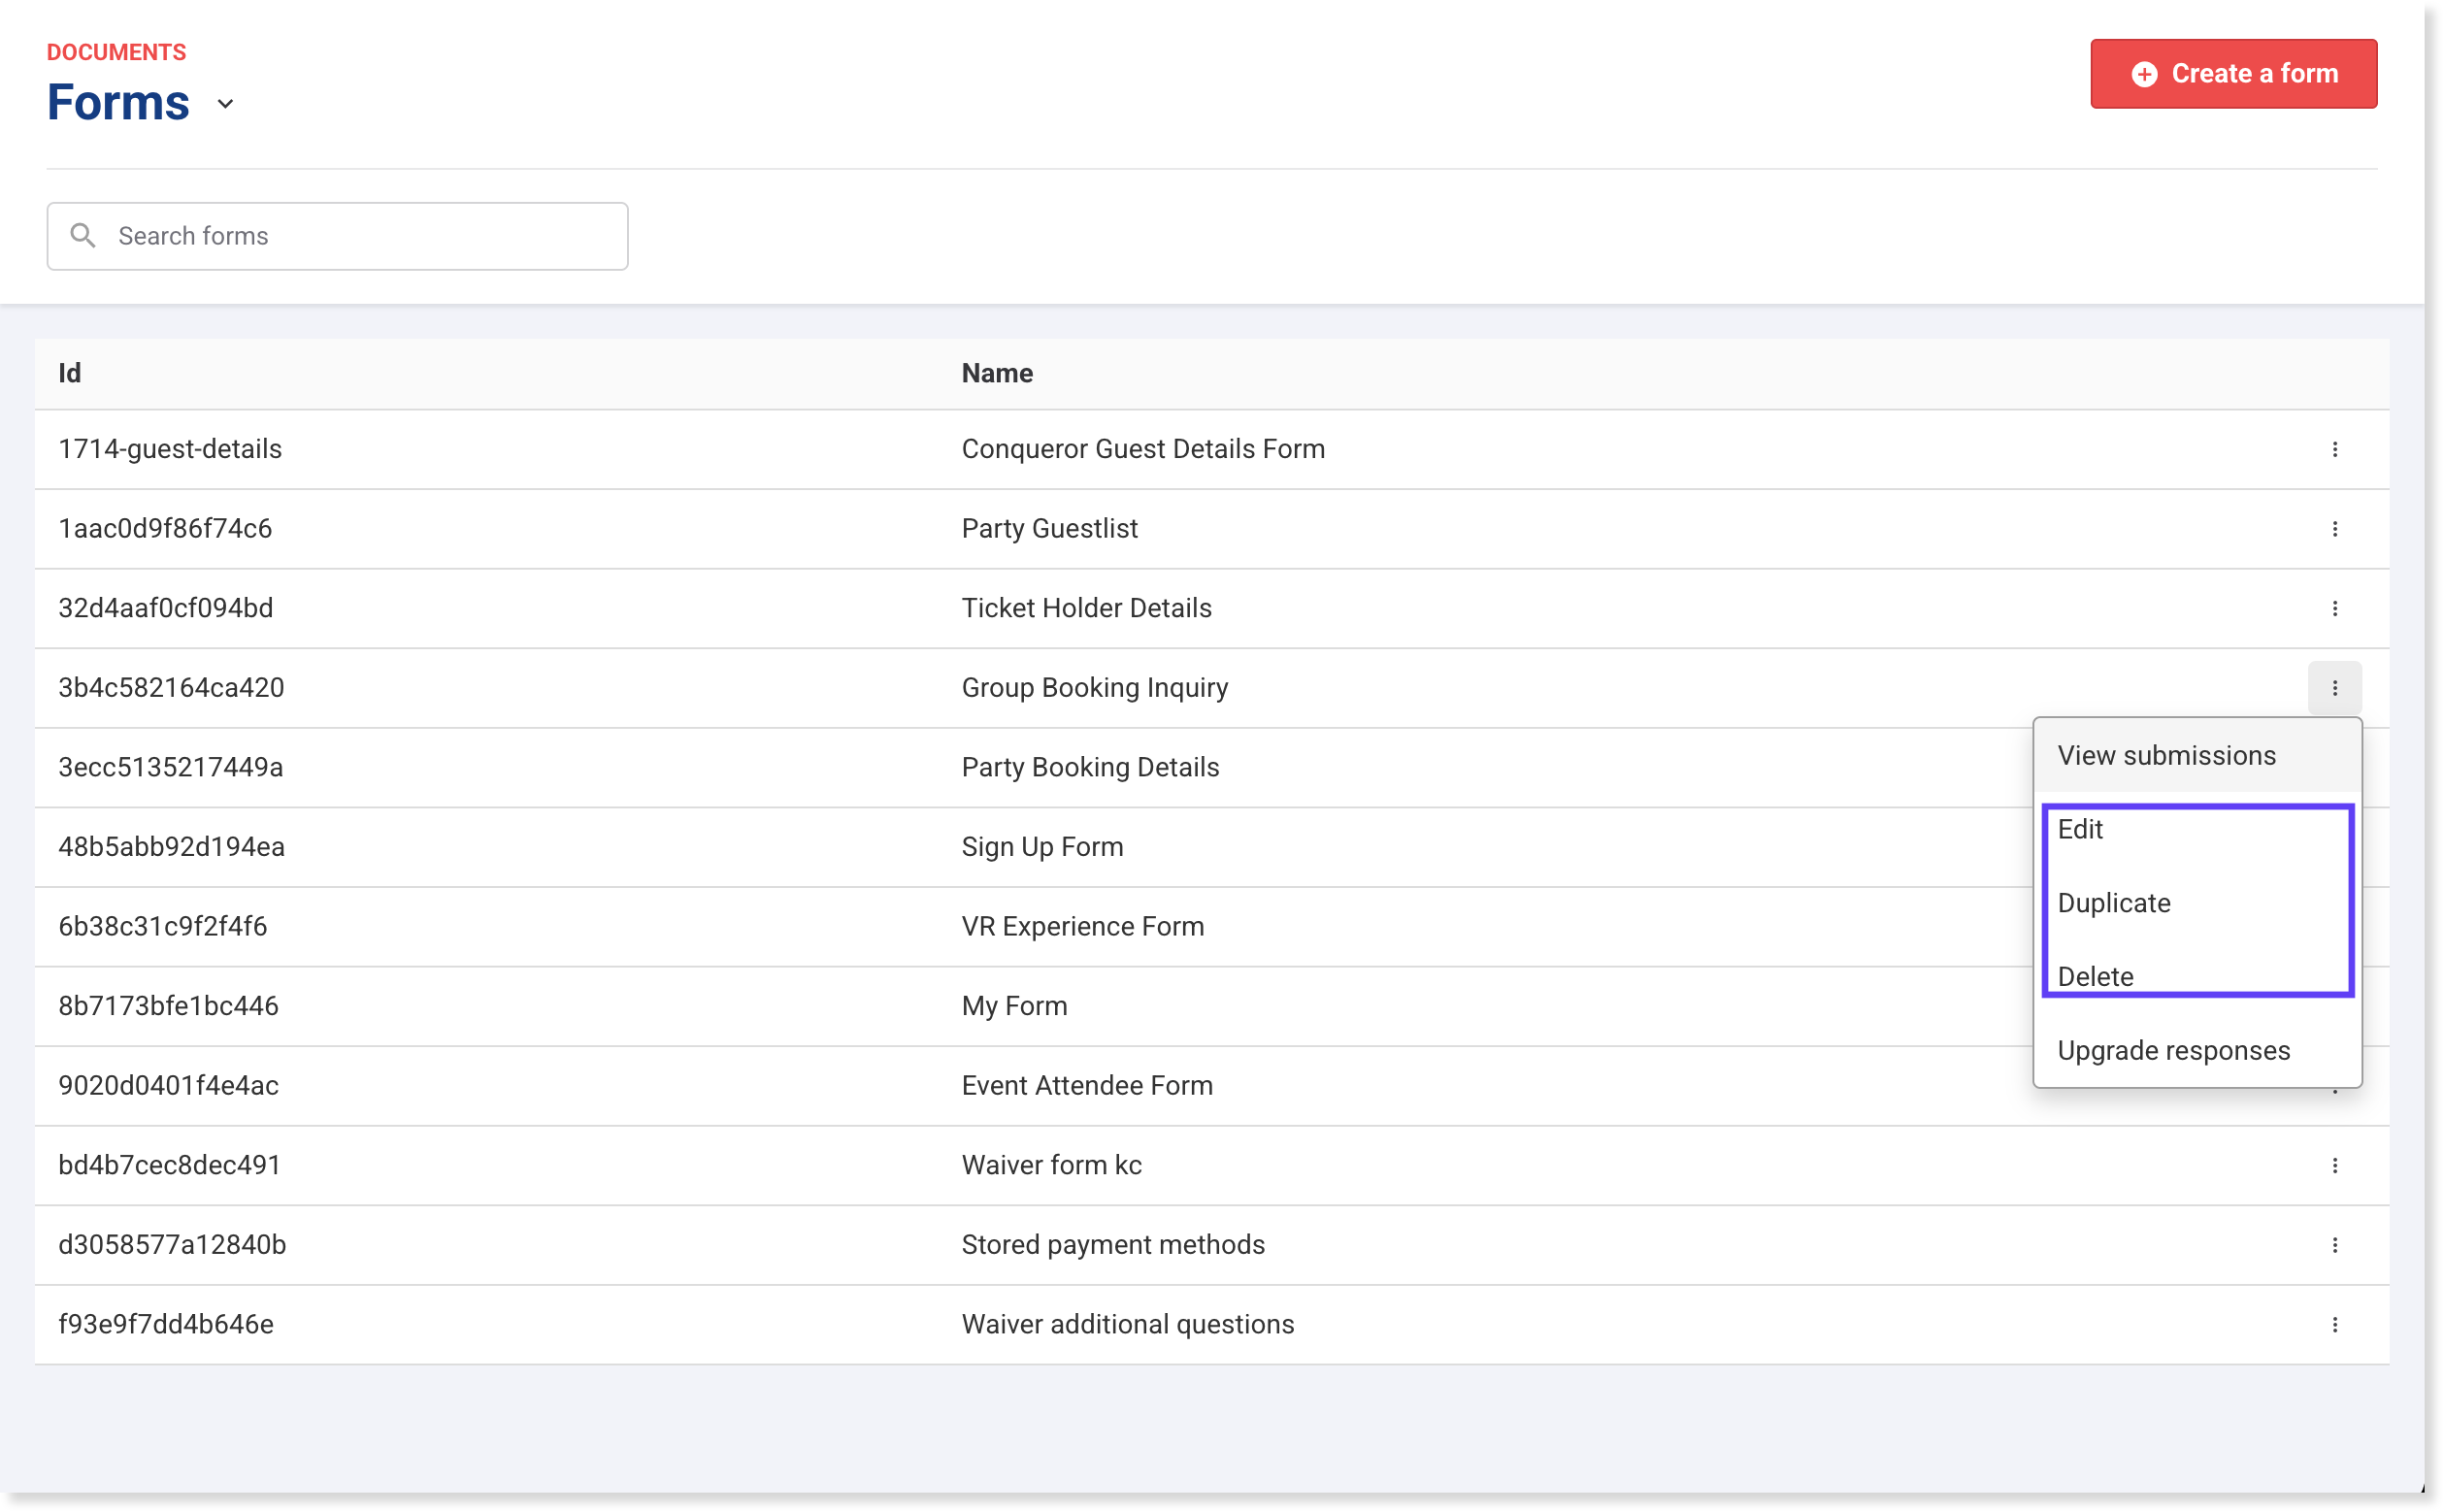
From Venue Manager, go to Documents > Forms > All Forms.
Scroll down or search for the form you want.
Select the options menu (3 dots) for the form.
Choose one of the following:
Edit — Open the form in the form builder to update fields, layout or settings.
Duplicate — Create a copy of the form that you can modify.
Delete — Permanently remove the form from your venue.
Edit fields in the form builder
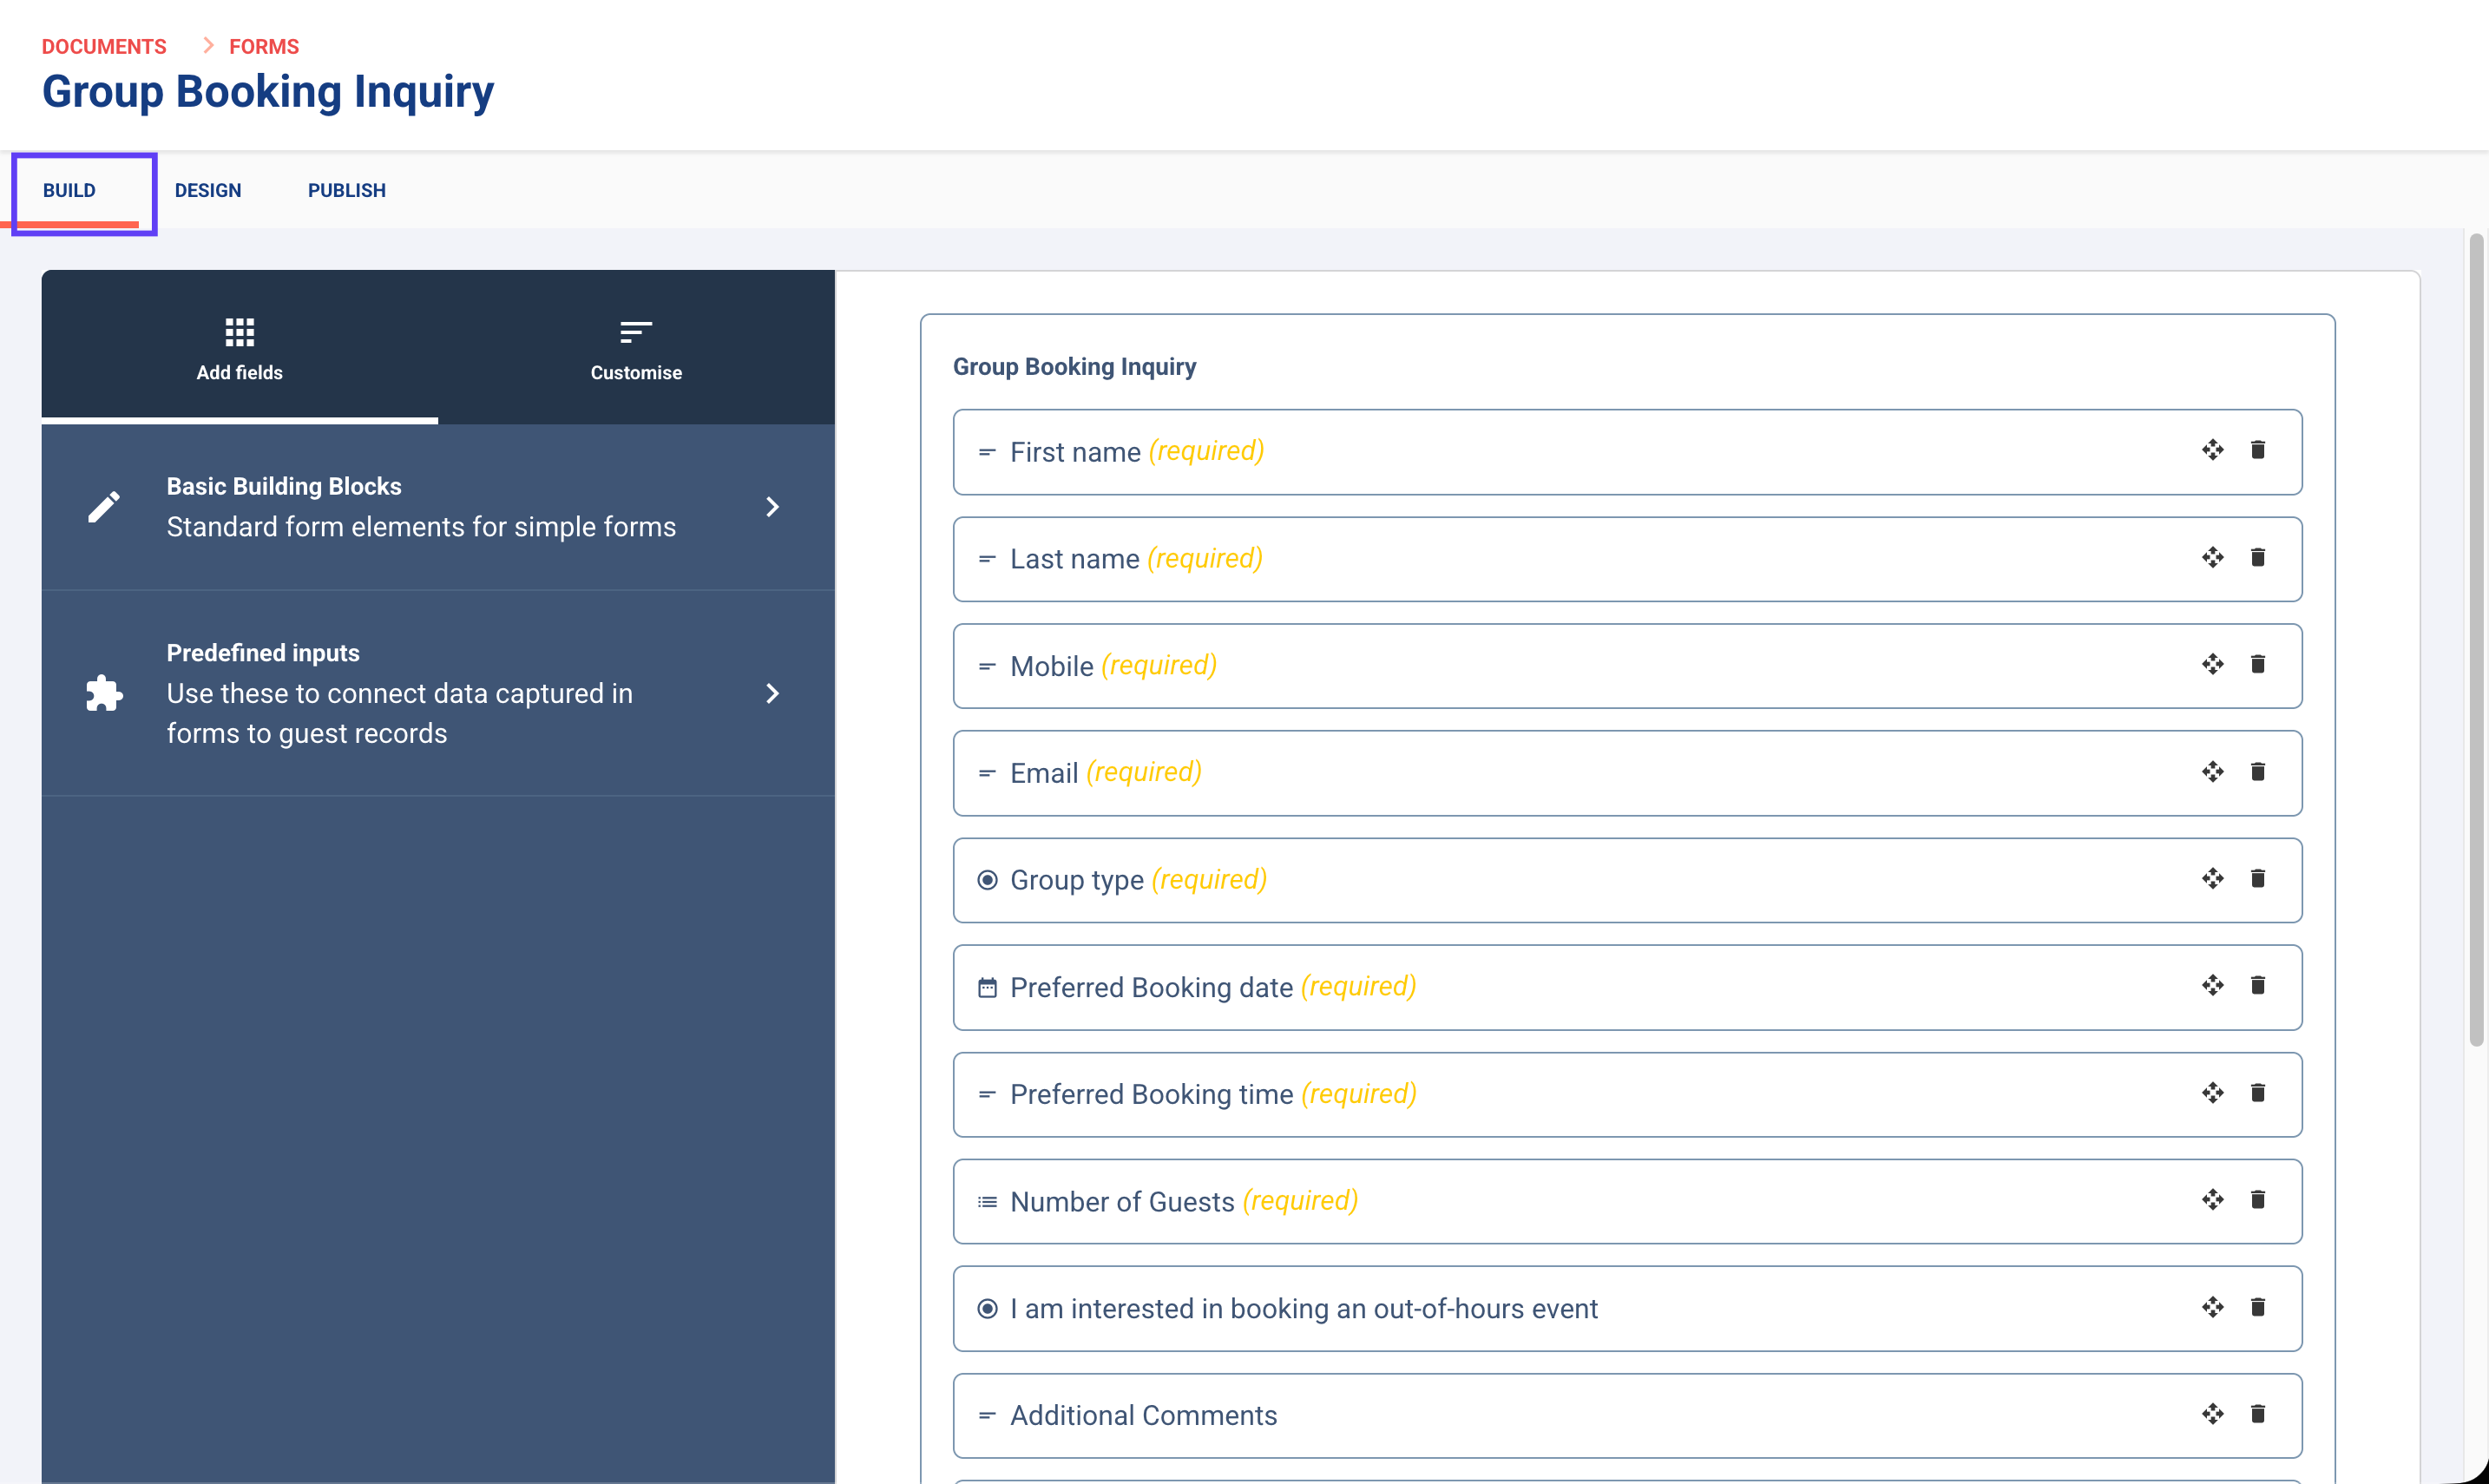
When you select Edit, the form opens in the form builder, where you can update fields and settings.
The form builder includes three main tabs:
Build — Add or edit form fields and configure form settings.
Design — Preview how the form appears to guests and adjust styling.
Publish — Copy the form link or embed code to share the form online.
Most changes are made from the Build tab.
Modify global form settings
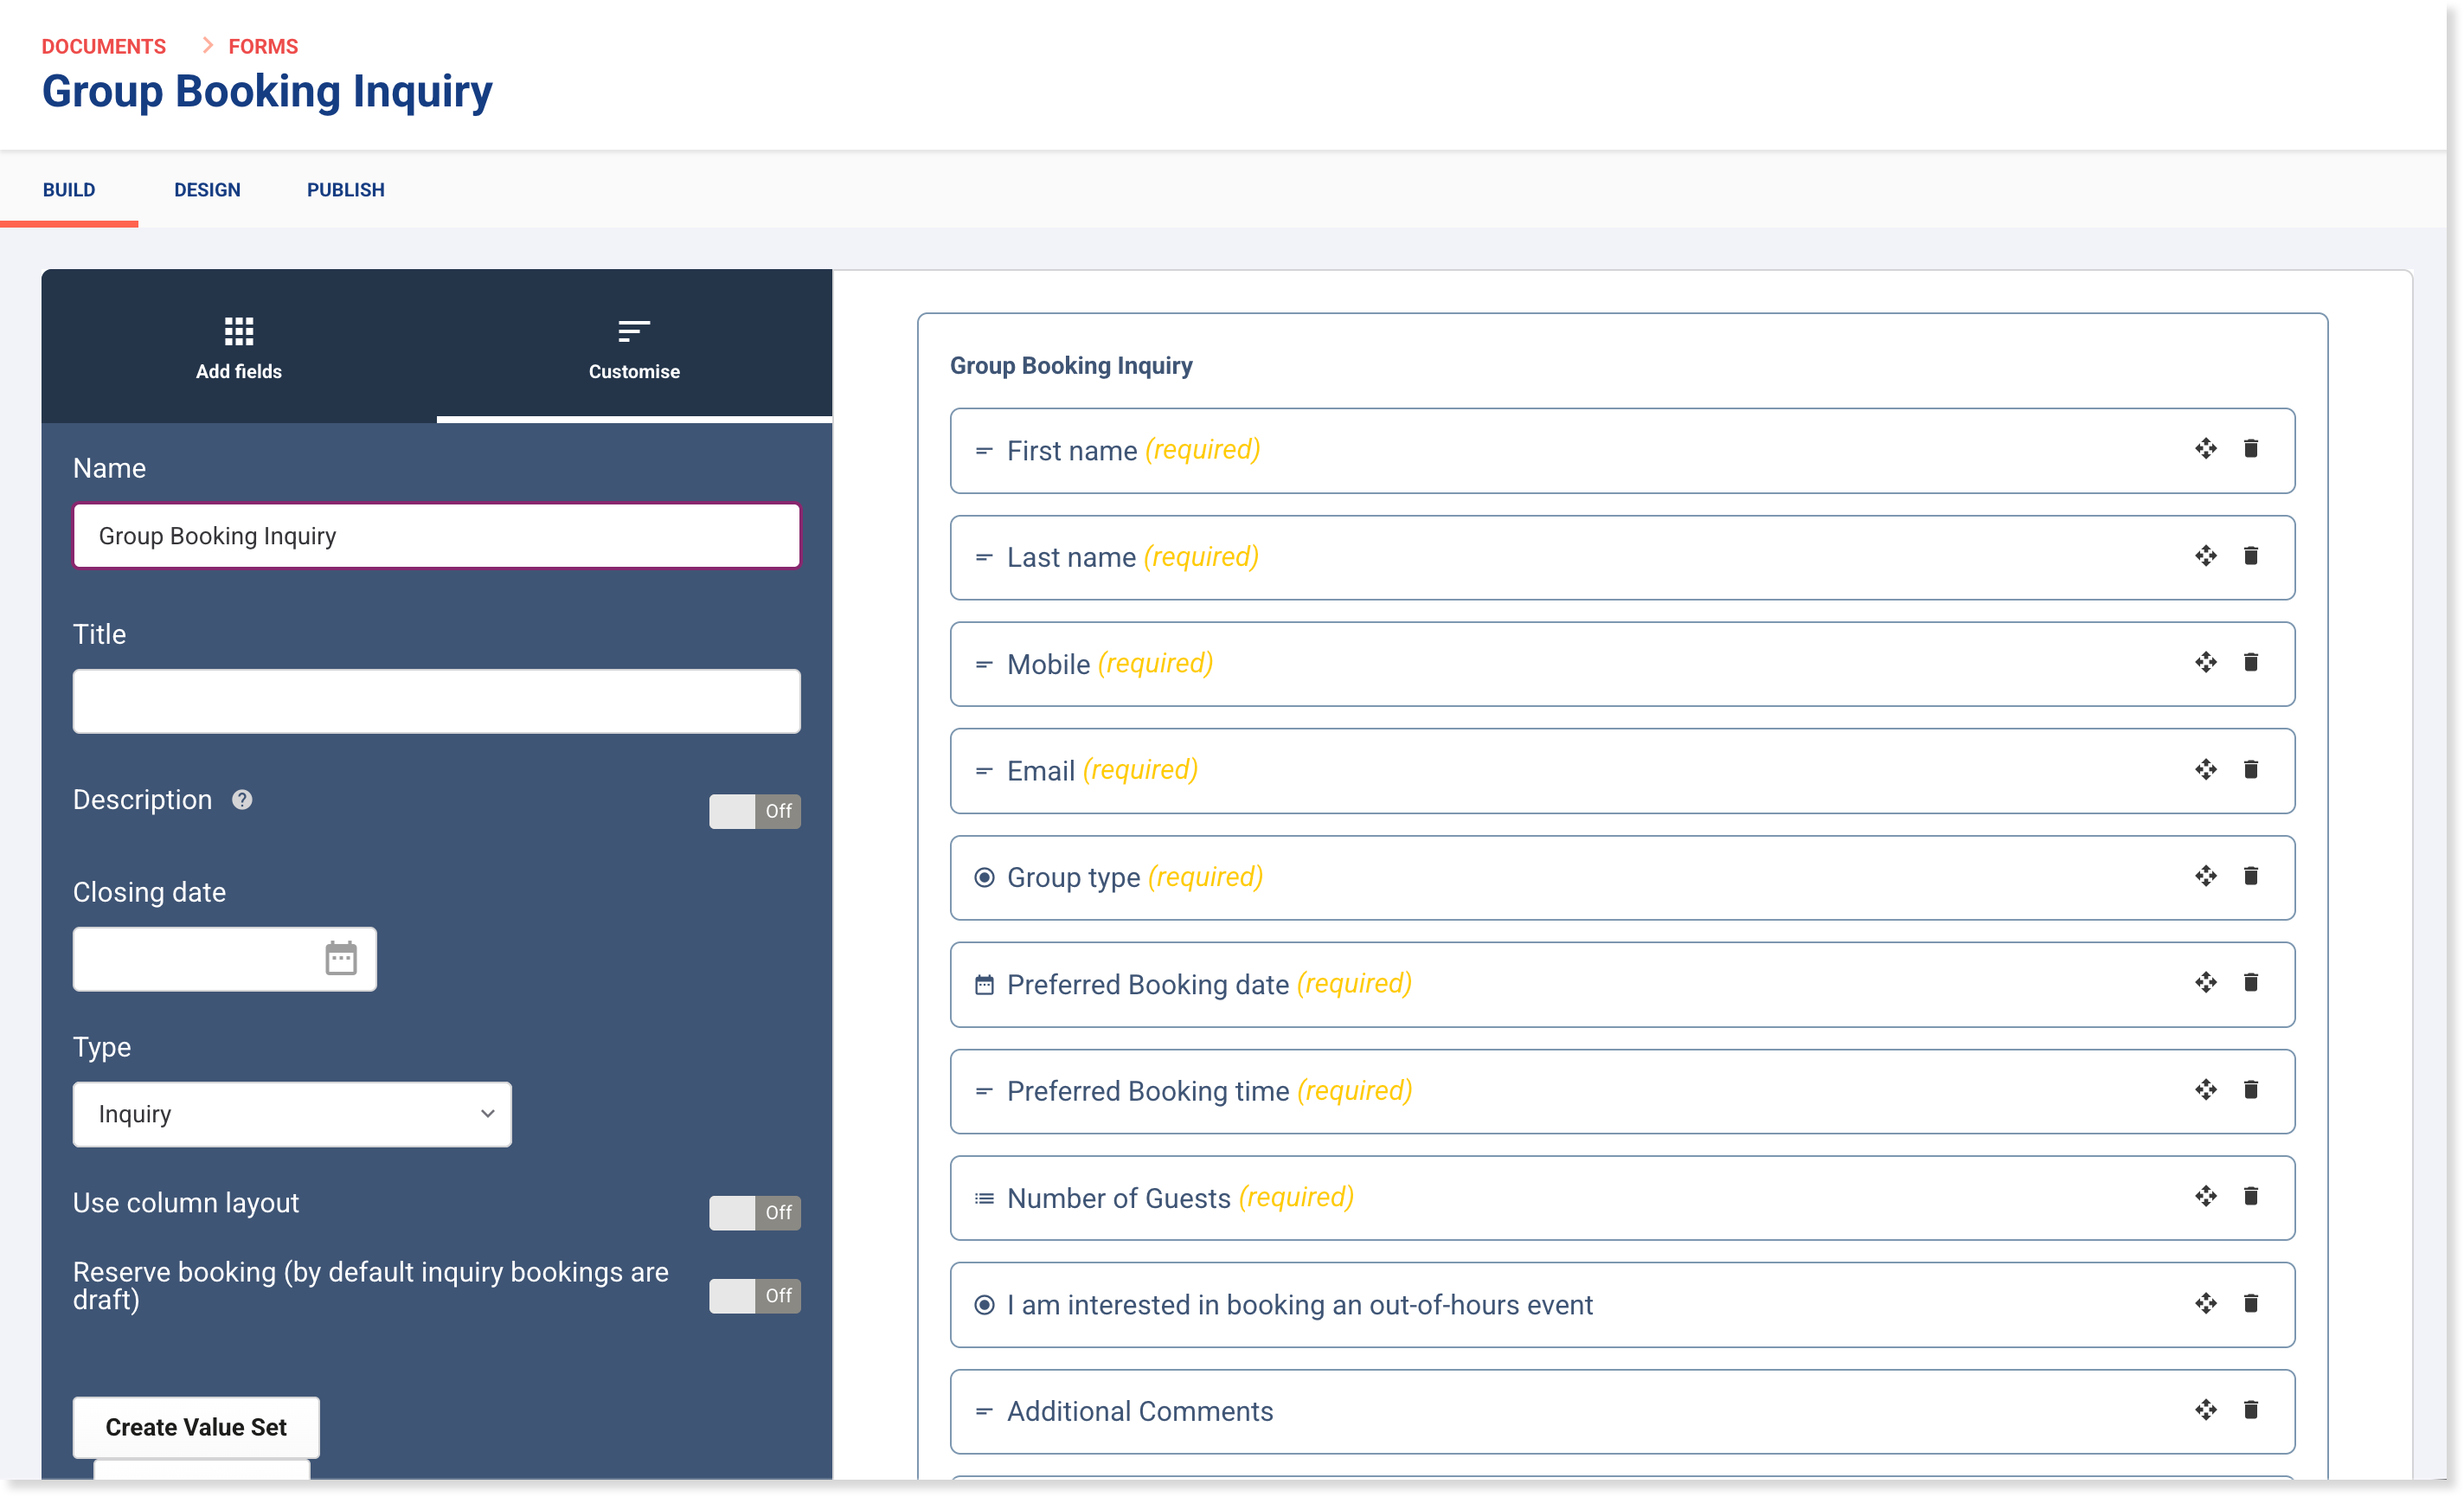
Global form settings control the overall setup of your form, including its internal name, guest-facing title, closing date and form type.
To update these settings:
From Venue Manager, go to Documents > Forms > All forms.
Find the form you want to update.
Select the options menu (3 dots), then select Edit.
In the form builder, stay on the Build tab.
Select Customize in the left panel.
Update the settings as needed.
General settings
Use these settings to control how the form is identified and displayed.
Name
The internal name of the form in Venue Manager. This name is not shown to guests.
Title
The guest-facing title shown at the top of the form.
Description
Optional text that gives guests more context or instructions before they complete the form.
Closing date
The date the form stops accepting responses.
Form type
Use Type to change how the form will be used.
Form type | What it does |
|---|---|
Inquiry | Sends guest submissions to the Activity Center in Venue Manager, where staff can review them and convert them into bookings. |
Online checkout additional details | Collects extra guest information during online checkout or from a link in order confirmation emails. |
Waiver | Loads the standard ROLLER waiver fields so you can modify them or add new fields. |
Depending on the form type you select, additional options may appear.
Layout and booking options
Some forms include extra settings that affect layout or inquiry handling.
Use column layout
Displays fields in columns instead of a single vertical list.
Reserve booking (by default inquiry bookings are draft)
Creates a draft booking when an inquiry form is submitted.
Value sets
A value set is a list of options for guests to choose from as a response to a question. They're used for dropdown or multiple-choice style fields in your custom forms.
Value sets are useful when you want to control and standardize guest responses — instead of open-ended text, guests pick from a predefined list. This makes responses easier to analyze and export consistently.
Select Create or Edit value set to create a reusable list of answer options for drop-down or multiple-choice fields.
For example, you might create value sets for:
Group type
Event type
Dietary requirements
After creating a value set, you can assign it to a relevant field (eg radio button, checklist, drop-down field) from that field’s settings.
Avoid removing options from drop-down or multiple-choice fields that have already been selected in past responses, as this will remove those responses from records.
Modify existing fields
To update a field:
Open the form in the Build tab.
Select a field in the form's fields preview on the right.
The Customize panel opens with the available settings.
Update the field settings as needed.
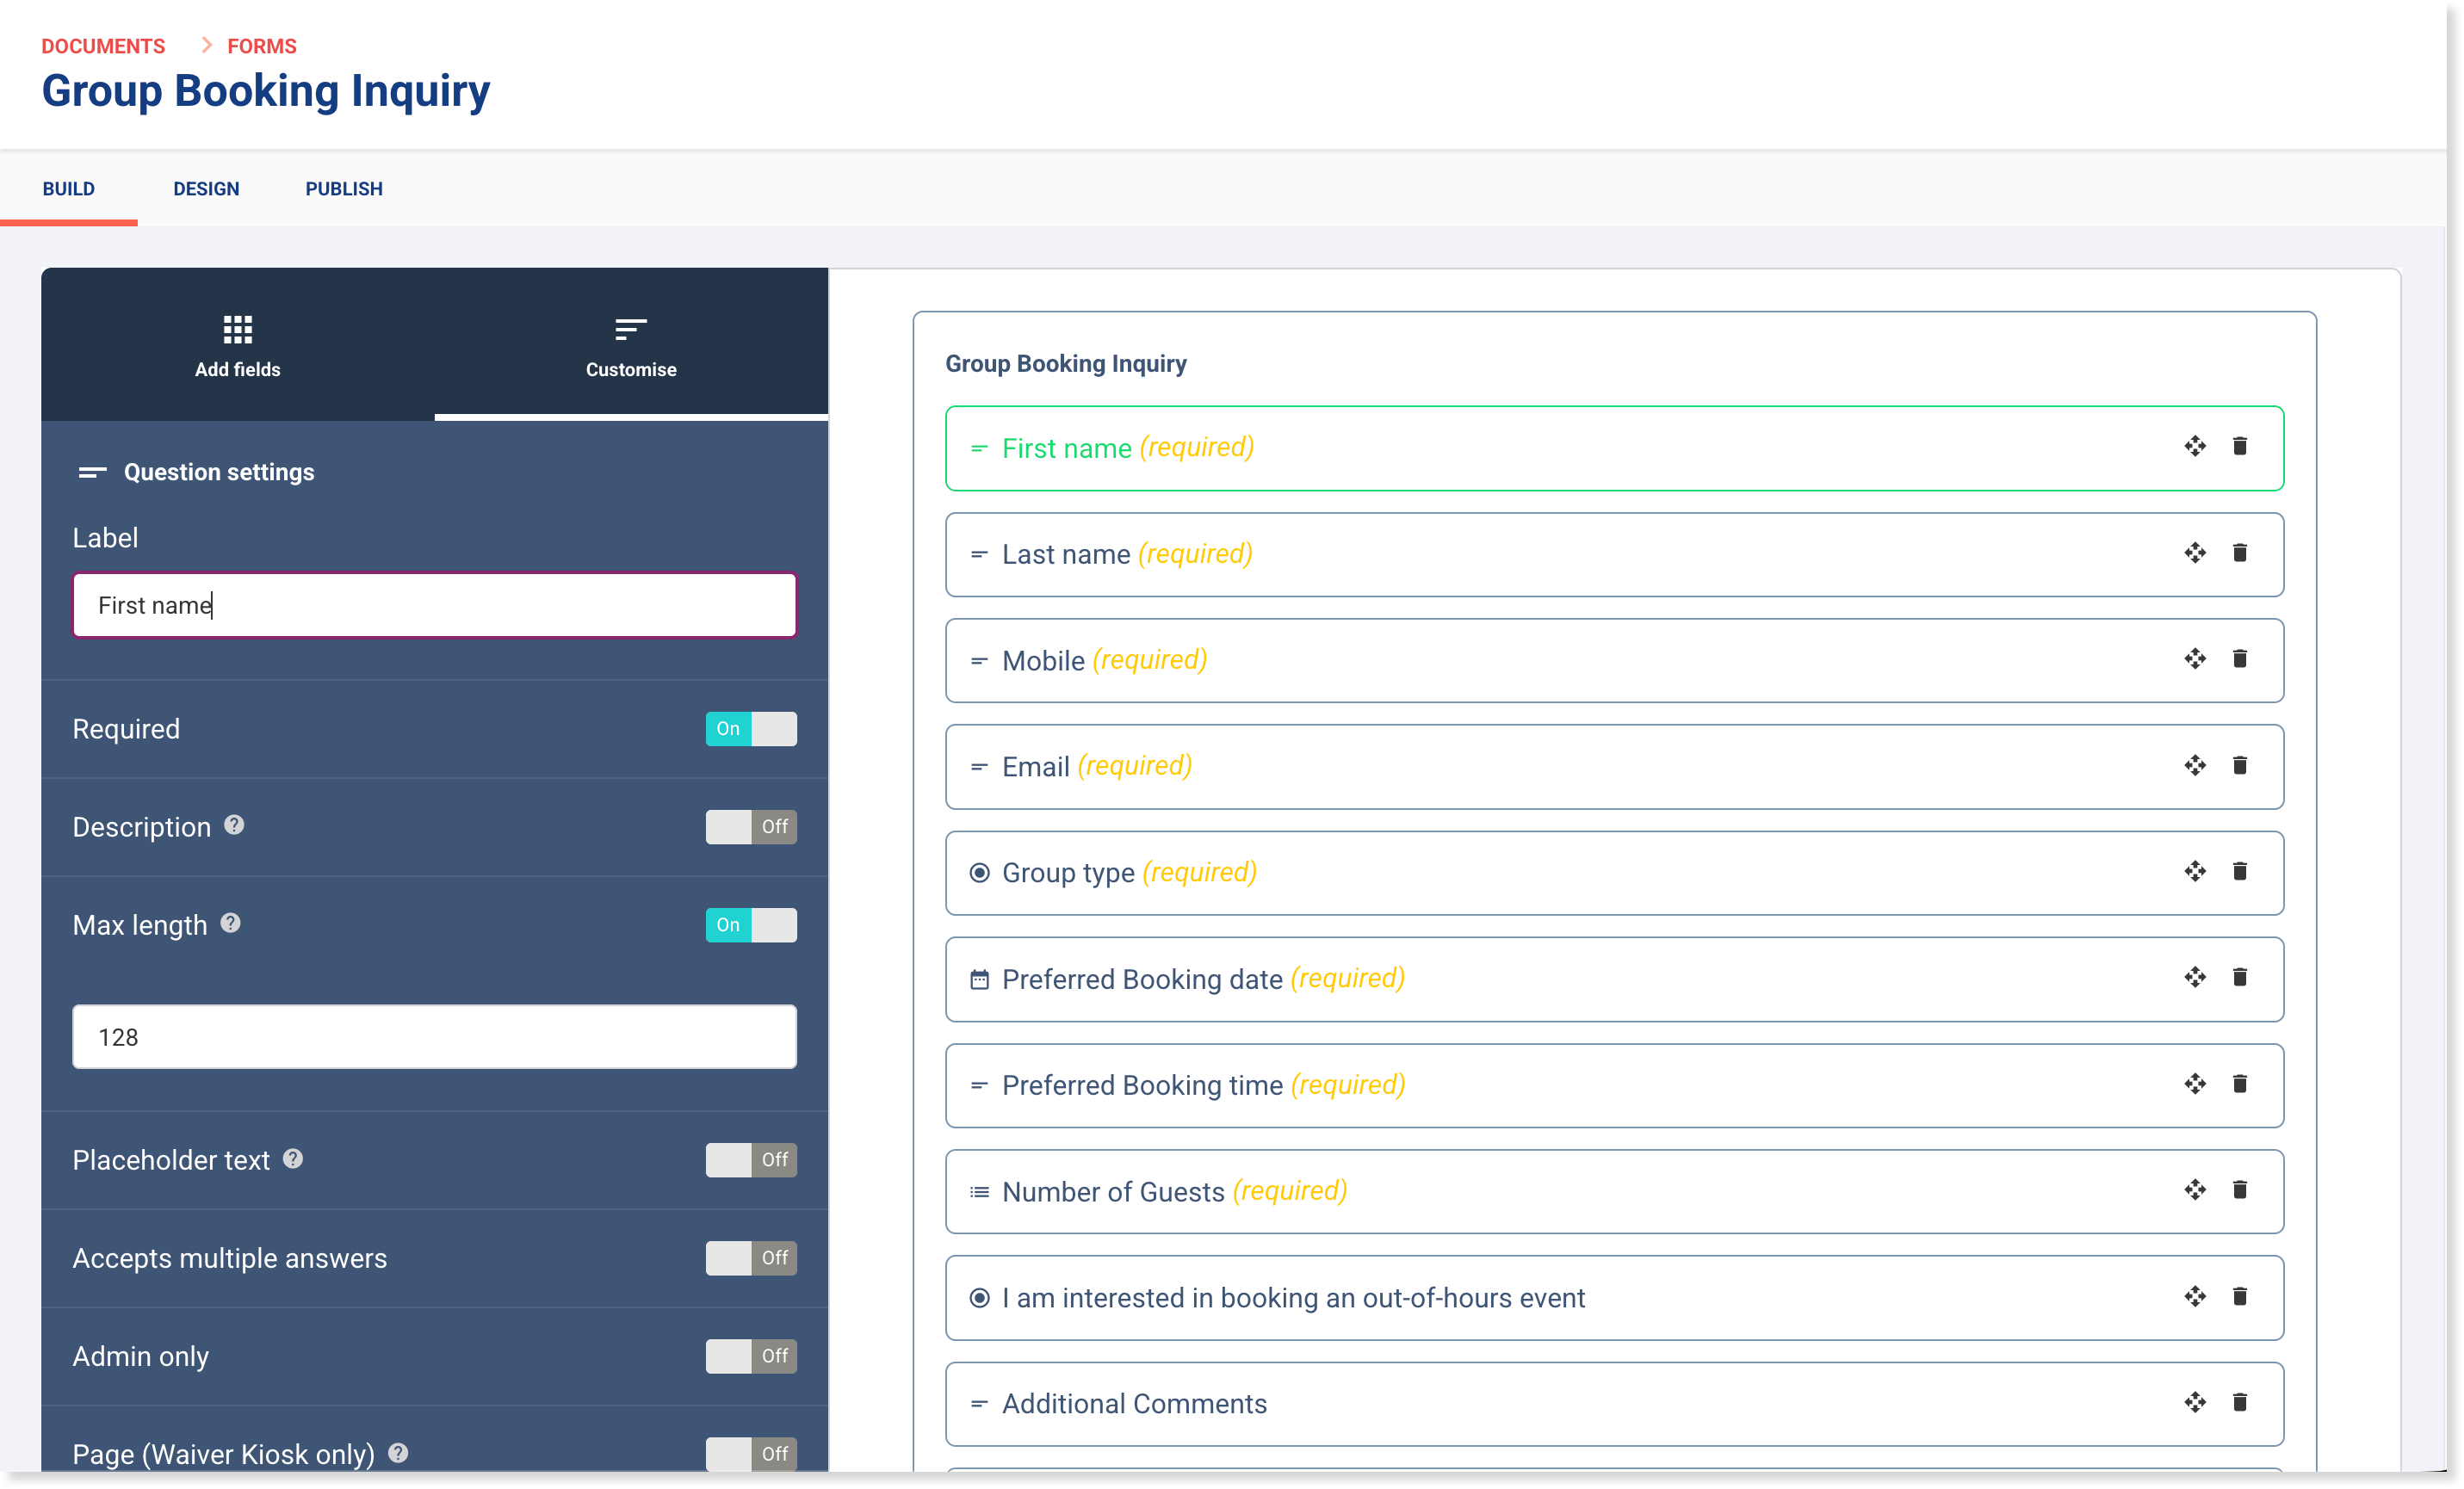
Common settings include:
Setting | Description |
|---|---|
Required | Makes the field mandatory for guests |
Description | Adds additional guidance for the field |
Placeholder text | Shows example text in the input field |
Max length | Limits the number of characters allowed |
Accepts multiple answers | Allows multiple selections for checkbox fields |
Admin only | Makes the field visible only to staff in Venue Manager |
Conditional | Displays the field only when certain responses are selected |
Add new fields to a form
You can add additional fields or questions to an existing form.
From the Build tab, select the Add fields tab (left panel).
Choose the field type you want to add.
Fields are grouped into two categories:
Basic building blocks
Standard form elements such as text inputs, checkboxes or drop-downs.
Predefined inputs
Fields linked to guest records in ROLLER, such as name, email or phone number.Select the field to add it to the form.
Drag and drop fields to rearrange their order if needed.
Organize fields using groups
You can group related fields together. Grouping fields under a heading helps guests understand what information is being asked for. This makes the form easier to scan and reduces confusion.
Examples:
Guest details
First name
Last name
Email
Phone number
Booking details
Party name
Number of guests
Special requests
To group related fields together
Select the Add fields tab.
Select Basic building blocks.
Select Group to add the box on the right.
Drag fields into the group.
Select the group to configure its settings.
Drag it to the position you want for the form.
Groups settings include:
Name — A guest-facing group title
Description — Additional instructions
Conditional — Show the group based on a response
Repeatable — Let guests add multiple entries, such as multiple guest names.
Example:
A Guest details group could include:
Guest name
Age
Dietary requirements
Guests can click Add to enter details for multiple attendees.
Edit value sets
Some fields use value sets, which are predefined lists of selectable answers.
To edit a value set:
Select the field using the value set.
The Customize settings open.
Select Edit value set.
Add, update or remove options.
Avoid deleting options that were previously used in responses, as this affects historical data.
Preview your form
To see how your form appears to guests:
Select the Design tab.
Review the layout and styling of the form.
Make any necessary adjustments before copying the link and adding it to the web page you want to link to it from.