Templates are a great way to save time and configure multiple POS devices at once, while maintaining consistency across all POS devices linked to the template. Templates are recommended for venues with multiple POS devices that offer the same products.
This guide walks through how to configure POS device templates to manage multiple POS devices in your venue.
Pro feature and above
Save time setting up and updating your POS devices using templates. To unlock this feature with a Pro plan, contact your customer success manager or the support team.
Create your template device settings
To create a new POS template and configure the template device settings, follow the steps below.
From Venue Manager, go to Apps > Point of Sale > Templates.
Select Create a template.
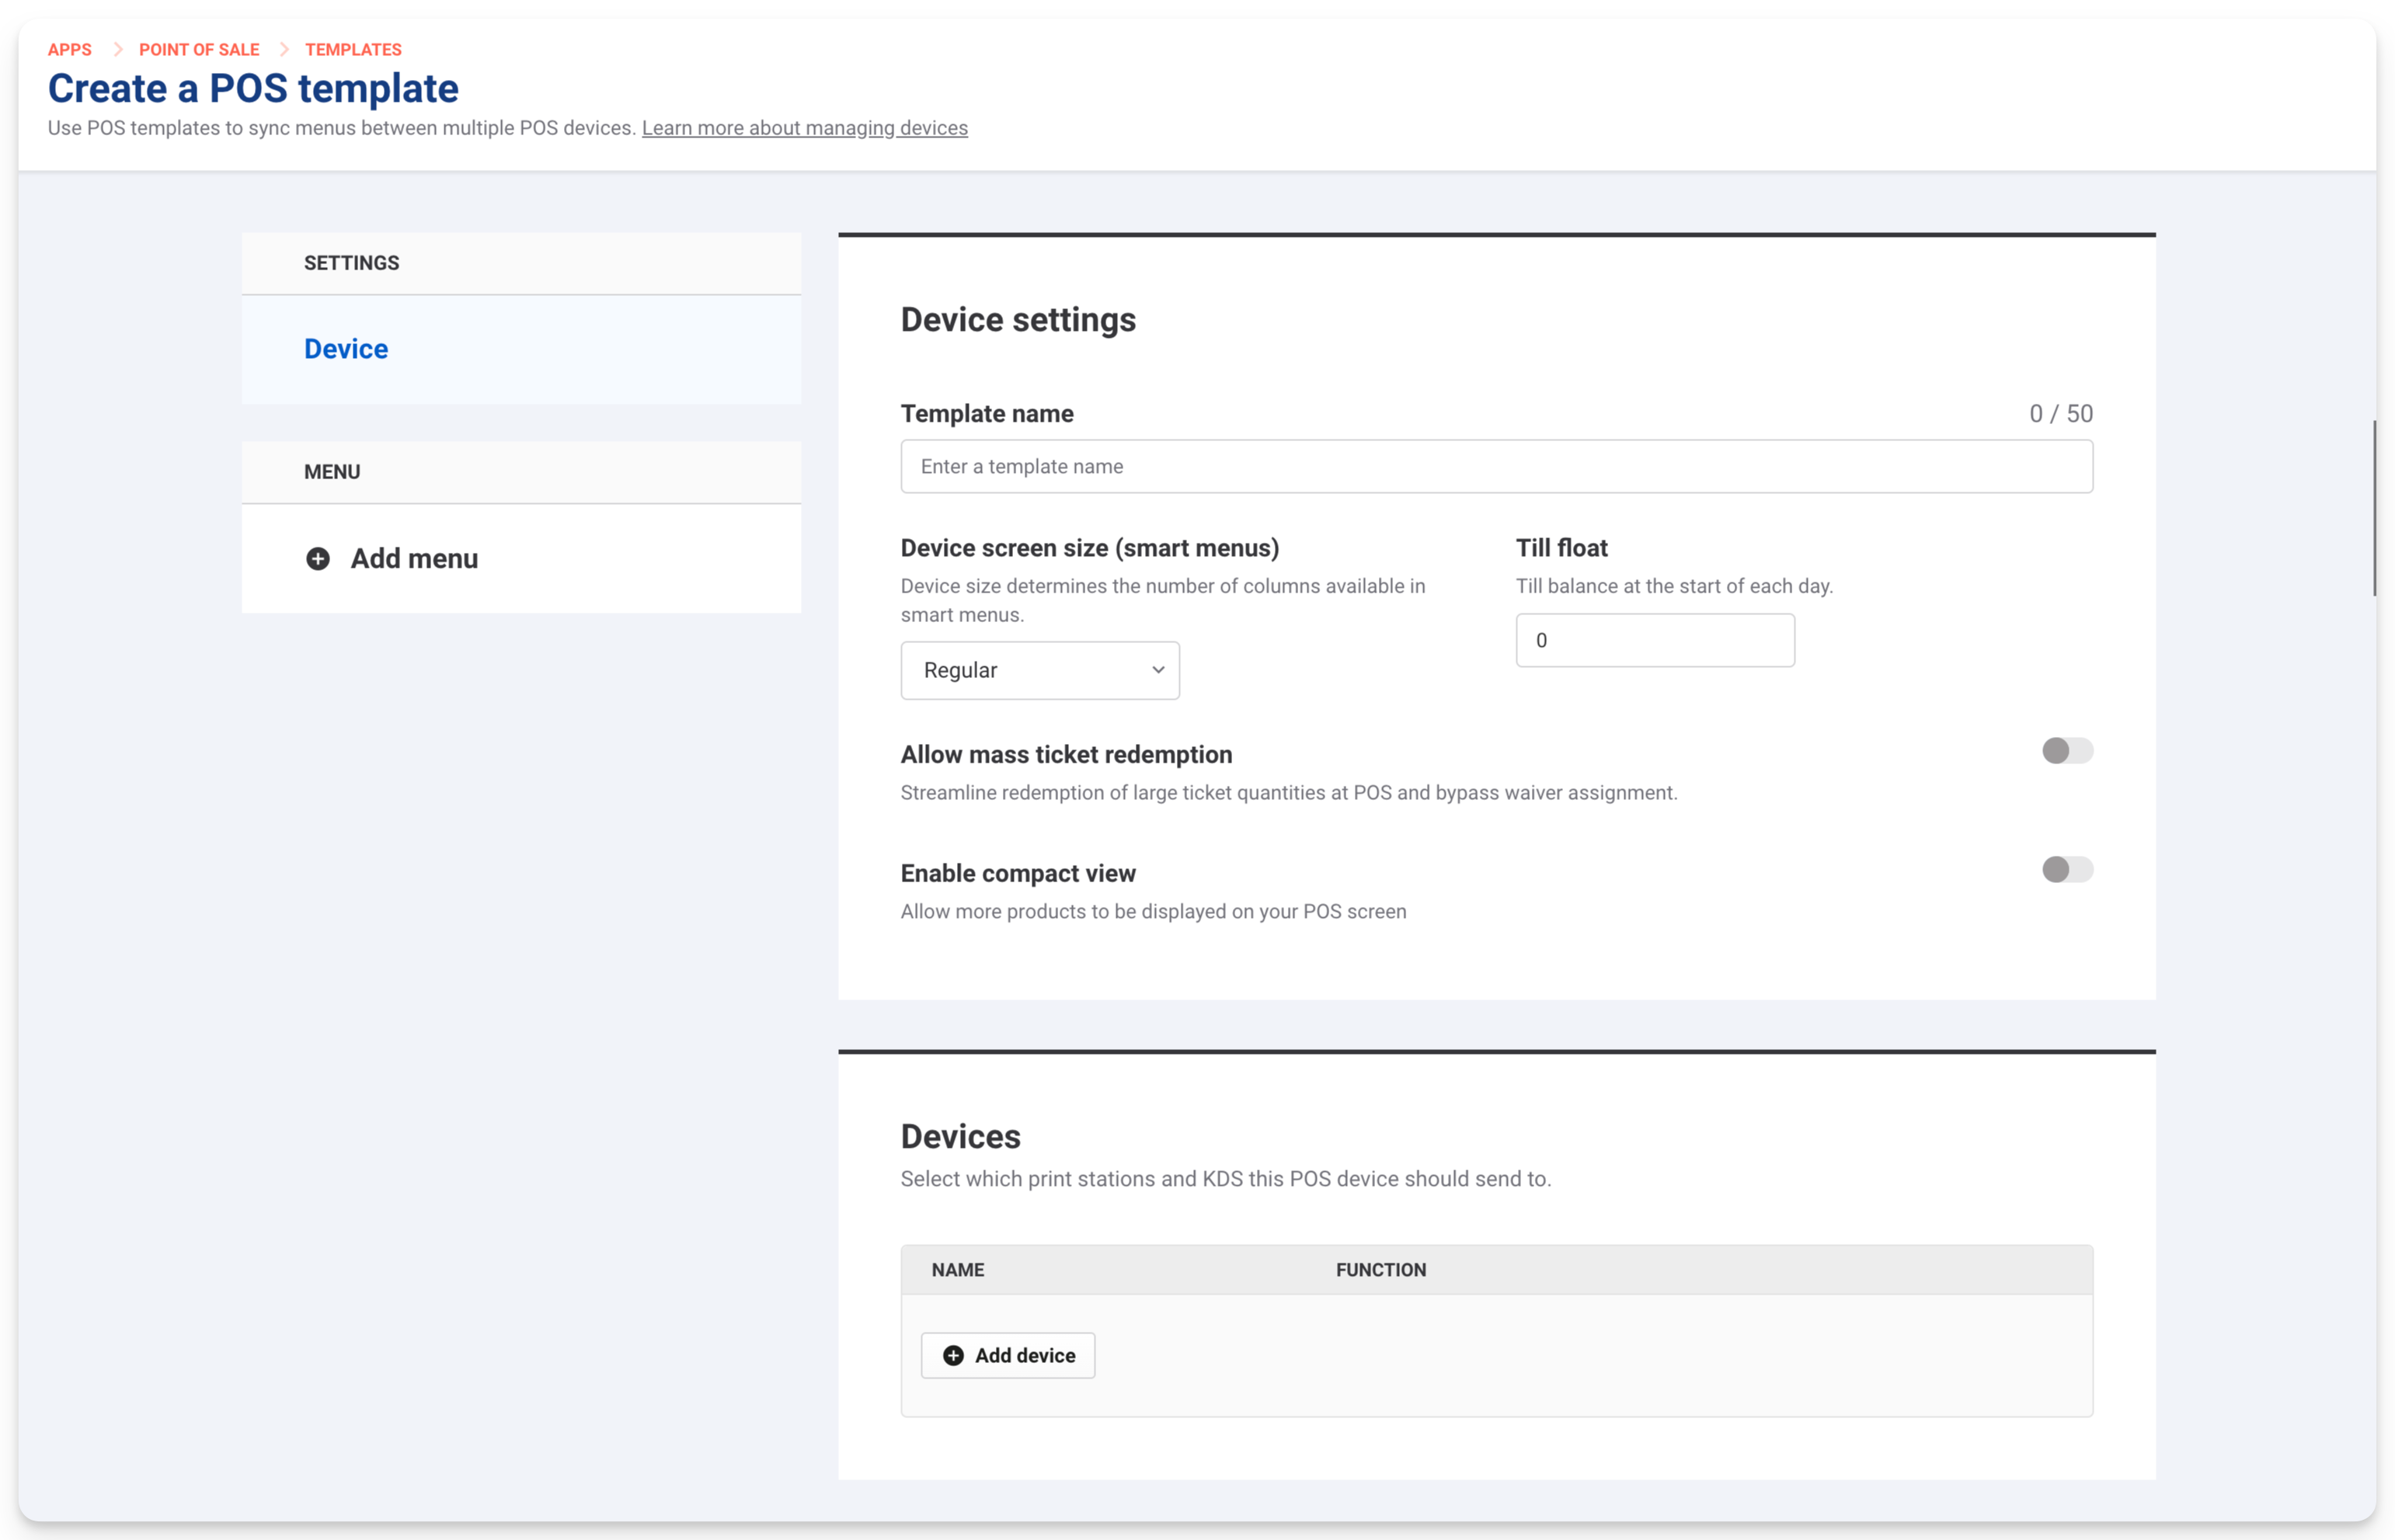
Give the device template a unique Template name.
Set the Device screen size. This determines the number of columns available in smart menus.
Set the Till float. This sets the balance of the till at the start of each session.
[Optional] Allow mass ticket redemption. Set a minimum ticket quantity to enable the mass redemption feature in POS.
Note: Mass redemption bypasses the waiver assignment and tickets can be redeemed without a waiver attached.[Optional] Enable compact view. This option makes your POS tiles smaller and allows for more products to be displayed on your POS screen.
This is great for POS devices you might use in your restaurants or cafes, because more stock items are available on one screen, making it easier for your staff to put through orders. Note: Selecting this option disables product images at POS.Link your Devices. Select Add device to choose which print stations or KDS devices this POS device should send orders to. Only one receipt printer can be assigned to a POS device.
Configure POS capacity view (optional)
If your venue has single-booking resources (e.g. escape rooms or courts) set up in ROLLER, you’ll see a Capacity view option in the template settings.
From here, you can choose which single-booking resources appear in your POS capacity view and the order they appear.
If your venue has no single-booking resources set up in ROLLER, the Capacity view option will not appear.
To configure POS capacity view:
Select Capacity view.
Under Resources use the dropdown to select the single booking resources to display.
Under Resource order drag resources to reorder them to best suit your venue and workflows.
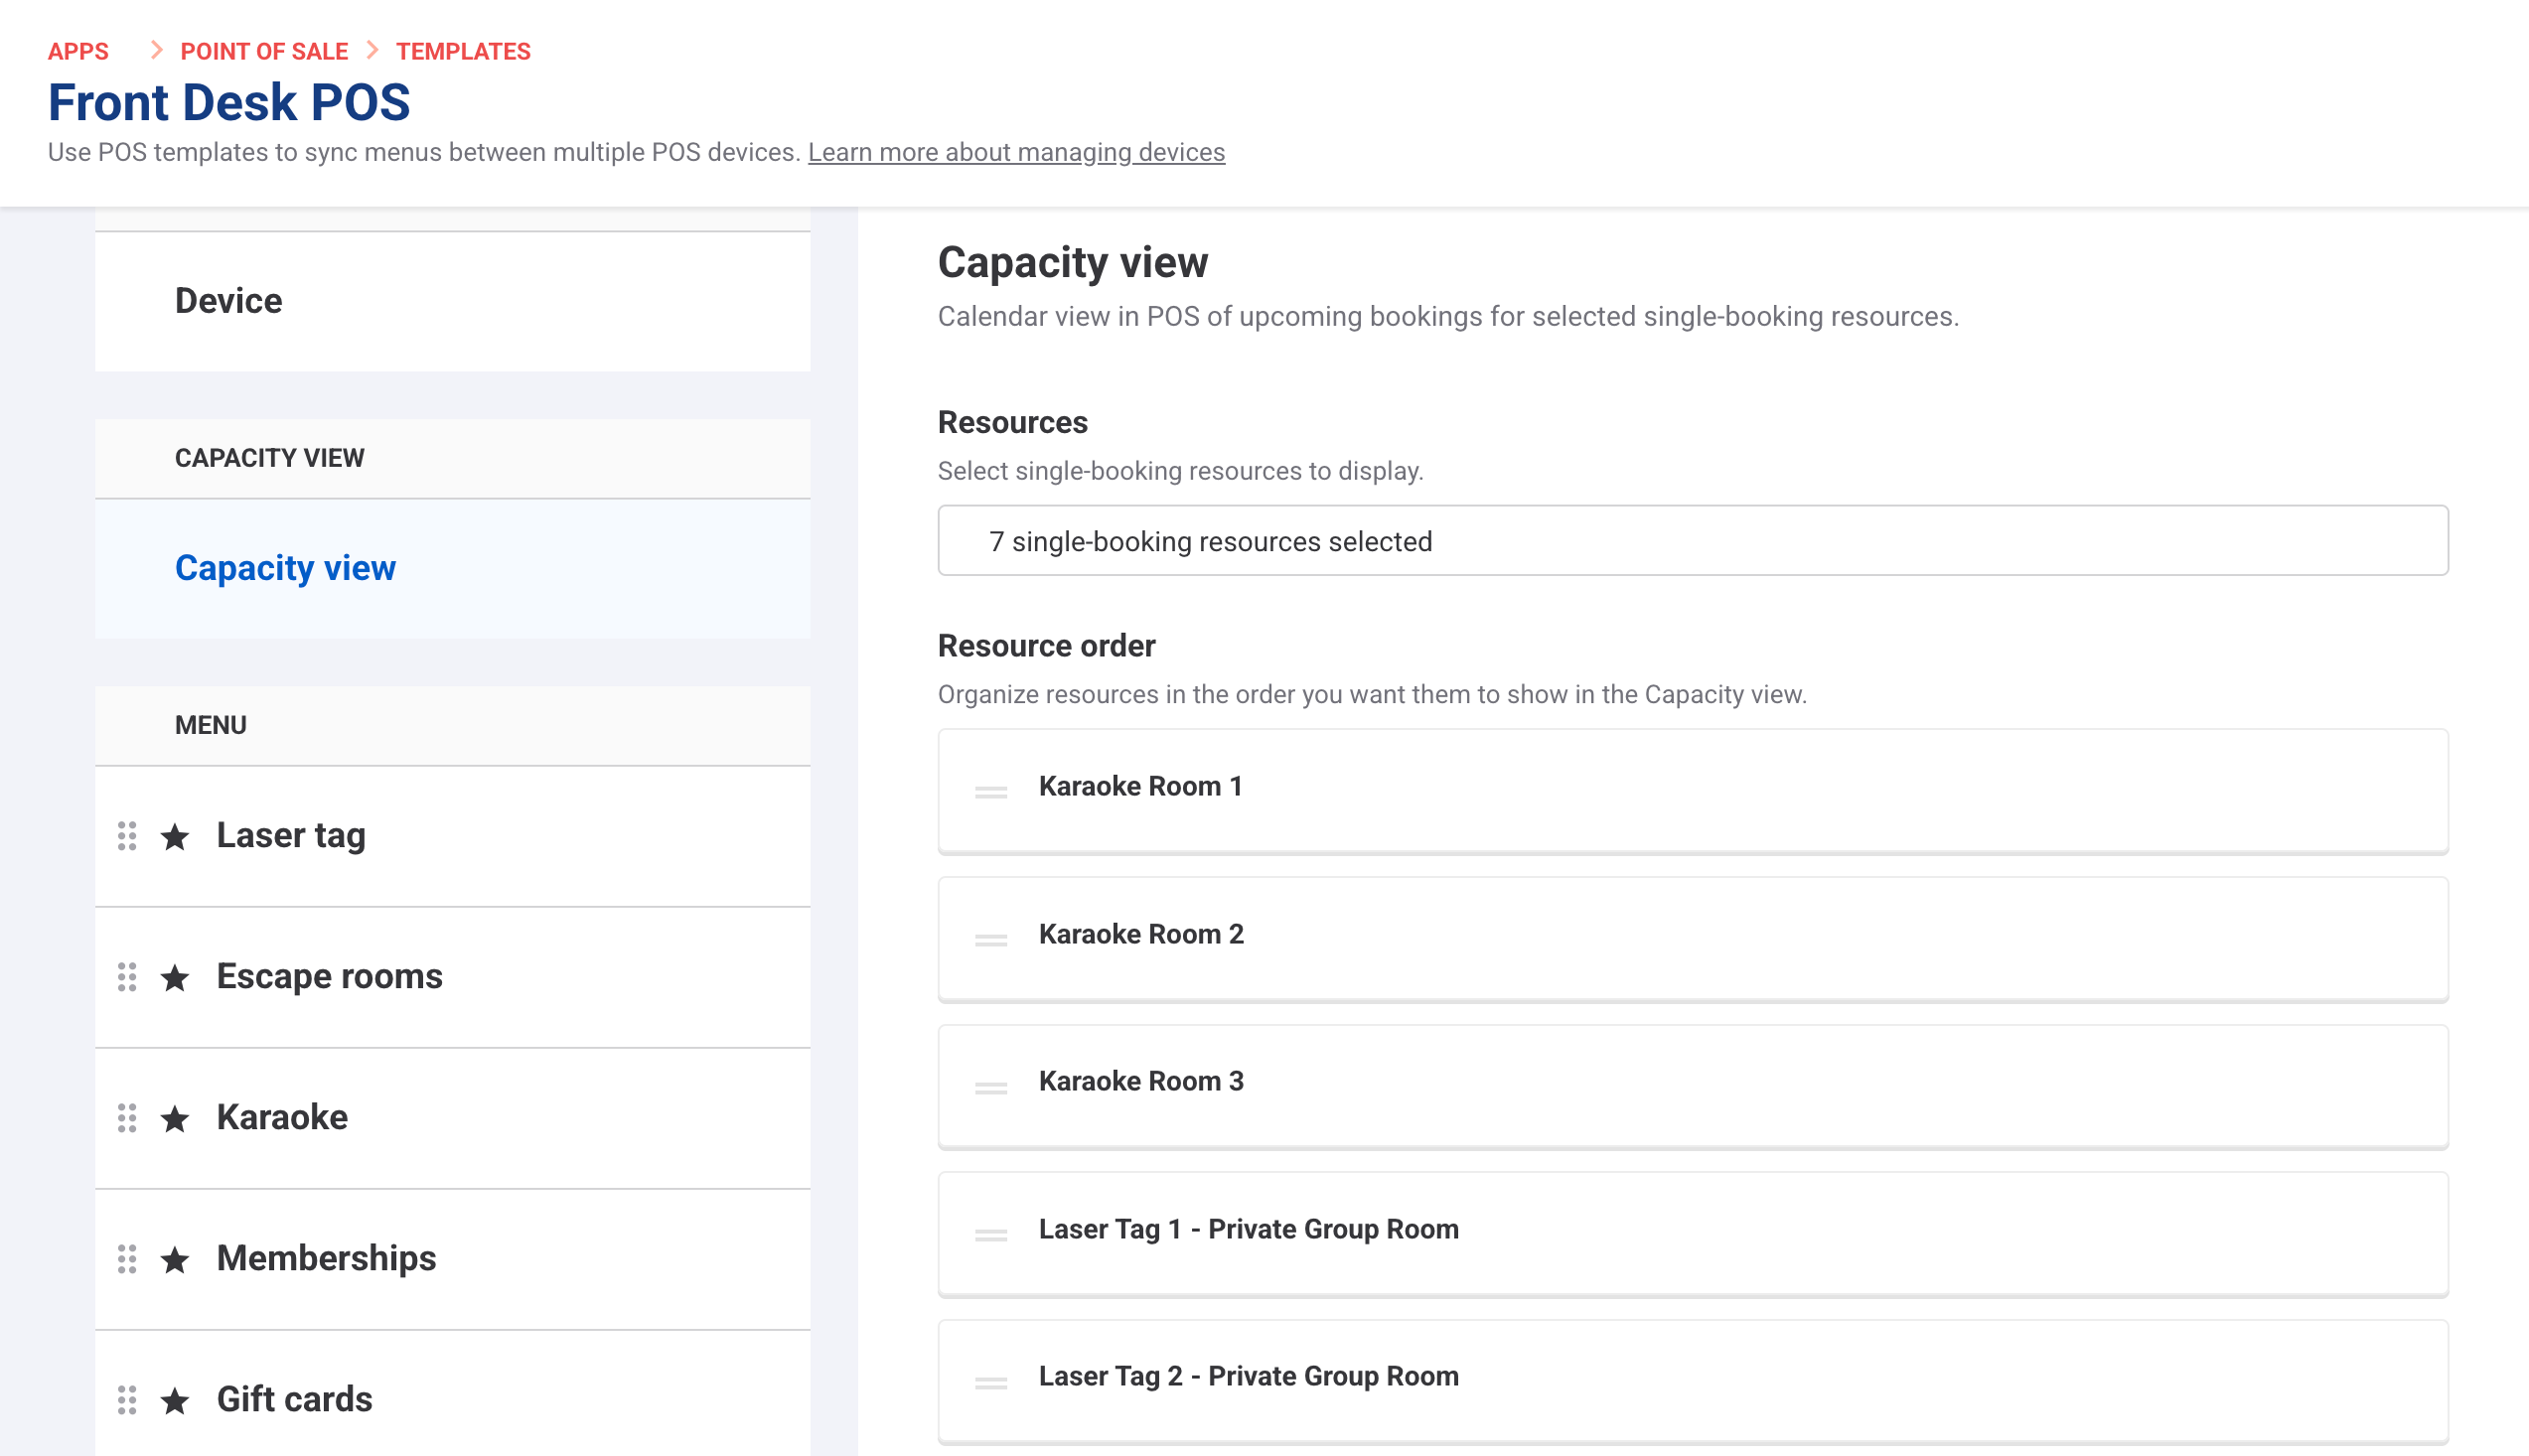
Any POS device linked to this template will show the selected resources in the order you set.
Create your menus and add products
To create your device template menu, follow the steps below.
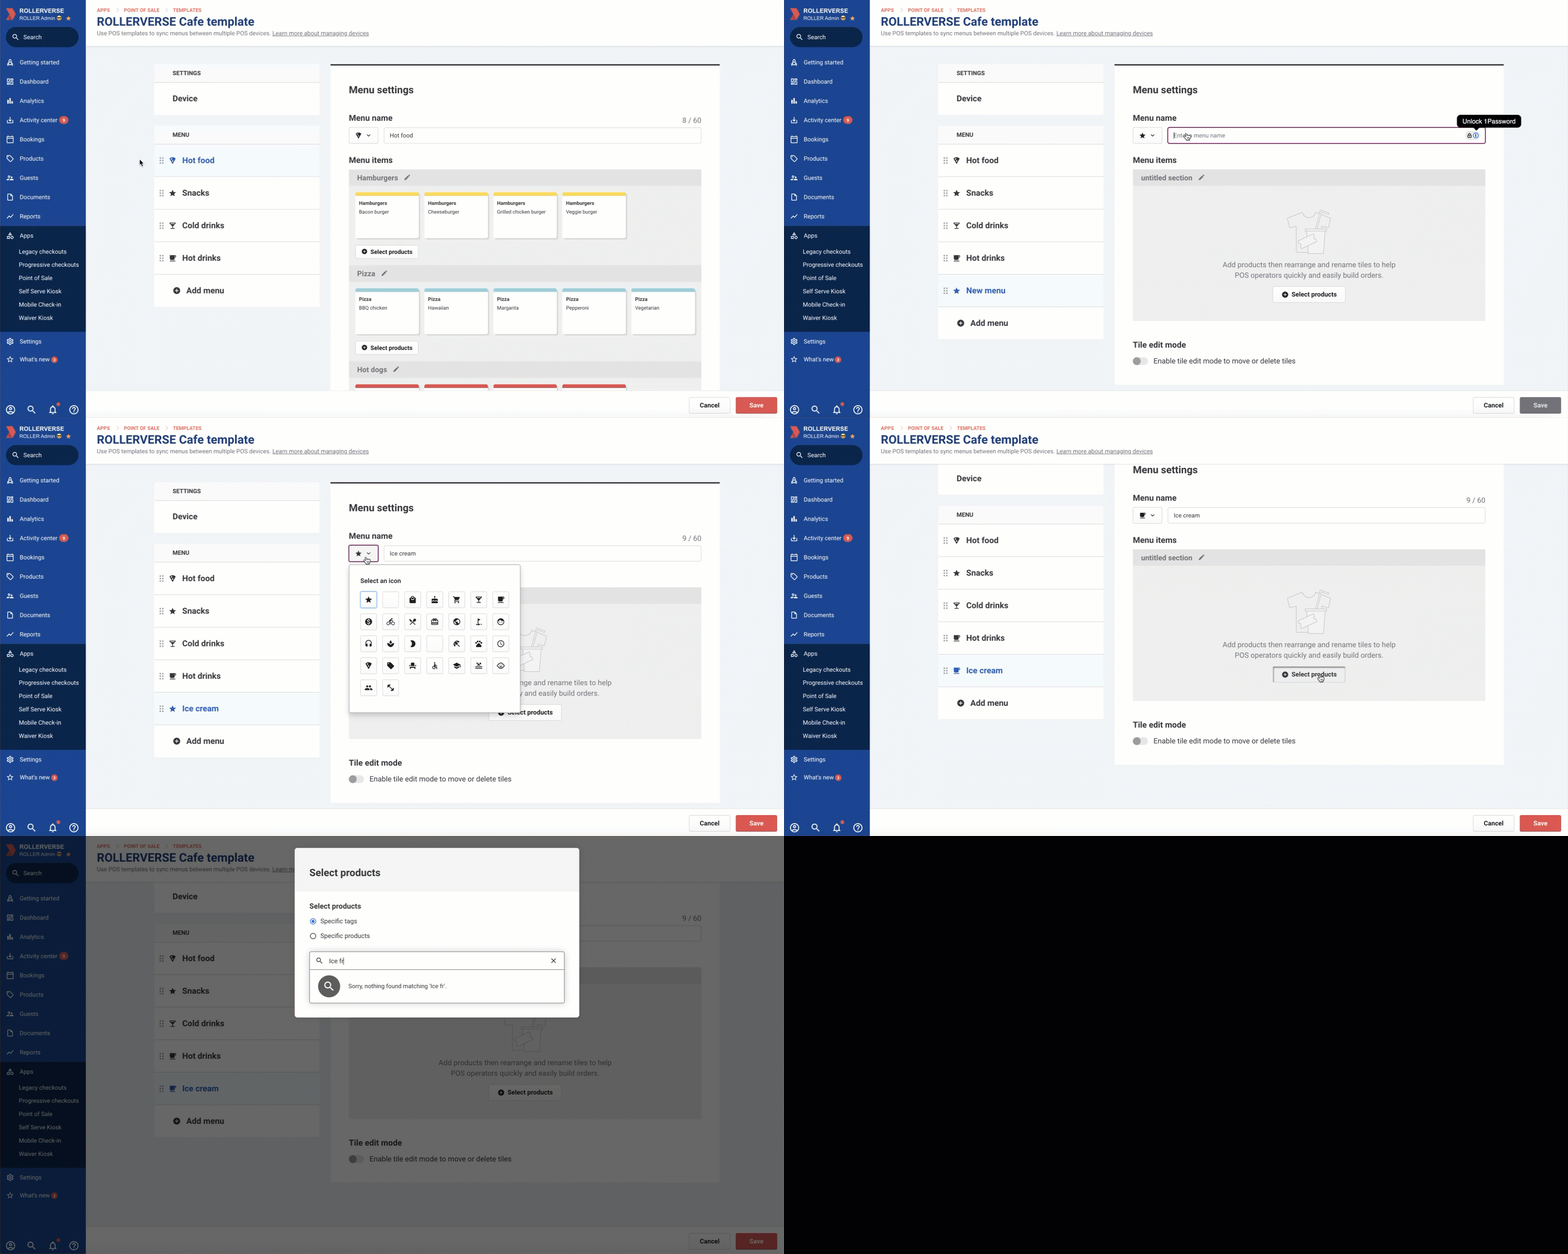
Select Add menu.
Enter a Menu name (eg Memberships) and select an icon from the dropdown.
Select products. You can choose to select your products by Specific tag or by choosing Specific products.
We recommend selecting products by tag because product tags reduce the administrative burden of manually managing and updating your POS device menus.
When you add or remove a tag from a product, it’s automatically added or removed from your POS menus too — no need to make manual updates to each of your devices and templates.Select Apply and then select Done.
Repeat the above steps for any other menus you wish to add to the template.
Select Save.
To learn more about linking a template to a POS device, read the guide Create your POS devices.
Create POS folders to group stock products
If you’re creating food and beverage menus, you can also streamline your POS menus with folders. Folders make it easier for you to find stock products, reducing the time it takes to put in a purchase, resulting in a better guest experience.
POS folders can only be used to group stock products.
A well-organized POS with folders keeps the interface less cluttered, especially if you have a large list of stock, making it easier for staff to use without getting overwhelmed.
To create POS folders, follow these steps.
Select Add menu.
Enter a Menu name (eg Hot food) and select an icon from the dropdown.
Select Add folder (this option will be next to the Select products button).
Give your folder a Name and choose a Tile color for the folder.
Then, add your products to the folder. You can choose to select your products by Specific tag or by choosing Specific products.
We recommend selecting products by tag because product tags reduce the administrative burden of manually managing and updating your POS folders.
When you add or remove a tag from a product, it’s automatically added or removed from your POS folder too — no need to make manual updates!Select your tags or products and then select Apply.
Once you’ve chosen all the products you want to add, select Add folder.
At POS, to add a stock product to the cart, simply select the folder, locate the stock product, and add it to the cart.
To learn more about POS menus and creating folders, read the guide Create and manage POS menus.
Manage POS templates
From Venue Manager, go to Apps > Point of Sale > Templates.
Select the options menu (3 dots) at the end of the row for the relevant template. The following options will appear from the dropdown.
Action | Description |
|---|---|
Edit | Opens the template settings page for you to edit your template device settings and POS menus.
|
Duplicate | Creates a copy of the existing template for you to modify and save. |
Create device from template | Automatically creates a POS device which shares the menu setup in the template. |
Delete | Removes the POS template from the list. |