You have several options to edit, speed up schedule creation by duplicating schedules and customize your product schedules using operating hours. This guide shows you how.
To learn how to create your product schedules, refer to the guide Create your product schedules using operating hours
Edit a schedule
From Venue Manager, go to Products > Schedules.
Select the product you want to update for an overview of its active schedules.
Select the schedule you want to edit.
Edit any of the schedule options: schedule name, description, how you want to link it to operating hours, schedule period, dates and sessions.
Select Save.
The schedules calendar and any changes to the session times available update.
Copy an existing schedule from another product
You can add an existing schedule from another product to help speed up the schedule creation process, then edit its details. Once copied, editing one schedule will not affect the other.
From the Schedules view in Venue Manager, select the product for the schedule you want to create.
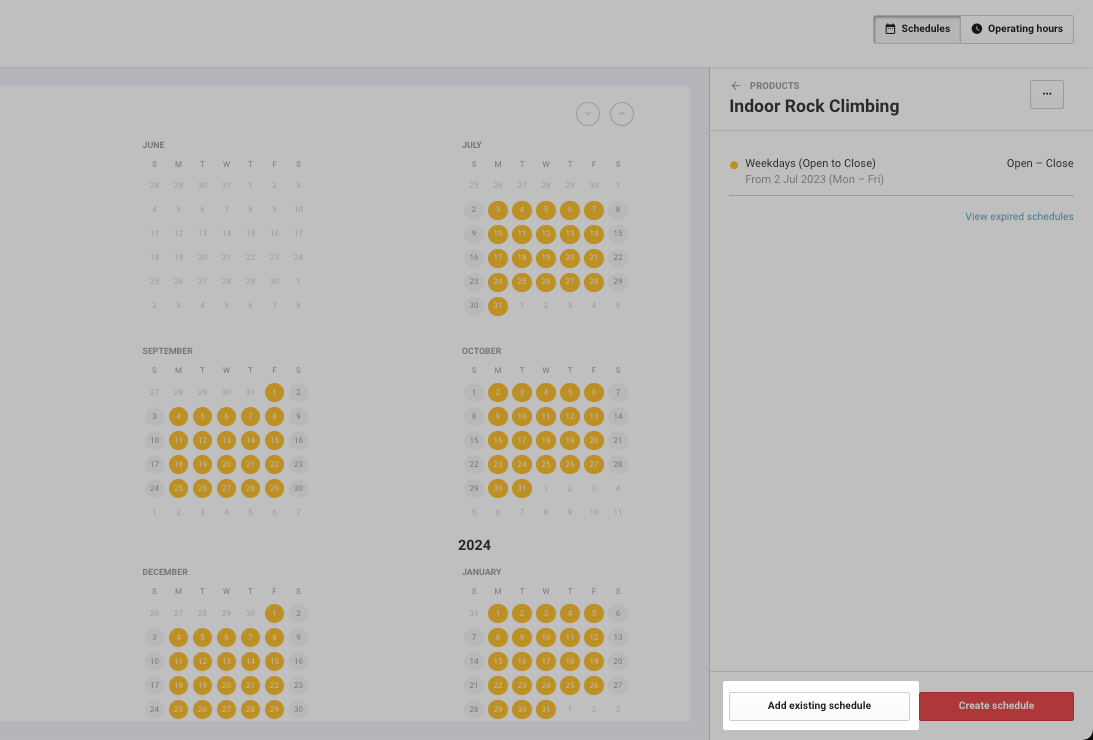
Select Add existing schedule at the bottom of the panel.
In the Copy schedule from another product pop-up, select the product and then the schedule to copy.
Keep Include all tickets selected to include all product tickets in the schedule. To apply to selected tickets, select the individual tickets.
Select Include exclusion dates to copy the exclusion dates.
Select Add schedule.
Enter a new name and description and edit the schedule’s options as needed. Read on to learn how to manage any schedule conflicts.
Click Save to add the schedule.
Days already in use conflicts
Scheduling conflicts occur when days in different schedules for a product overlap. To learn how to resolve such conflicts, refer to the guide Create your product schedules using operating hours.
Common schedule management options
From within a product schedule, several other management options are available.
From Venue Manager, go to Products > Schedules.
Select the product, then select the schedule you want.
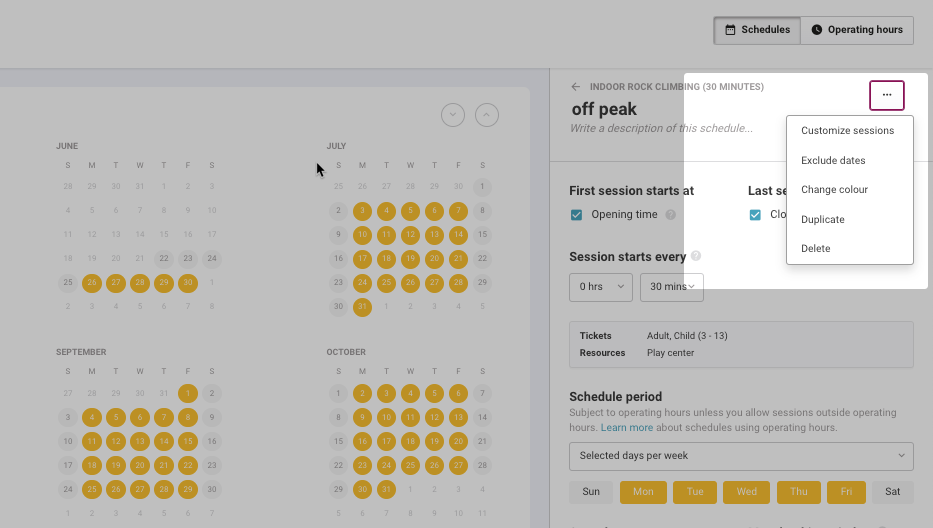
Select the options menu (3 dots) at the top right.
Choose from the menu options available. Read on for more details about each option.
Options | Description |
|---|---|
Customize sessions | Select to create a customized schedule not linked to operating hours. You can set your own irregular session times, vary the tickets and resources available for each session, whatever variation you want. |
Exclude dates | Select to exclude dates from an individual schedule. |
Change color | Select to customize the color highlighting the schedule period in the schedule calendar. |
Duplicate a schedule | For more than one schedule for a product, select to duplicate one of its existing schedules to speed up the schedule creation process. |
Delete a schedule | Select to delete a product schedule. |
Customize sessions for a schedule
You can create a completely customized schedule for your product, not linked to operating hours, with its own irregular session interval times and varying ticket types and resources per session time.
From the options menu (3 dots) at the top right, select Customize sessions from the drop-down.
This action unlinks schedule session times from your venue's opening and closing times set up in operating hours. As a result, your session times won't automatically adjust to fit within any updates to operating hours.
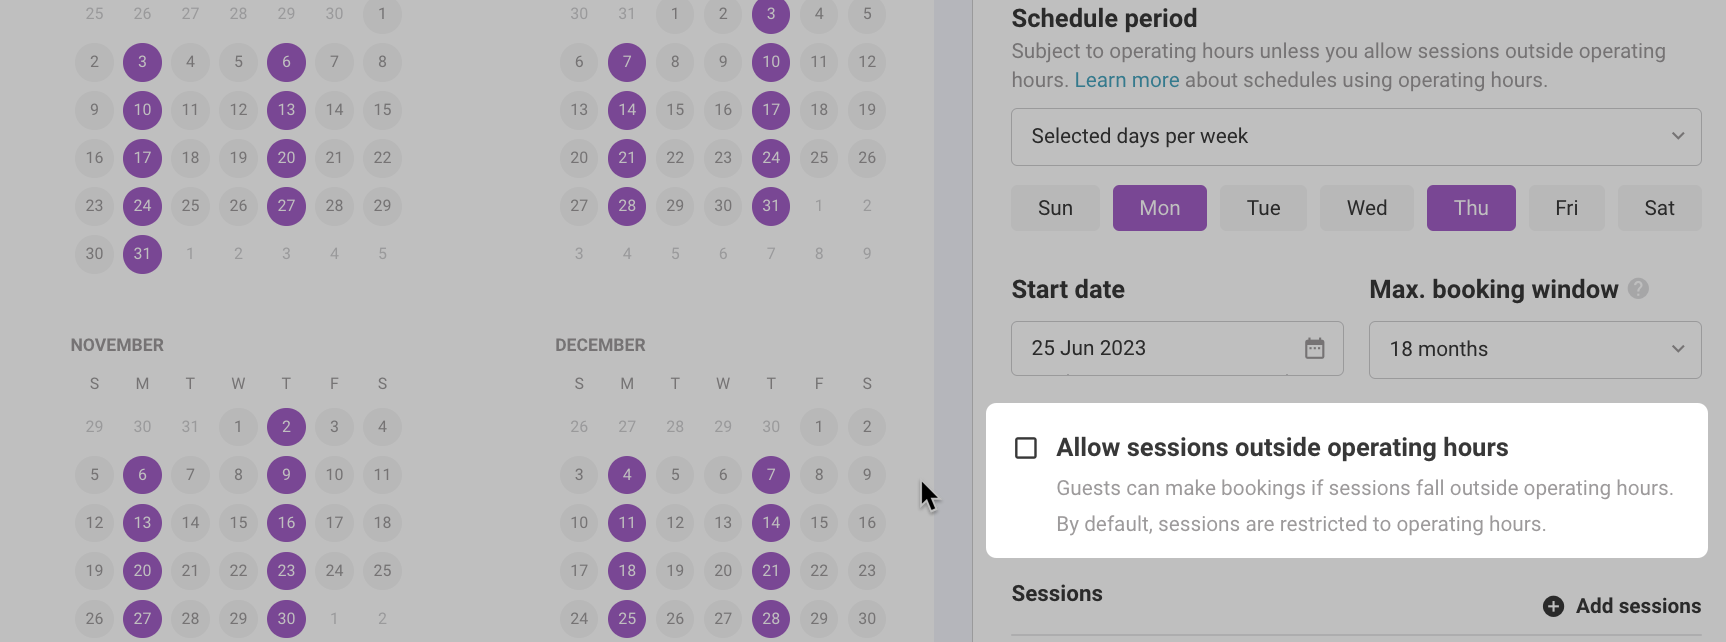
However, the schedule is still connected to operating hours in that you can choose to allow guests to purchase sessions outside of operating hours.
By default sessions are restricted to operating hours, and won't be available for purchase if the session times set are not within operating hours unless you specifically allow guests to do so.
To learn more, refer to the guide Create fully customized schedules
Exclude dates from a schedule
If you prefer not to add temporary hours to exclude days from all schedules linked to operating hours, you can exclude dates for the product schedules only.
Exclude dates from all schedules for a product
From Venue Manager, go to Products > Schedules.
Select the product, then the schedule.
Select the options menu (3 dots) in the top right.
Select Exclude dates.
The Exclusion dates field appears. Select the Plus icon to select a date or date range to exclude from the drop-down.
If you’re only excluding one date, double-click the date to exclude.
If you’re excluding a date range, select the first and last date.
Select Apply.
The Schedules calendar updates to show the dates are no longer part of the product’s schedules.
Exclude a date for one schedule within a product
From Venue Manager, go to Products > Schedules.
Select the product, then the schedule.
Select the options menu (3 dots) in the top right.
Select Exclude dates.
The Exclusion dates field appears.
Select the Plus icon to select a date or date range to exclude from the drop-down. Double click to select one date only.
Select Apply.
The Schedules calendar updates to show the dates are no longer part of the schedule.
If you've already excluded dates from a product or an individual schedule, the Exclude dates option no longer appears in the options menu. The excluded dates appear in the product or individual schedules panel, where you can add more dates to exclude if required.
Duplicate a product’s schedule
To create more than one schedule for a product, you can duplicate one of its existing schedules to speed up the schedule creation process.
From Venue Manager, go to Products > Schedules.
Select the product, then the schedule.
Select the options menu (3 dots) at the top right.
Select Duplicate.
This duplicates the schedule, which you can then edit how you want.
Initially, you’ll get a Days already in use message as it’s copied across the same days from your first schedule. All you need to do is adjust the days of the week for this schedule, or choose a different date range for your Schedule period.
Edit the details as needed.
The Schedules calendar is updated with the new schedule showing in a different color.
Learn more about managing conflicting dates in your schedules.
Change color
If your product has multiple schedules (eg one for weekdays and one for weekends), you can customize the color of each schedule in the schedules calendar.
From Venue Manager, go to Products > Schedules.
Select the product, then the schedule.
Select the options menu (3 dots) at the top right.
Select Change color.
Select a new color from the palette and select Apply.
Select Save.
Delete a schedule
From Venue Manager, go to Products > Schedules.
Select a product, then the schedule.
Select the options menu (3 dots) at the top right.
Select Delete.
Select Confirm.
The schedule is deleted. This action can't be undone.