Once you've created your POS devices and templates in ROLLER, you can then set up their individual device settings.
This guide walks through how to customize an individual POS device's settings to suit your specific needs and to switch between different POS devices so you can update settings for each POS device.
Update POS device settings
To access and update the POS device settings, follow the steps:
From POS, select More on the bottom left.
Select Settings and select Device.
Review the available device settings on the right-hand side.
Use the toggles to enable or disable each setting as needed.
Select Save Settings to apply your changes.
To see the process in action, select the hotspots on the interactive demo below.
POS device settings
The tables below describe each POS device setting, and what action or behaviour it controls. Settings are grouped to match the sections on the device settings page.
Tender & payment
Option | Description |
|---|---|
Enable fast tender payments | Adds Fast Cash or Fast Card buttons to bypass the payments page for quicker transactions. Use if your venue primarily accepts one payment type. Note: Unavailable when tickets require a waiver; Fast Cash doesn't calculate change automatically. |
Default tender to full amount | Defaults cash payments to the full transaction amount to streamline the checkout process. Staff must manually enter the cash amount received if this is disabled. |
Enable tabs (pay later) | Enables pay-later tab functionality allowing guests to settle before leaving. |
Enable discounts | Activates discount code functionality at POS. |
Enable custom discount | Allows custom discounts in fixed dollar amounts or percentages. Requires manager POS PIN approval. |
Enable custom discount without authorized POS PIN | Applies custom discounts without requiring manager POS PIN approval. |
Enable complimentary | Processes complimentary bookings with manager PIN approval. All items are marked as complimentary, including any additions to the order. |
Enable tax override | Allows tax adjustments at individual device level. Contact the support team to activate this across all devices. |
Cash drawer
Option | Description |
|---|---|
Open cash drawer when a receipt is printed (Cloud printing) | Opens the cash drawer whenever a receipt is printed. Includes auto prints, manual prints, and reprints. For venues using Cloud Printing. |
Open cash drawer when taking payment or refund (Cloud printing) | Opens the cash drawer when a payment or refund is processed, regardless of tender type. For venues using Cloud Printing. |
Only open cash drawer for cash (Cloud printing) | Restricts cash drawer opening to cash transactions only — applies to cash payments, cash refunds, and receipt prints for cash transactions. Acts as a modifier on the two settings above, so at least one of those must also be enabled. |
Require reason for opening till | Requires a till note or reason when opening the cash drawer. Disable if not required for your operations. |
Printing
Option | Description |
|---|---|
Print production dockets | Sends production dockets to kitchen or café printers. Refer to the stock items guide for configuration details. For venues using ROLLER Connect for printing (legacy). |
Auto-print production dockets | Sends production dockets to kitchen or café printers for venues using Cloud printing. |
Print tickets | Enables ticket printing from the POS system. |
Print master tickets | Allows master ticket printing as an alternative to itemized tickets. Defaults to itemized format if disabled. |
Authorized POS PIN is required for reprinting tickets | Requires manager approval (POS PIN entry) before receipts can be reprinted. |
Auto print receipts | Automatically prints receipts after purchase. |
Auto print tickets | Automatically prints tickets after the POS operator select the Go to booking button. |
Auto print tickets when purchased | Prints tickets automatically upon full payment. Only appears if "Auto print tickets" is enabled. |
Only print package tickets | Prints package product tickets when auto-printing is active. Available only for package products and requires "Auto print tickets" to be enabled. |
Guest details
Option | Description |
|---|---|
Skip "New Guest" details | Skips guest data collection (name, email, address, postal code, phone) during checkout if unnecessary for your operations. |
Require Post Code in "New Guest" details | Makes postal code mandatory when collecting new guest information. |
Enable postcode autocomplete in "New Guest" details | Auto-populates postal code if the guest's information has been previously captured. |
Capture Country in "New Guest" details | Requires country selection from a preset drop-down list when creating new guest records. |
Check-in
Option | Description |
|---|---|
Auto check-in on purchase | Automatically redeems tickets upon purchase. Ideal for points of entry with immediate access requirements. |
Auto check-in when waivers are attached | Automatically redeems tickets when a valid waiver is attached to the transaction. |
Allow users to undo check-ins | Permits staff to reverse ticket redemptions if needed. |
Check-in a ticket automatically when scanned | Automatically redeems tickets when scanned at POS rather than requiring manual confirmation. |
Capture at sale
Option | Description |
|---|---|
Automatically prompt for modifiers | Prompts staff to add item modifications (eg sides for meals, extras like sugar/milk for beverages). Staff can still add these manually from the cart if this setting is off. |
Capture table numbers | Enables table number assignment to orders, which displays on production dockets for kitchen/service reference. |
Automatically prompt guest for table number before payment | Prompts for table number entry before payment processing. Only appears if "Capture table numbers" is enabled. |
Automatically revert sell date to current date after each sale | Resets the transaction date to today after each sale. Useful since most sales are for the current day; future-dated transactions default back to today. |
Device
Option | Description |
|---|---|
Enable "Help" in the main menu | Activates the Help resources panel in the POS main menu. |
Device Timeout | Sets automatic logout duration after inactivity. Defaults to Never; adjust using the slider to specify minutes (eg 15 minutes) before automatic logout. |
Language | Sets the display language for the POS device via drop-down menu selection. |
Switch POS devices to enable settings for other devices
From POS, select More > Settings > Device.
Scroll to the bottom of the page and select Deactivate Device.
Choose a new POS device from the list of available devices.
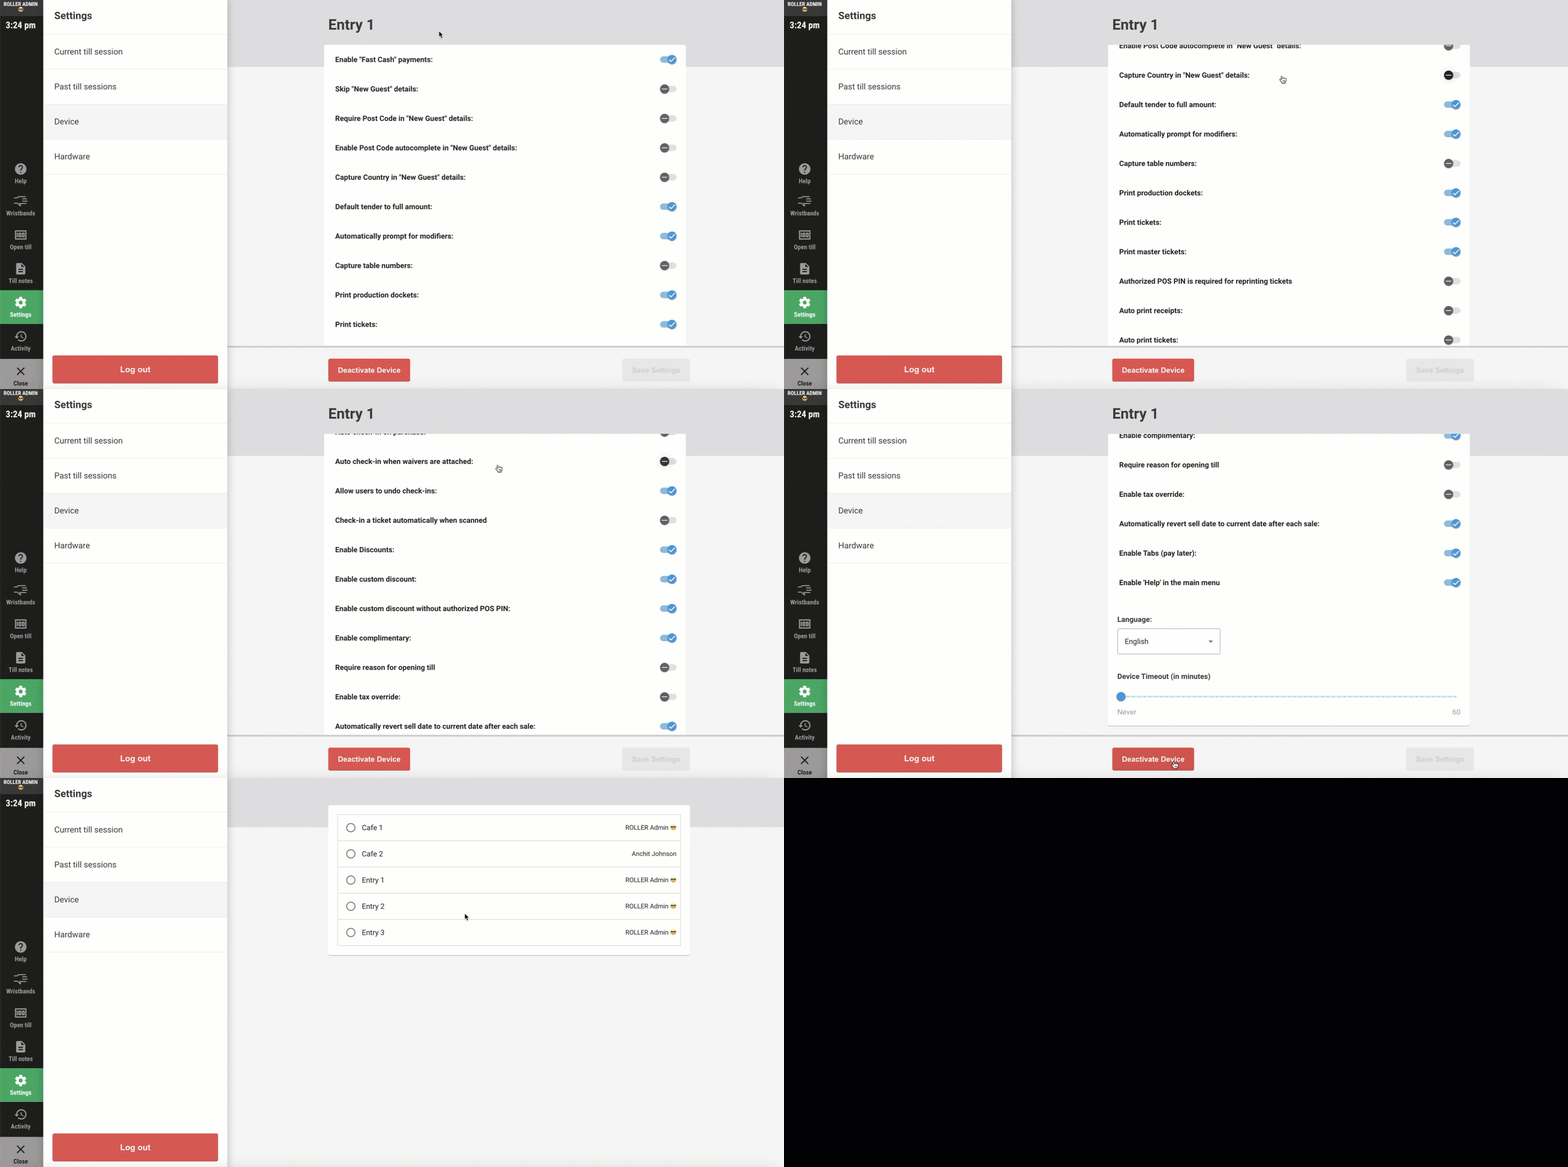
If the other POS device you're trying to select is greyed out, this means it is in use and cannot be deallocated from your POS device. To deallocate a POS device that's in use, refer to the guide Log in to POS.