Every business has unique needs. Saved views simplify your workflow by ensuring quick access to your most relevant data. ROLLER lets you save custom filters and columns as "saved views" for reports (eg Attendance) and booking views (eg daily capacity, calendar, all bookings view etc). This guide shows you how to create, edit and use saved views to make accessing your data faster and more efficient.
What you can do
Save customized views for reports and bookings data pages.
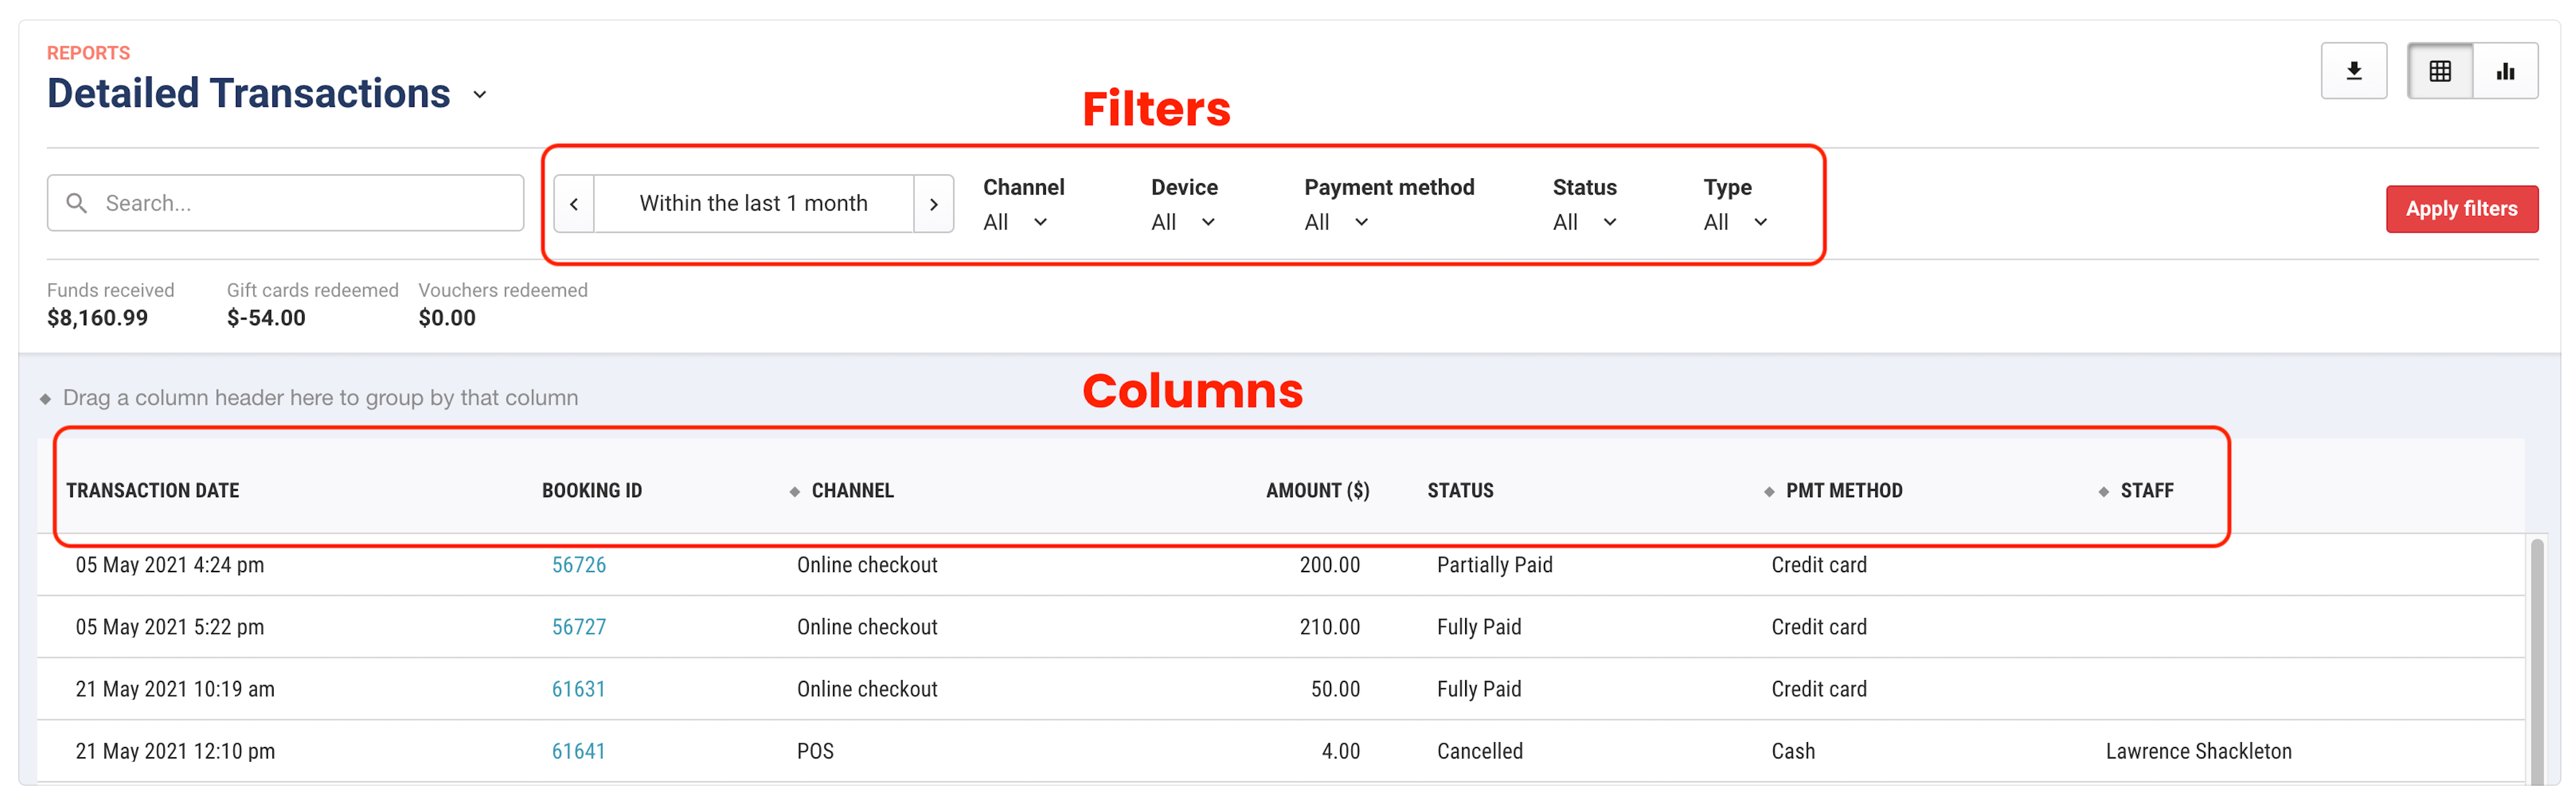
Customize filters (eg Date, Channel, Device) and columns (eg Status, Payment method).
Create a saved view
If you frequently use the same filters and columns, saving them as a saved view can help you work more efficiently. For example, you could save a daily capacity view filtered for bookings from 9 AM to 8 PM.
From Venue Manager, go to the relevant report or page with booking data.
Select the filters you want to save as a saved view. Make sure that you apply the filters and check that you're happy with the returned data.
Right-click the table to open a menu that allows you to add or remove columns from it.
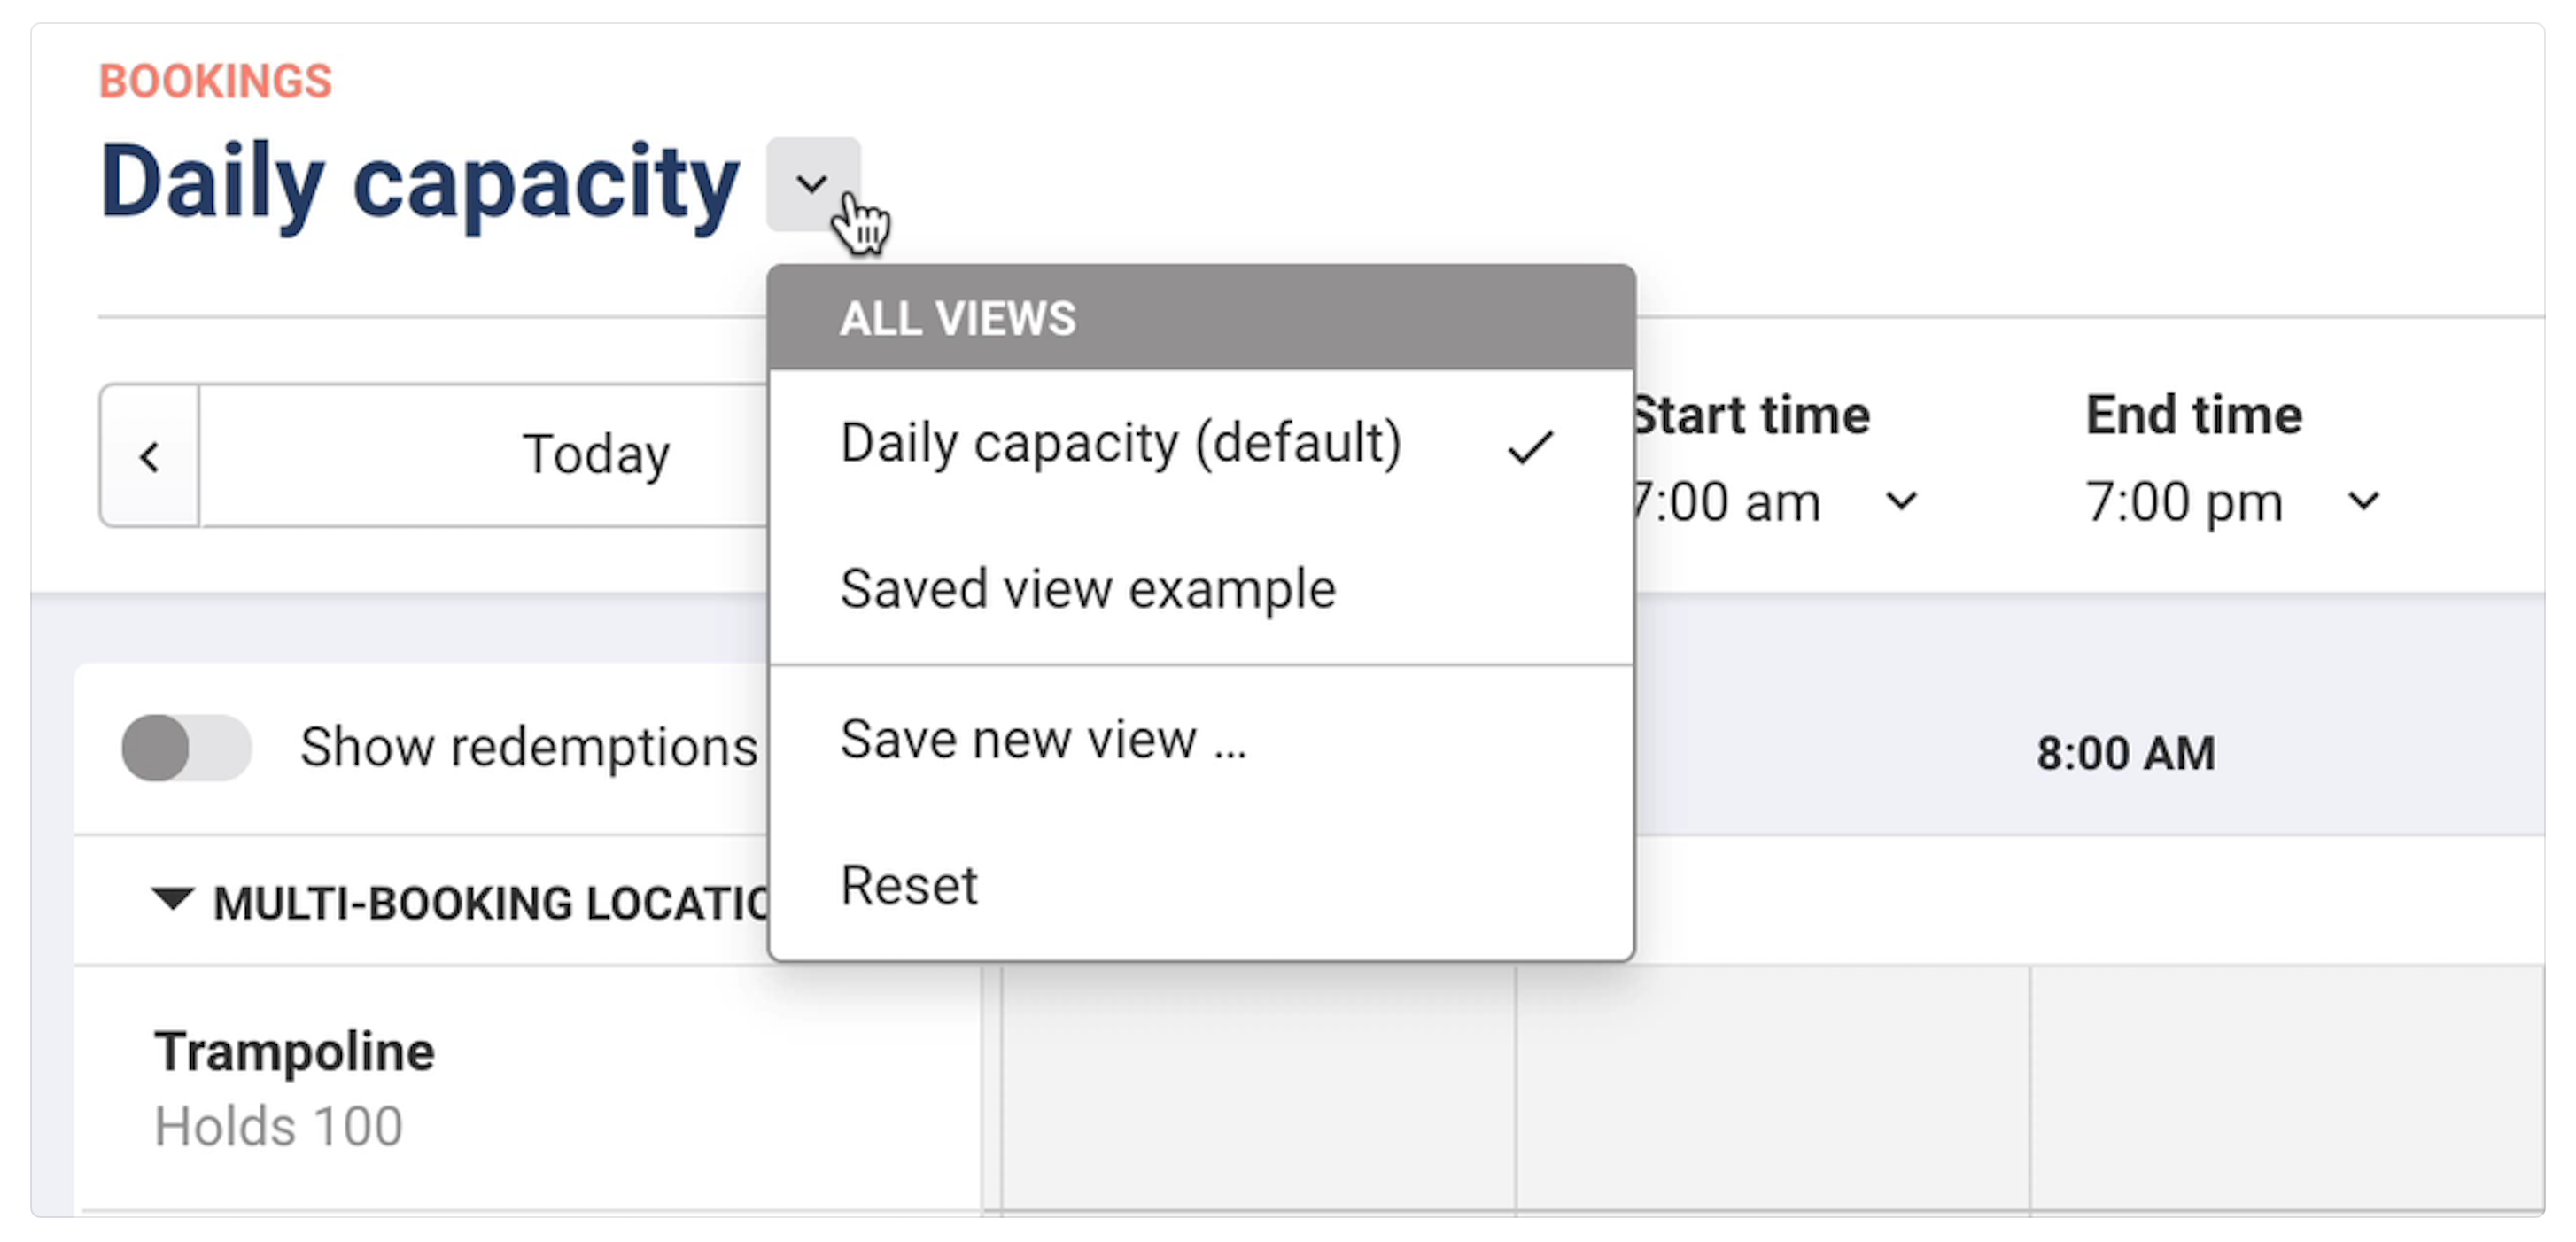
Select the saved view drop-down arrow next to the page heading in the top left once your filters and columns are selected. An arrow will not be displayed if the page does not support saved views.
Select Save new view.
Give the view a name, then select Save.
See below for how to make a saved view a default view for all staff each time they access the page.
Edit a saved view
You can make a number of modifications to existing saved views.
From Venue Manager, go to the relevant page or report.
Select the drop-down arrow next to the heading of the page, then select the saved view to edit.
Select the drop-down arrow again to open the editing options.
Save changes | Allows you to save any changes made to an existing saved view:
|
Rename | Renames the selected saved view |
Make default | Makes the currently applied saved view the default view for the report or page. The saved view will load by default each time staff access the page or report. |
Delete | Removes the saved view. |
All views | Select a different saved view from the list. |
Reset | Resets the filters and columns. |
Switch to a saved view
To quickly load a saved view:
From Venue Manager, go to the relevant page or report.
Select the drop-down arrow next to the page heading, then select the saved view you want to apply.
Make a saved view the default view
Making a saved view the default view makes sure that the selected saved view will load by default each time a team member accesses the page.
To make a saved view the default:
From Venue Manager, go to the relevant page or report.
Select the drop-down arrow next to the heading of the page, then select the saved view.
Select the drop-down arrow again, then select Make default.
Delete a saved view
To delete a saved view:
From Venue Manager, go to the relevant page or report.
Select the drop-down arrow next to the heading of the page, then select the saved view.
Select the drop-down arrow again, then select Delete.