Scheduled reports let you automate report delivery by email. This guide shows you how to create and manage scheduled reports.
Lite and Pro feature
Automate report delivery by email with scheduled reports. Available on the Lite plan with one scheduled report, or on the Pro plan and above for multiple scheduled reports. To upgrade your plan, contact your customer success manager or the support team.
Scheduling a report
From Venue Manager, go to Reports > Scheduled Reports.
Select Create scheduled report.
The permission Can manage Scheduled reports is required for staff to create, edit and delete schedules and automatically distribute reports by email. Administrators have this permission by default.
1. Select a report
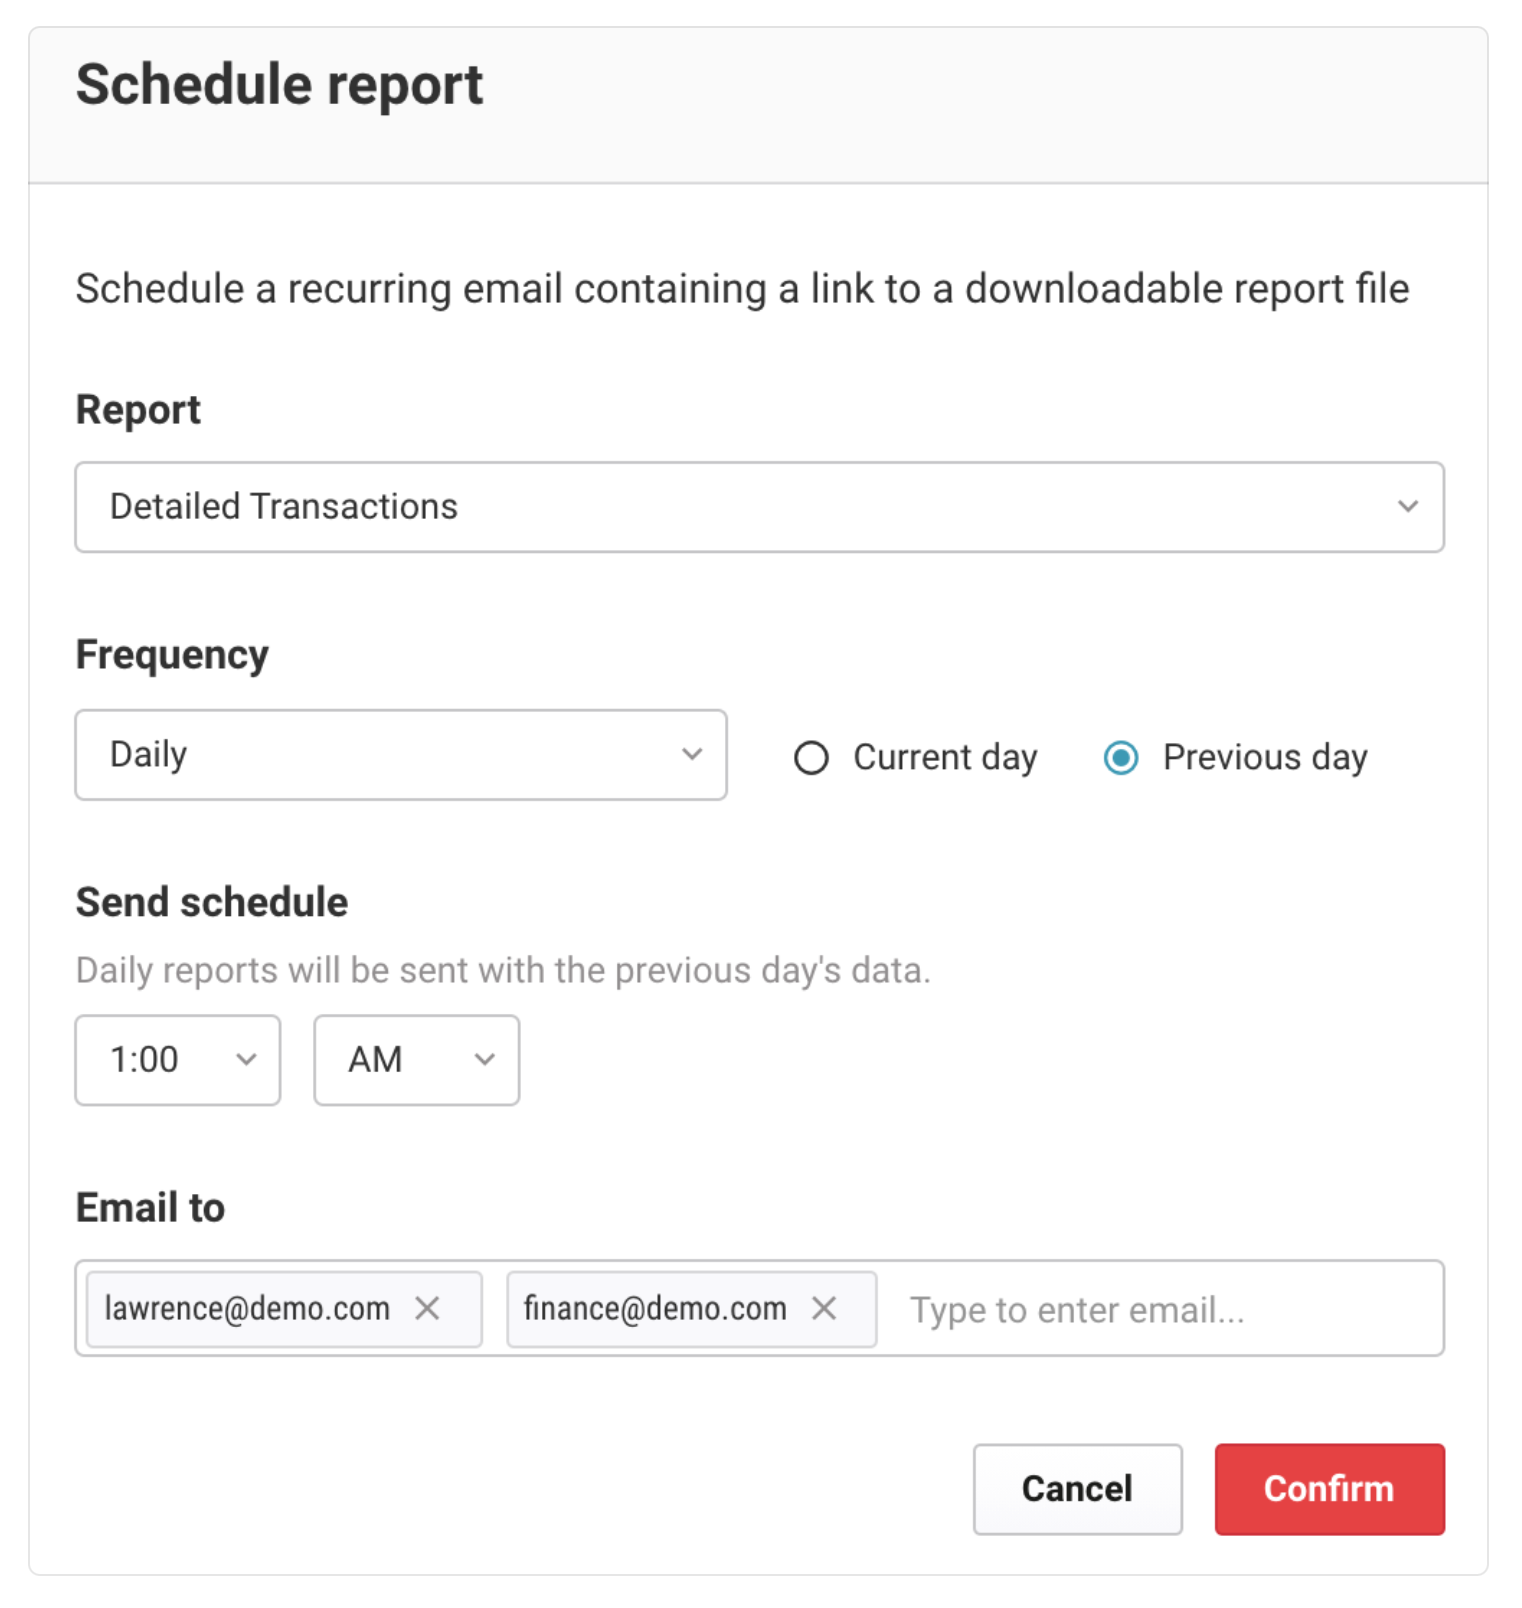
Select the Report drop-down menu and select the report you want to schedule.
The most common reports in ROLLER are supported with scheduled reports. This includes CSV, PDF and external link reports such as the Daily Summary report.
2. Select the frequency of the email
Select the Frequency drop-down menu to select if the report will be sent:
Daily | This will send the report for either the current day or the previous day, based on your selection |
Weekly | This will send the report for the previous 7 days, based on the day of the week you choose to send on. For example, if you schedule a 9 am send on Thursday, you will receive data for the previous Thursday to Wednesday (yesterday). |
Monthly | These reports will always be sent on the 1st of the month for the prior month |
Note that some reports do not support weekly or monthly options.
3. Configure the send schedule
The send schedule allows you to select the time of day the report will be sent. Please allow for up to 15 minutes after the scheduled time for the report to arrive based on the venue's configured timezone.
If you select data for the current day with a daily send schedule, keep in mind the report will only contain data up to the time of the report being sent, with the exception of the Daily Summary and Trial Balance reports which are real-time data even if you send them before the end of the day.
When scheduling we recommend scheduling the report after 1 am the following day to ensure all data for the prior day is captured.
4. Email recipients
You can configure reports to send to multiple recipients, and those recipients do not need to have ROLLER login credentials.
Simply enter an email address and hit the enter key on your keyboard to add it. Additional email addresses can be added.
Editing, disabling or deleting a scheduled report
To edit, disable or delete a scheduled report:
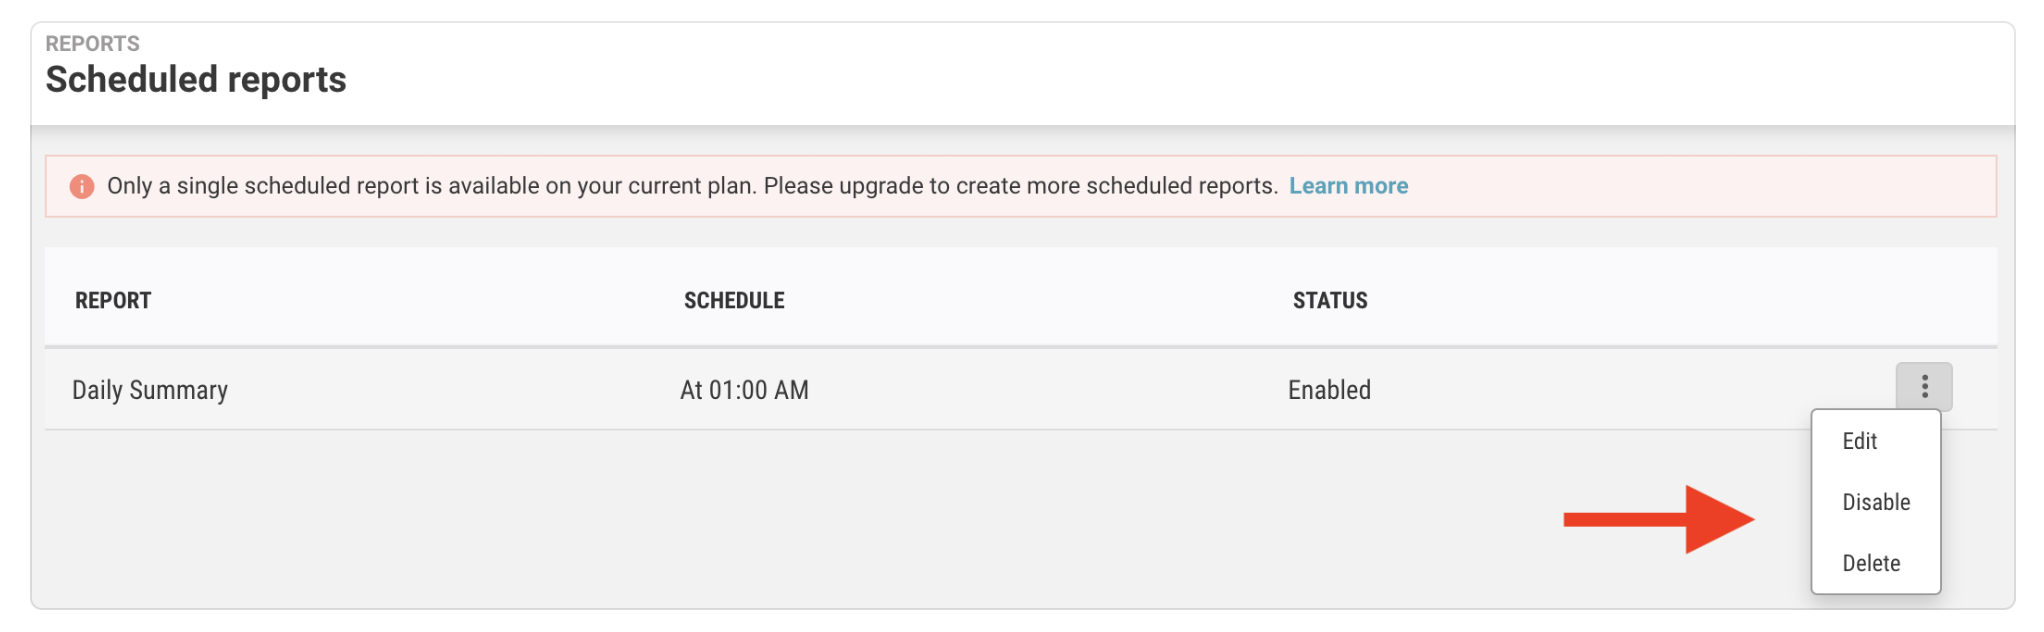
From Venue Manager, go to Reports > Scheduled Reports.
Find your scheduled report and select the options menu (3 dots) on the right hand side of the report.
Select the appropriate action from the list.
Receiving the reports
The emails received will contain a link to the report. Files will not be directly attached.
If the email is a CSV or PDF file, selecting the link will initiate a download of the report file. If the report is an external link (Daily Summary and Trial Balance reports) then the user will be taken to that report.
All report download links will expire after 3 months.
Supported reports
Summary reports | Transactions reports |
Sales reports | Guests reports |
Operations reports | Accounting |