Sell your tickets on Viator (and Tripadvisor), GetYourGuide, Tiqets, Klook, Trip.com and Headout from the products you set up once in ROLLER. Each online travel agency (OTA) sells from your live availability. Every OTA booking comes into Venue Manager with your other bookings. When you add a second or third OTA, you turn it on in the variations you've already set up and give it its own prices.
Use this guide to activate an OTA, set up the products it sells and get them mapped and tested.
Advanced Channel Management add-on
To connect to Online Travel Agents (OTAs), you need the Advanced Channel Management add-on. It covers every OTA available in ROLLER, and you can add it to any plan.
You pay a small percentage of your OTA booking revenue, billed monthly after the bookings happen, so there’s nothing to pay upfront.
If you're the account owner, you can add it yourself. From Venue Manager, go to Settings > Channel management > Advanced Channel Management and select Add now. Review the cost and terms, then select Agree and add.
What you'll do
Connect an OTA by completing these steps:
If your venue doesn't have the Advanced Channel Management add-on yet, an account owner contact agrees to the terms and adds it.
Activate the OTA in Venue Manager.
Create your products for OTA sales.
Set up each variation with tax-inclusive prices, Sell, its prices and a Reseller Type.
Send the OTA what it needs to map your products.
Make a test booking.
Before you begin
Have these ready, so the OTA can match your venue and map your products without delays:
The Advanced Channel Management add-on. There's nothing to pay until OTA bookings come in, so you can add it while you wait for your OTA supplier account. You add it in Step 1.
A supplier account with each OTA. Use the same business and contact details you use in ROLLER. The OTA uses them to match your venue when it maps your products. Most OTAs need a separate account for each venue.
Time to switch, if you already sell on the OTA through another booking system (eg Rezdy). Most OTAs won't connect to two systems at once, so the OTA moves your connection to ROLLER. Allow 3 to 5 business days. For Headout, ask Headout how long it takes.
OTA | Create your account |
|---|---|
Viator (and Tripadvisor) | Go to supplier.viator.com/sign-up-info and select Get started |
GetYourGuide | Go to getyourguide.supply. You also need a signed GetYourGuide supplier agreement, which is separate from the account. Start it early, so it doesn't hold up your go-live |
Tiqets | Email customerservice@tiqets.com and ask to become a Tiqets supplier. Tiqets passes your request to its supplier team, who get back to you |
Klook | Go to merchant.klook.com and select Get started to create a merchant account |
Trip.com | Go to trip.com and select Get started |
Headout | Go to Headout Hub and select Start selling |
If you manage several venues from HQ, you can create your session passes and standard passes at HQ. Then, in each managed venue, add the Advanced Channel Management add-on, activate the OTA and turn on Sell for it in each variation. HQ doesn't support OTA connections yet.
Only an account owner contact for your venue can agree to the add-on's terms and add it. If you're not one, ask one to add it. The permissions required to connect an OTA and set up its products are Can access external service settings, Can create products and Can edit products. The administrator role has all three enabled by default. The manager role has the two product permissions by default.
What your OTA products need in ROLLER
Here’s a summary of what your products need in ROLLER before an OTA can sell them. Steps 2 and 3 show you how.
Product type: OTAs can only sell session passes and standard passes.
Tax: OTA prices include tax. If your venue’s prices don’t include tax, override tax in each variation you sell through an OTA and make it tax inclusive (see Step 3).
Session duration: Set a session pass's Session duration to per session. OTAs can't sell a session pass set to per guest.
Prices: You set each OTA’s prices in the settings of each product variation you sell through it (see Step 3). Price rules don’t apply to OTA prices.
Reseller Type: The ticket category an OTA lists a variation under (eg Adult or Child). Each type can be used once per product. For a second version of the same ticket (eg a VIP Adult ticket), create another product.
Scheduled sessions: For a session pass, only sessions in a schedule show on the OTA.
Step 1: Activate the OTA
Activating an OTA in ROLLER turns it on for your venue. The OTA then shows in the settings of your session pass and standard pass variations, where you set its prices and Reseller Type (eg Adult or Child) ready for mapping.
From Venue Manager, go to Settings > Channel management > Online Travel Agents.
If your venue doesn't have the Advanced Channel Management add-on yet, select Add now. Review the cost and terms, then select Agree and add.
If you see Admin access required, ask an account owner contact for your venue to add it.
If you see Turn on Online Travel Agents, select it.
Find the OTA and select Activate.
For every OTA except GetYourGuide, the page refreshes and shows its API key. You’ll copy this key to send to the OTA in Step 4.
GetYourGuide doesn’t use an API key. You save your GetYourGuide Supplier ID in its Settings instead (see Step 4).
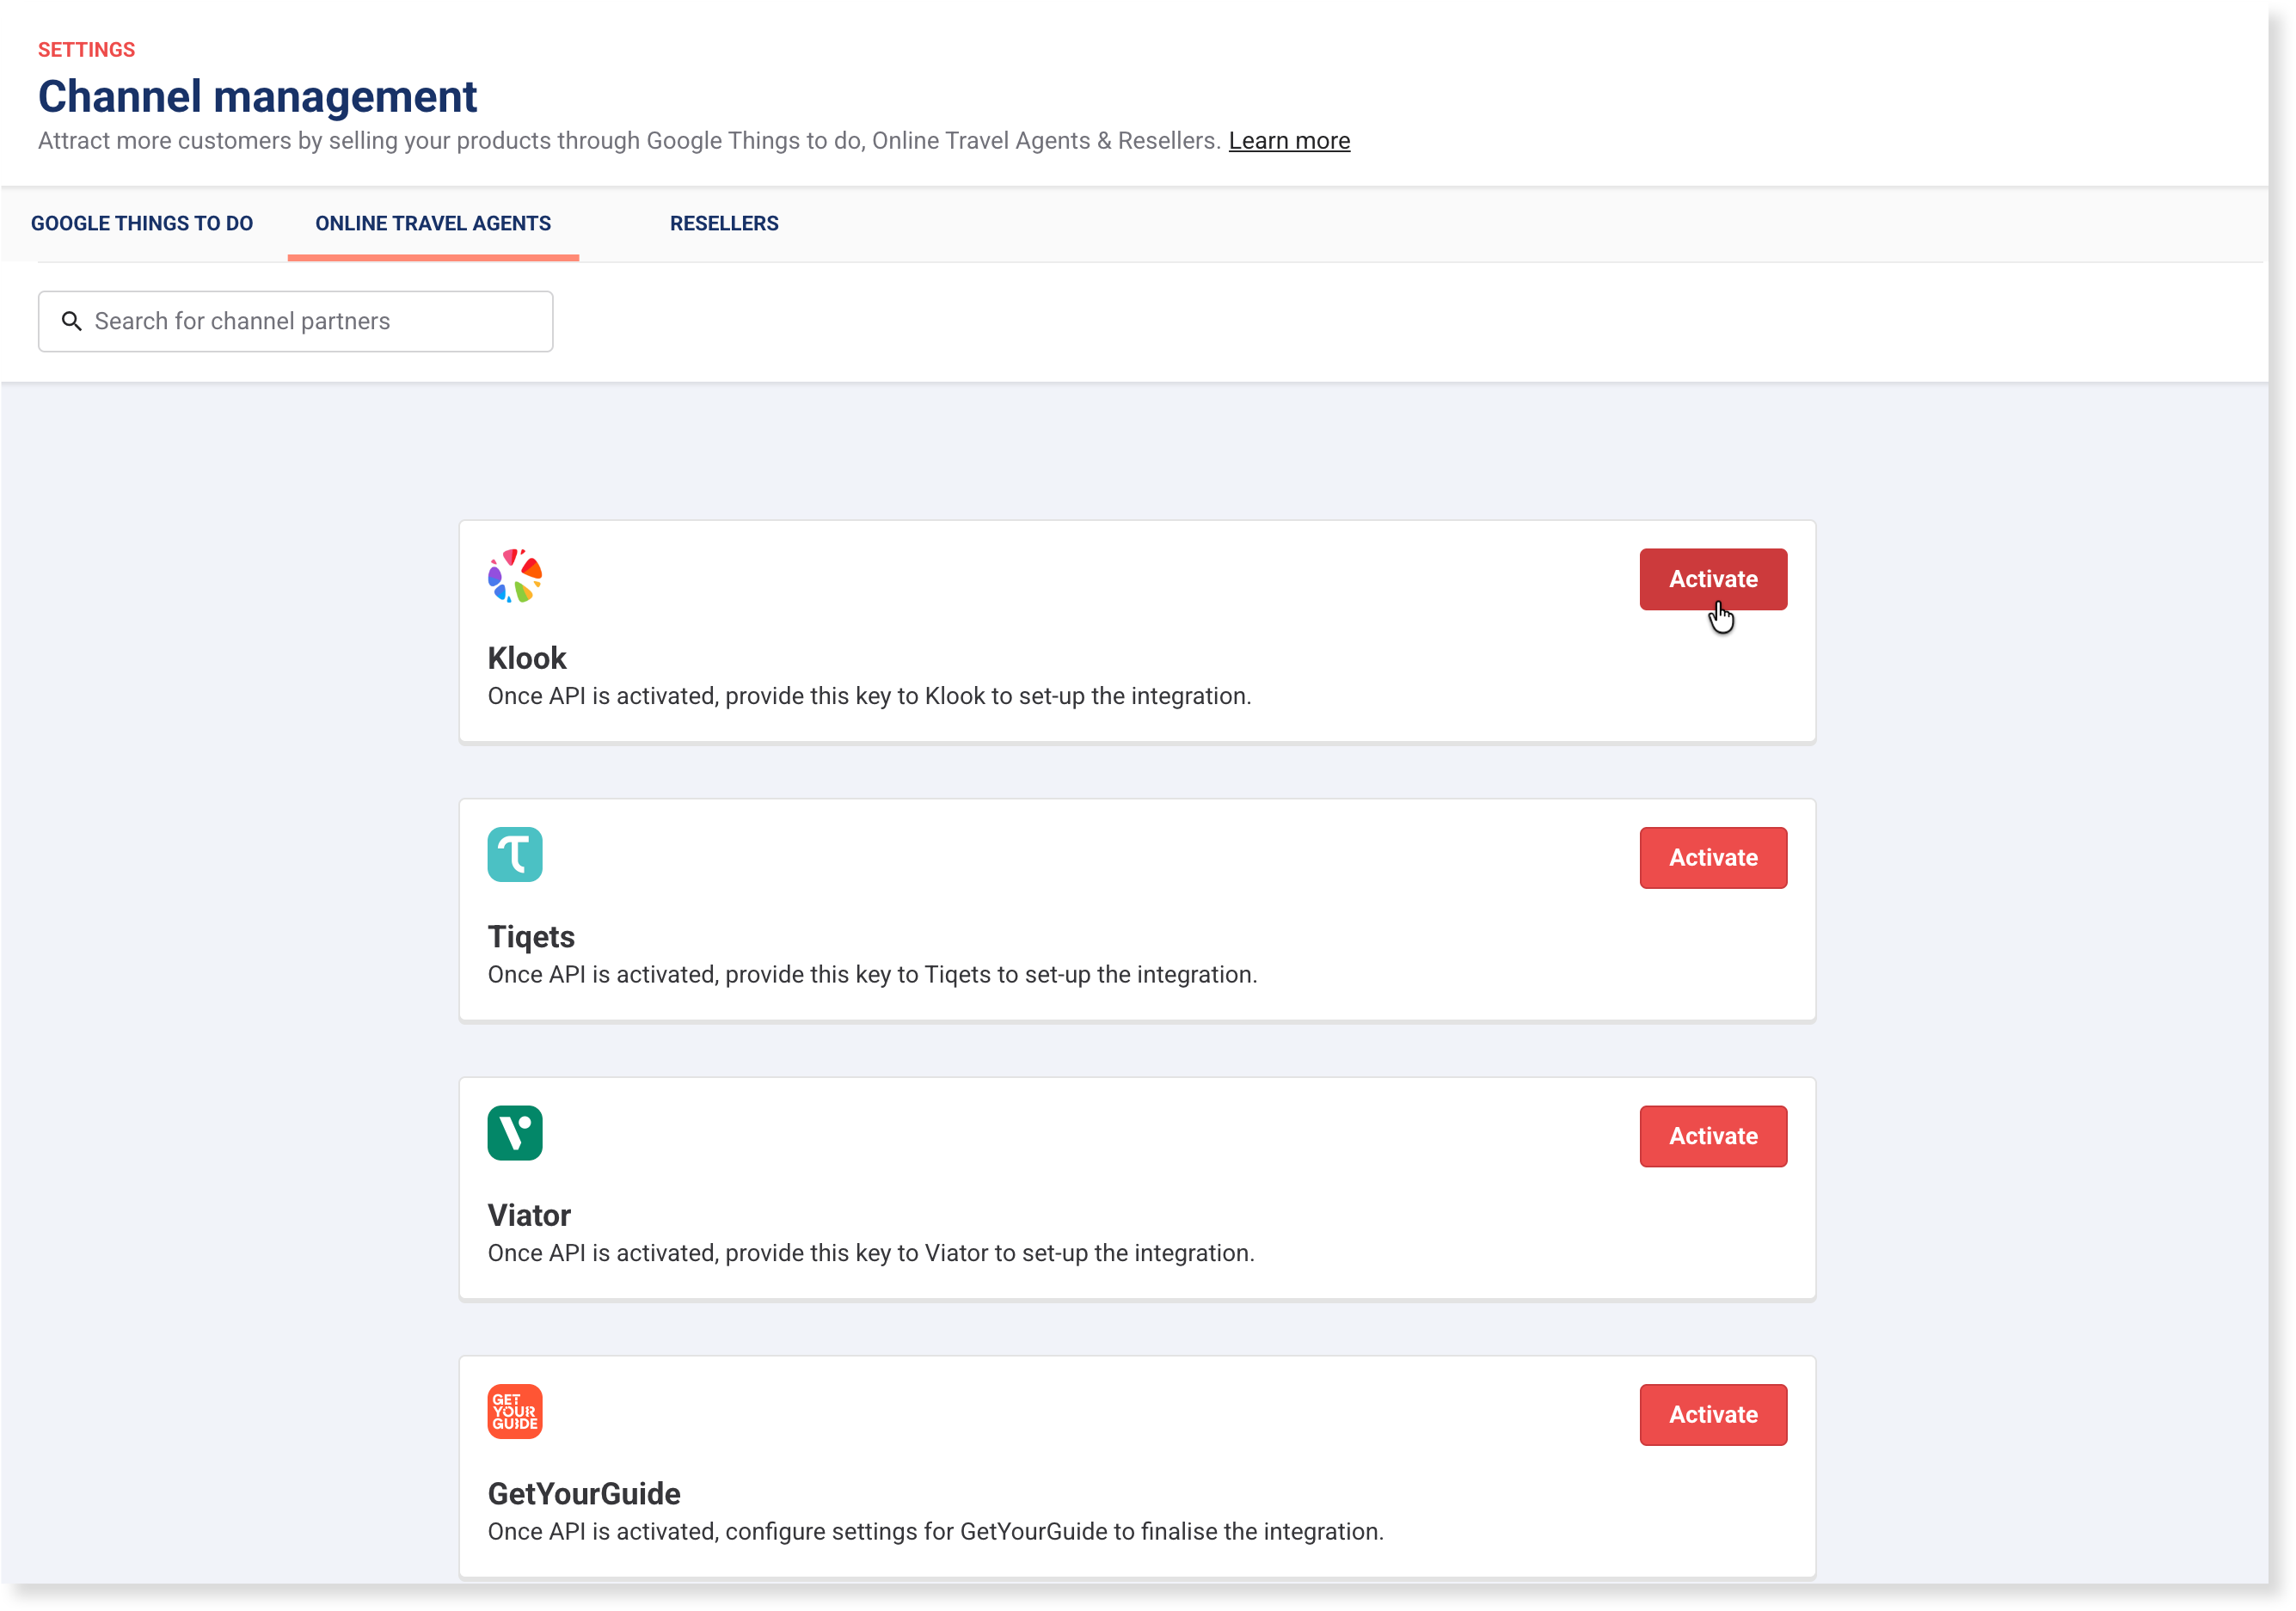
When you first activate an OTA, ROLLER creates a company for it with the OTA’s name (eg Viator). Every booking from that OTA is linked to this company, and you can see the OTA’s total spend in Guests > Companies.
To see the bookings, use the Companies filter in the OTA reports (see Report on and reconcile OTA bookings). You can’t edit an OTA’s company or make bookings for it in Venue Manager.
Step 2: Create your products for OTA sales
A separate product for OTA sales lets you set OTA prices without changing what guests buy in your own checkout.
Create a session pass or standard pass for OTA sales. See the guides Create session pass products and Create standard pass products.
Cap how much of your capacity OTAs can sell (optional)
From Venue Manager, go to Settings > Resources and create a resource for OTA sales (eg OTA allocation). Set its capacity to the number of places you’re giving OTAs.
In the product’s Resource field, add the OTA resource and your main venue resource.
In each variation, put the two resources on separate rows. In the first row, select the resources drop-down and remove the OTA resource. Then add it back in a new row.
Your main venue resource manages your overall capacity, and the OTA resource manages how much of it OTAs can sell. Each OTA booking needs space in both, so OTAs can’t sell more than you set aside or more than your venue holds.
Don’t put both resources in the same row. ROLLER then treats them as a resource group and fills one before the other. That adds to what OTAs can sell instead of capping it.
Step 3: Set up each variation for your OTAs
Each variation becomes a ticket on the OTA’s site (eg Adult or Child), with its own price on each OTA. Work through these steps for each variation you want to sell.
OTAs show guests one price with tax included, so Sell stays grayed out until the variation is tax inclusive. If your venue’s prices already include tax, skip that part of the steps.
Open the variation
From Venue Manager, go to Products > All products and select the product.
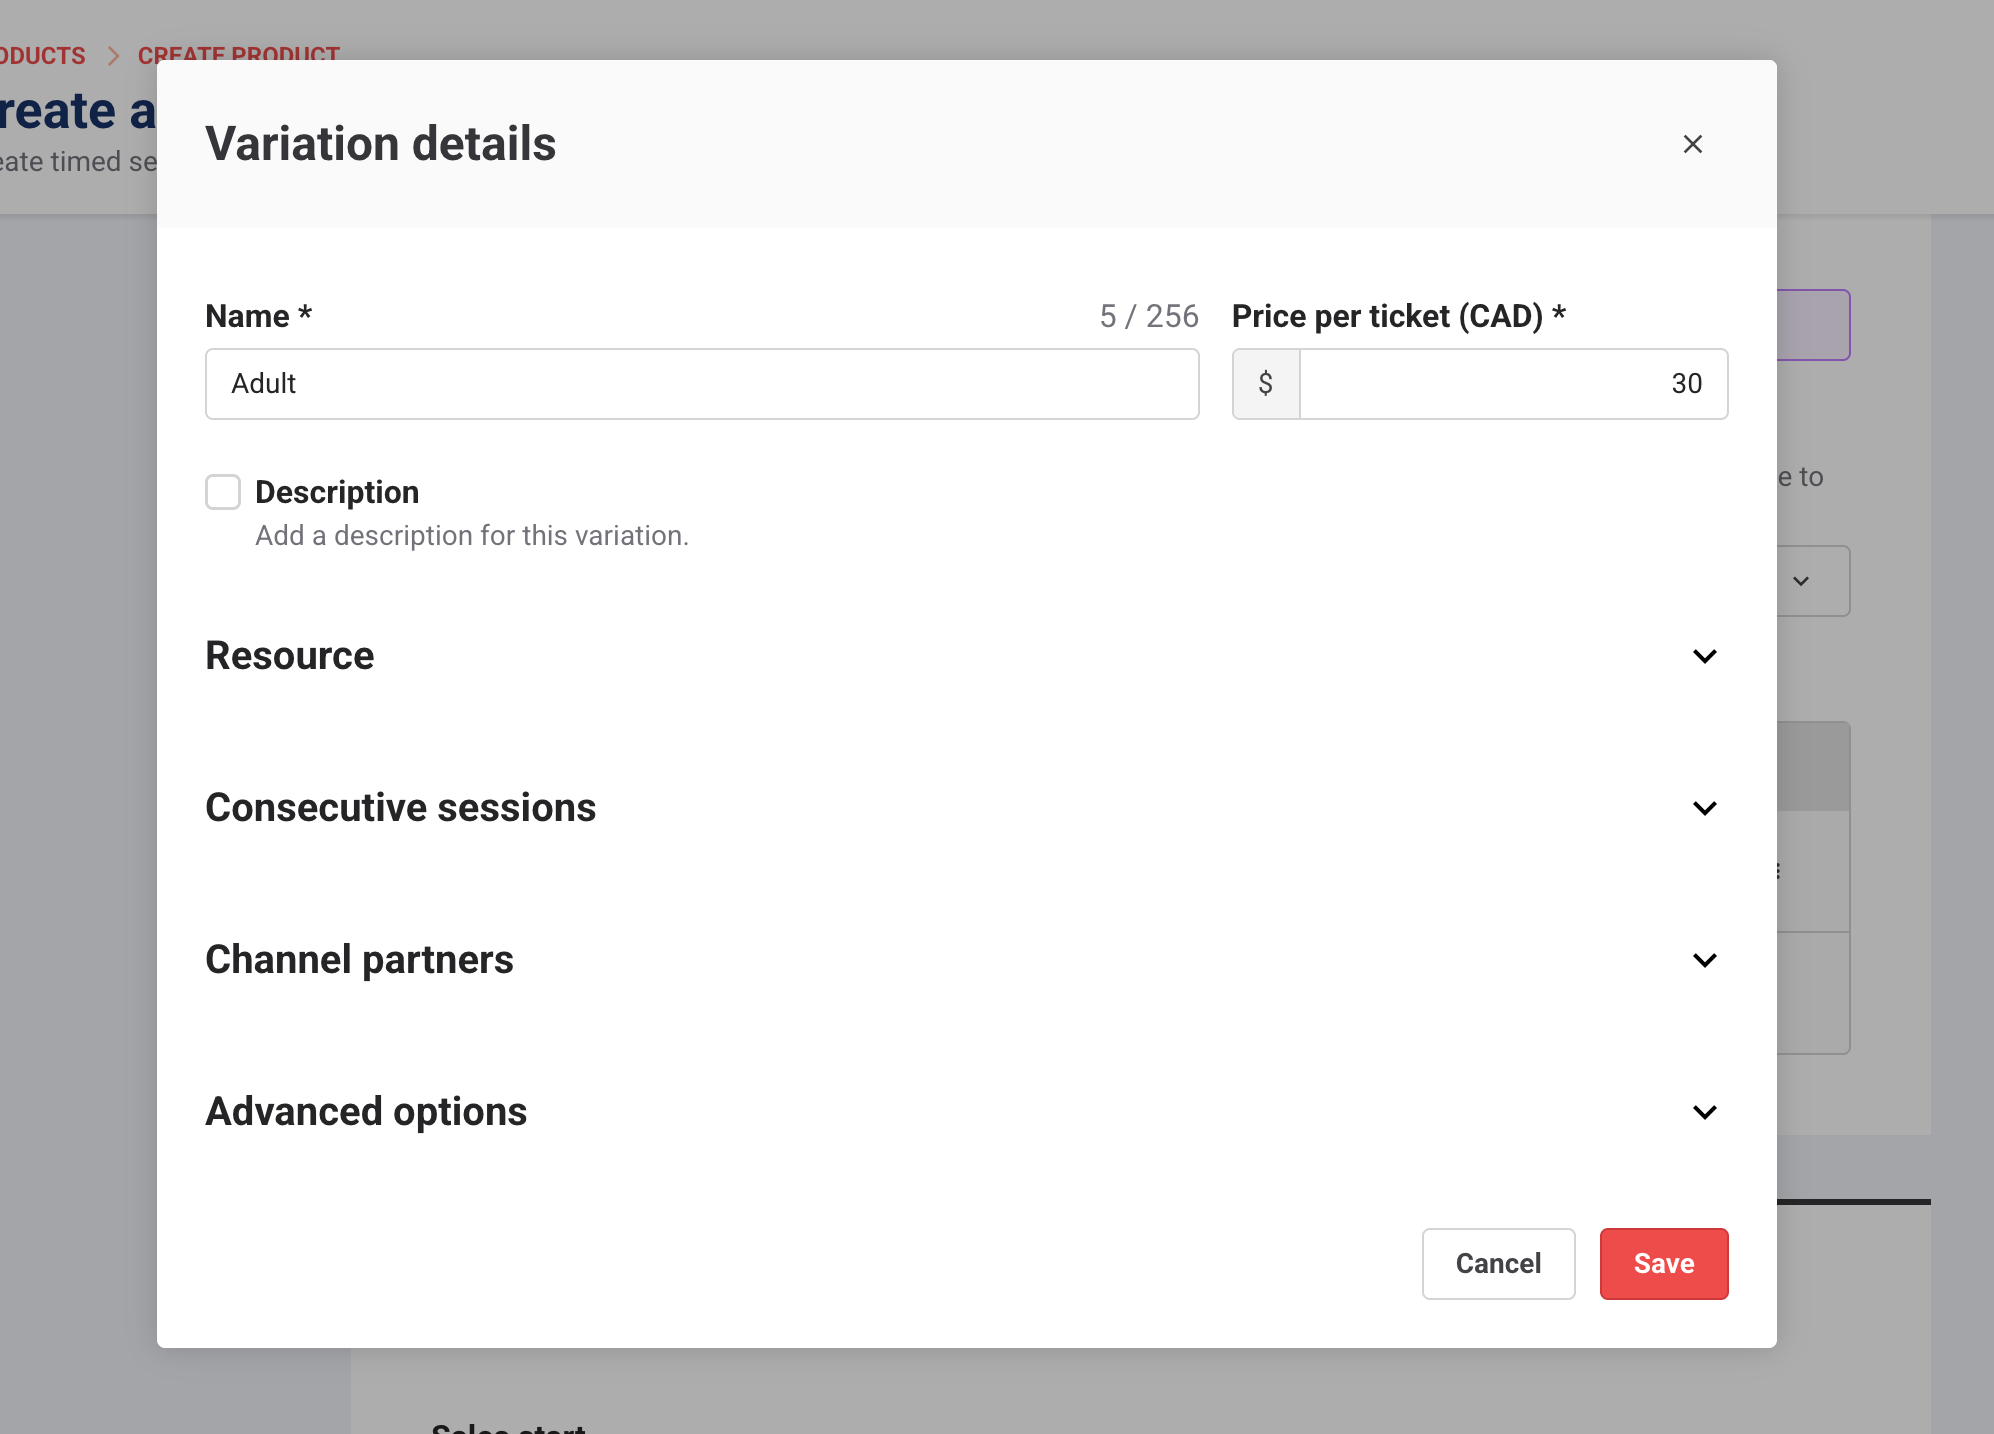
Under Variations, select the variation’s row. Variation details opens.
Make the price tax inclusive
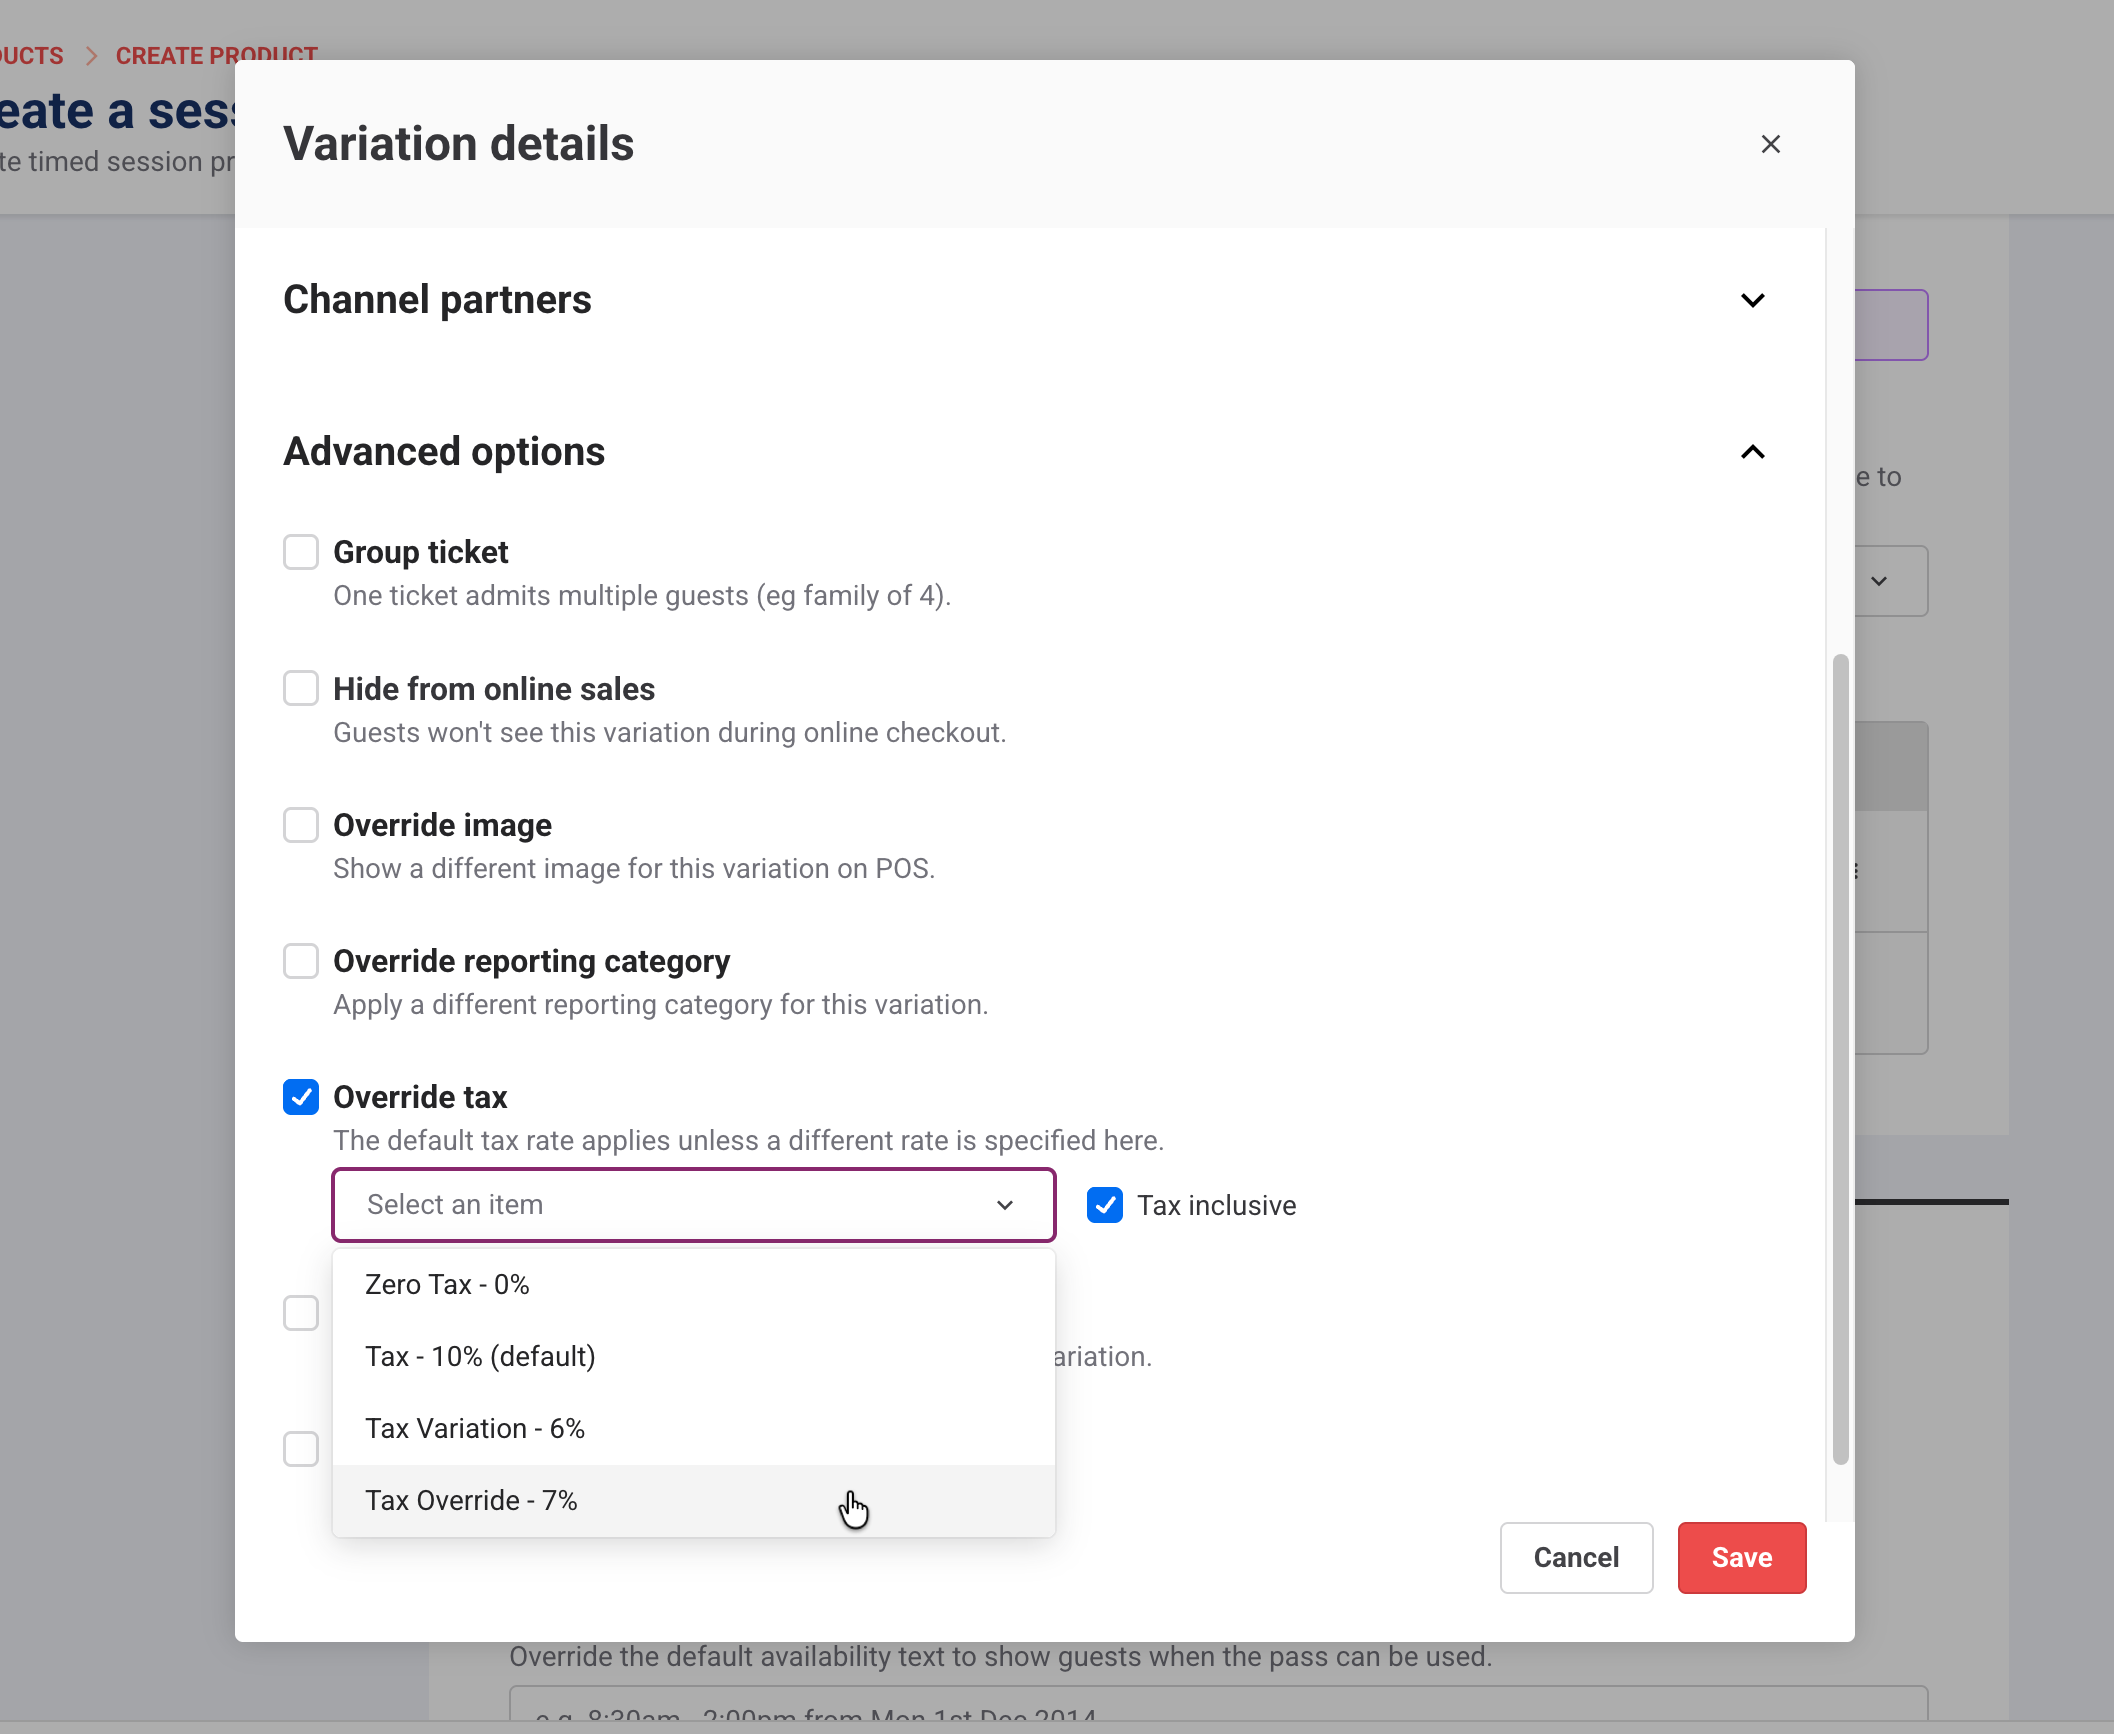
Expand Advanced options.
Scroll to Tax override and select Override tax.
Select Tax inclusive, then select the tax rate.
Turn on Sell, set prices and choose a Reseller Type
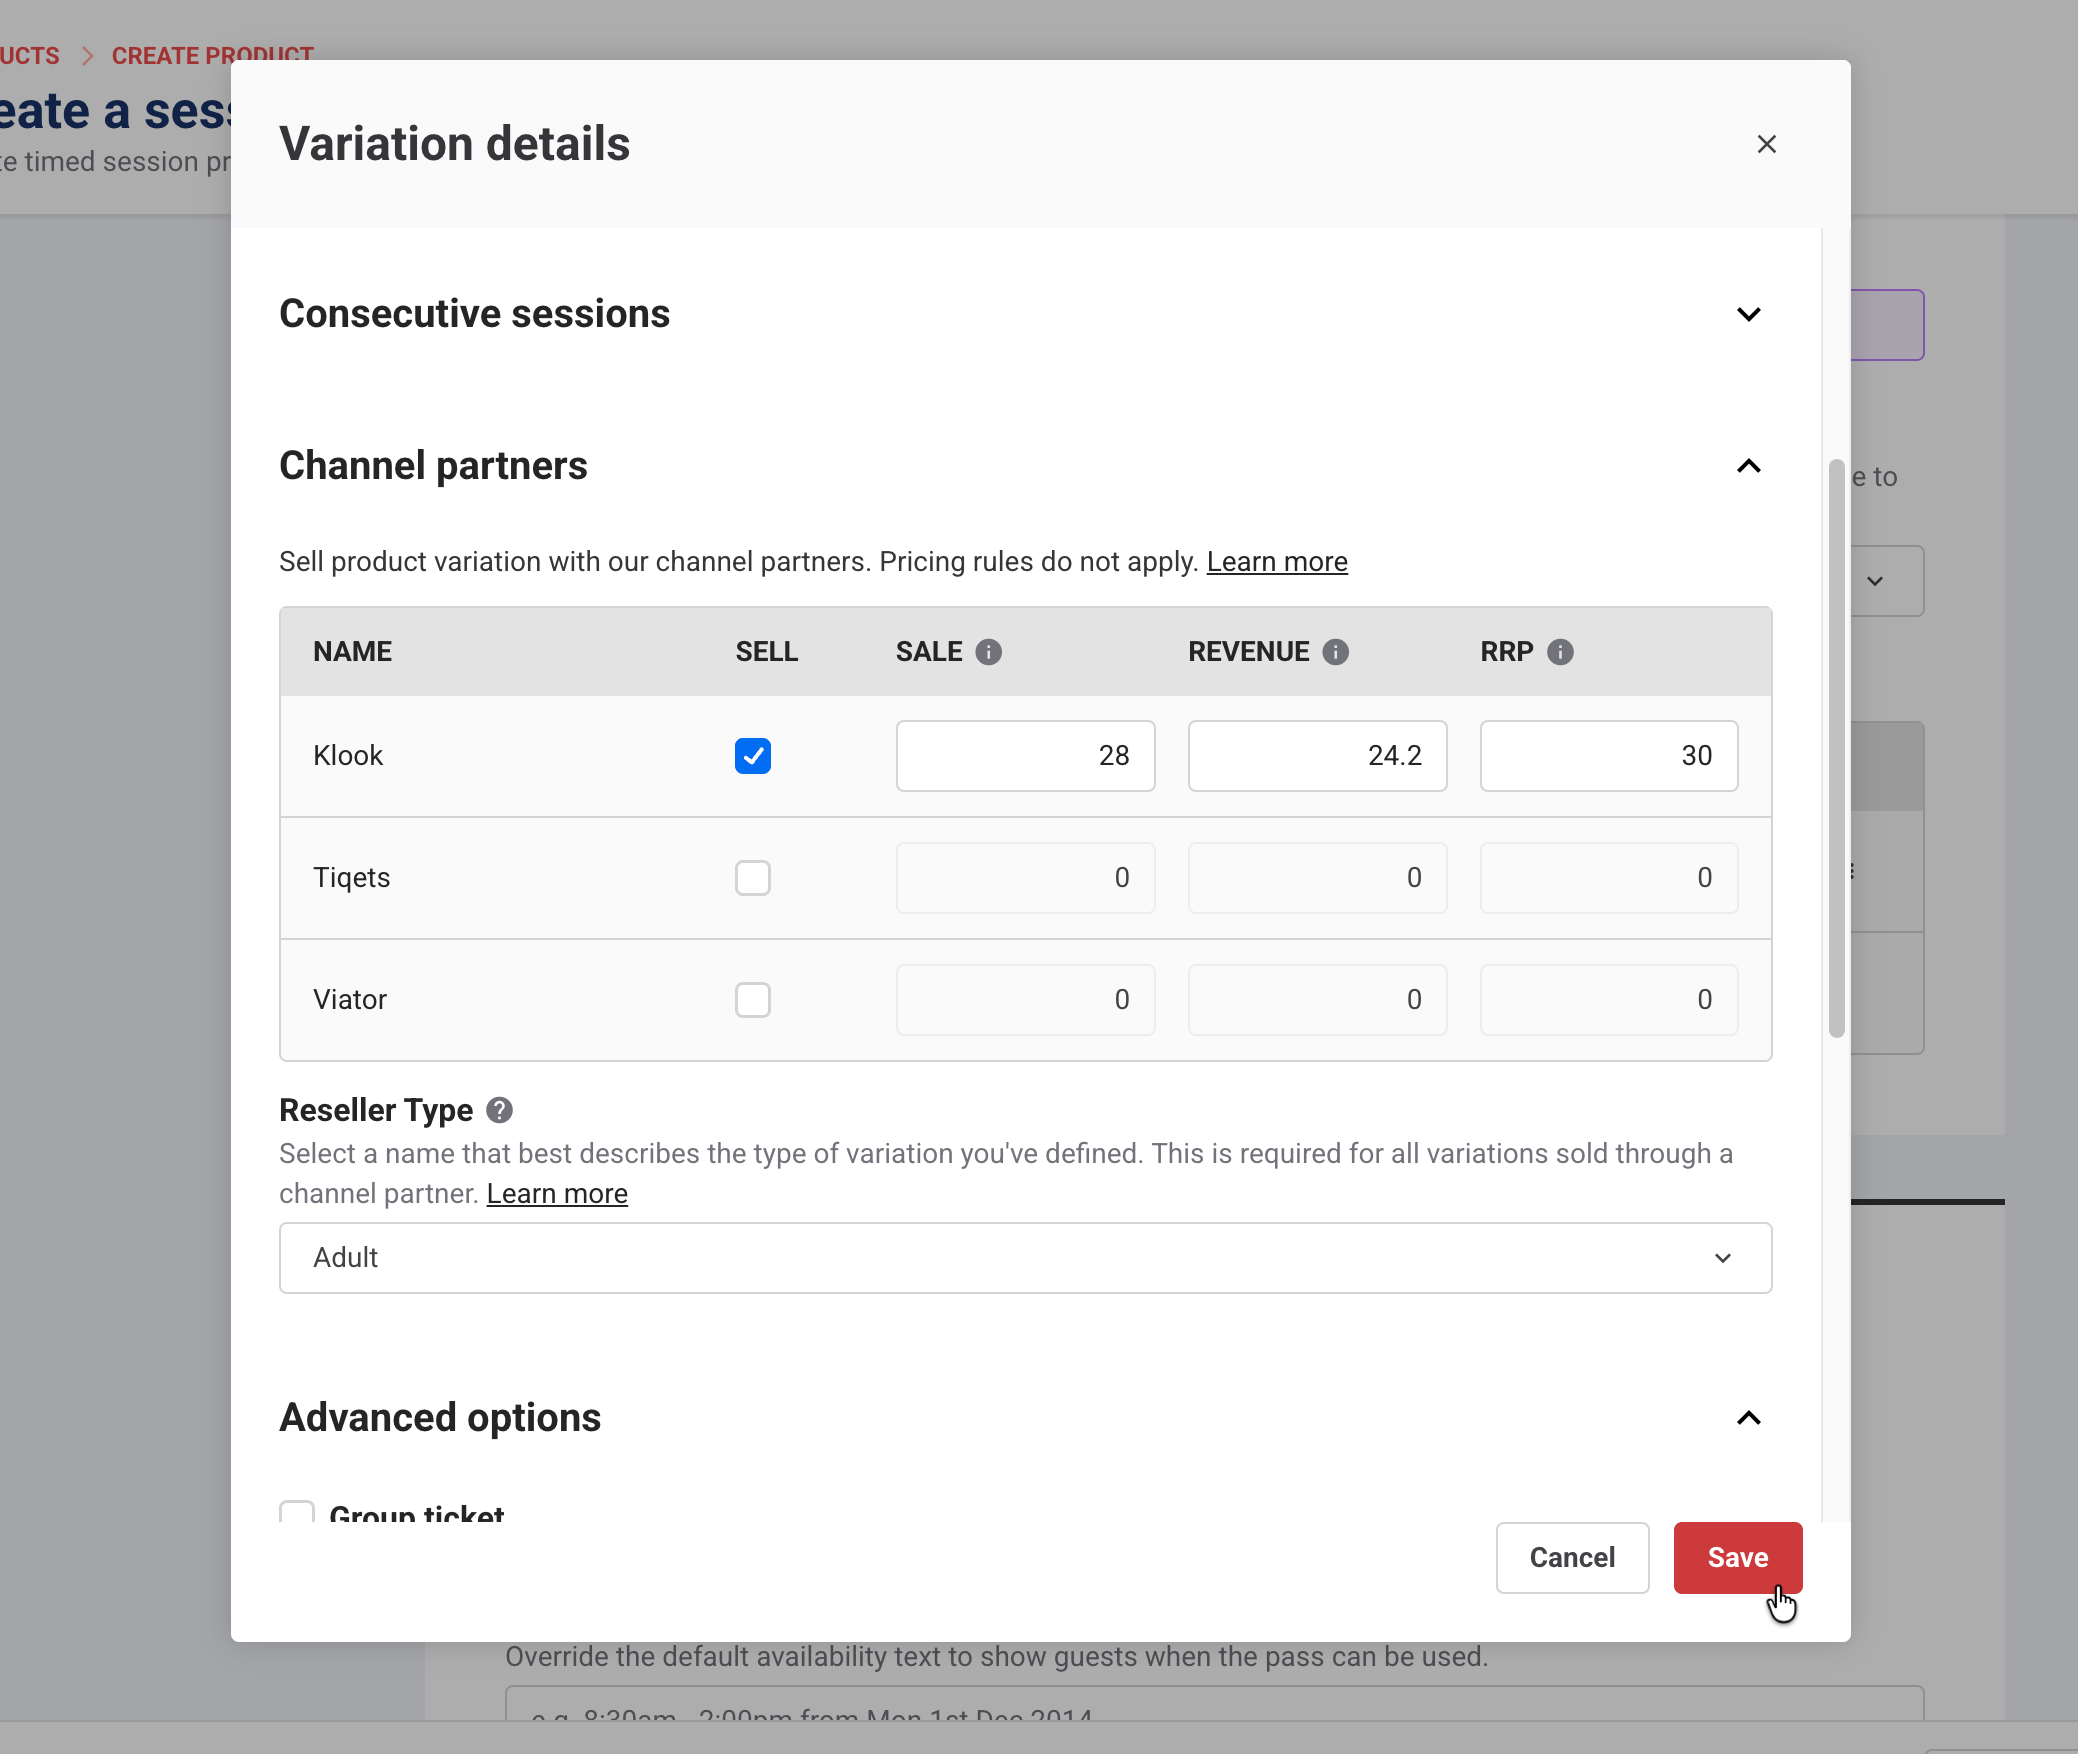
Expand Channel partners.
Can’t see it? Check that at least one OTA is activated, that you have the Can access external service settings permission and that Session duration is set to per session.
For each OTA you want to sell the variation through, turn on Sell.
Enter the OTA’s Sale, Revenue and RRP prices (see What to enter for each price in this guide).
Under Reseller Type, select the type that matches the variation (eg Adult), so guests see the right ticket on the OTA.
Save
Select Save for the variation.
Repeat for each variation you want to sell, then select Save for the product.
Open the variation
From Venue Manager, go to Products > All products and select the product.
Under Variations, select the variation’s row.
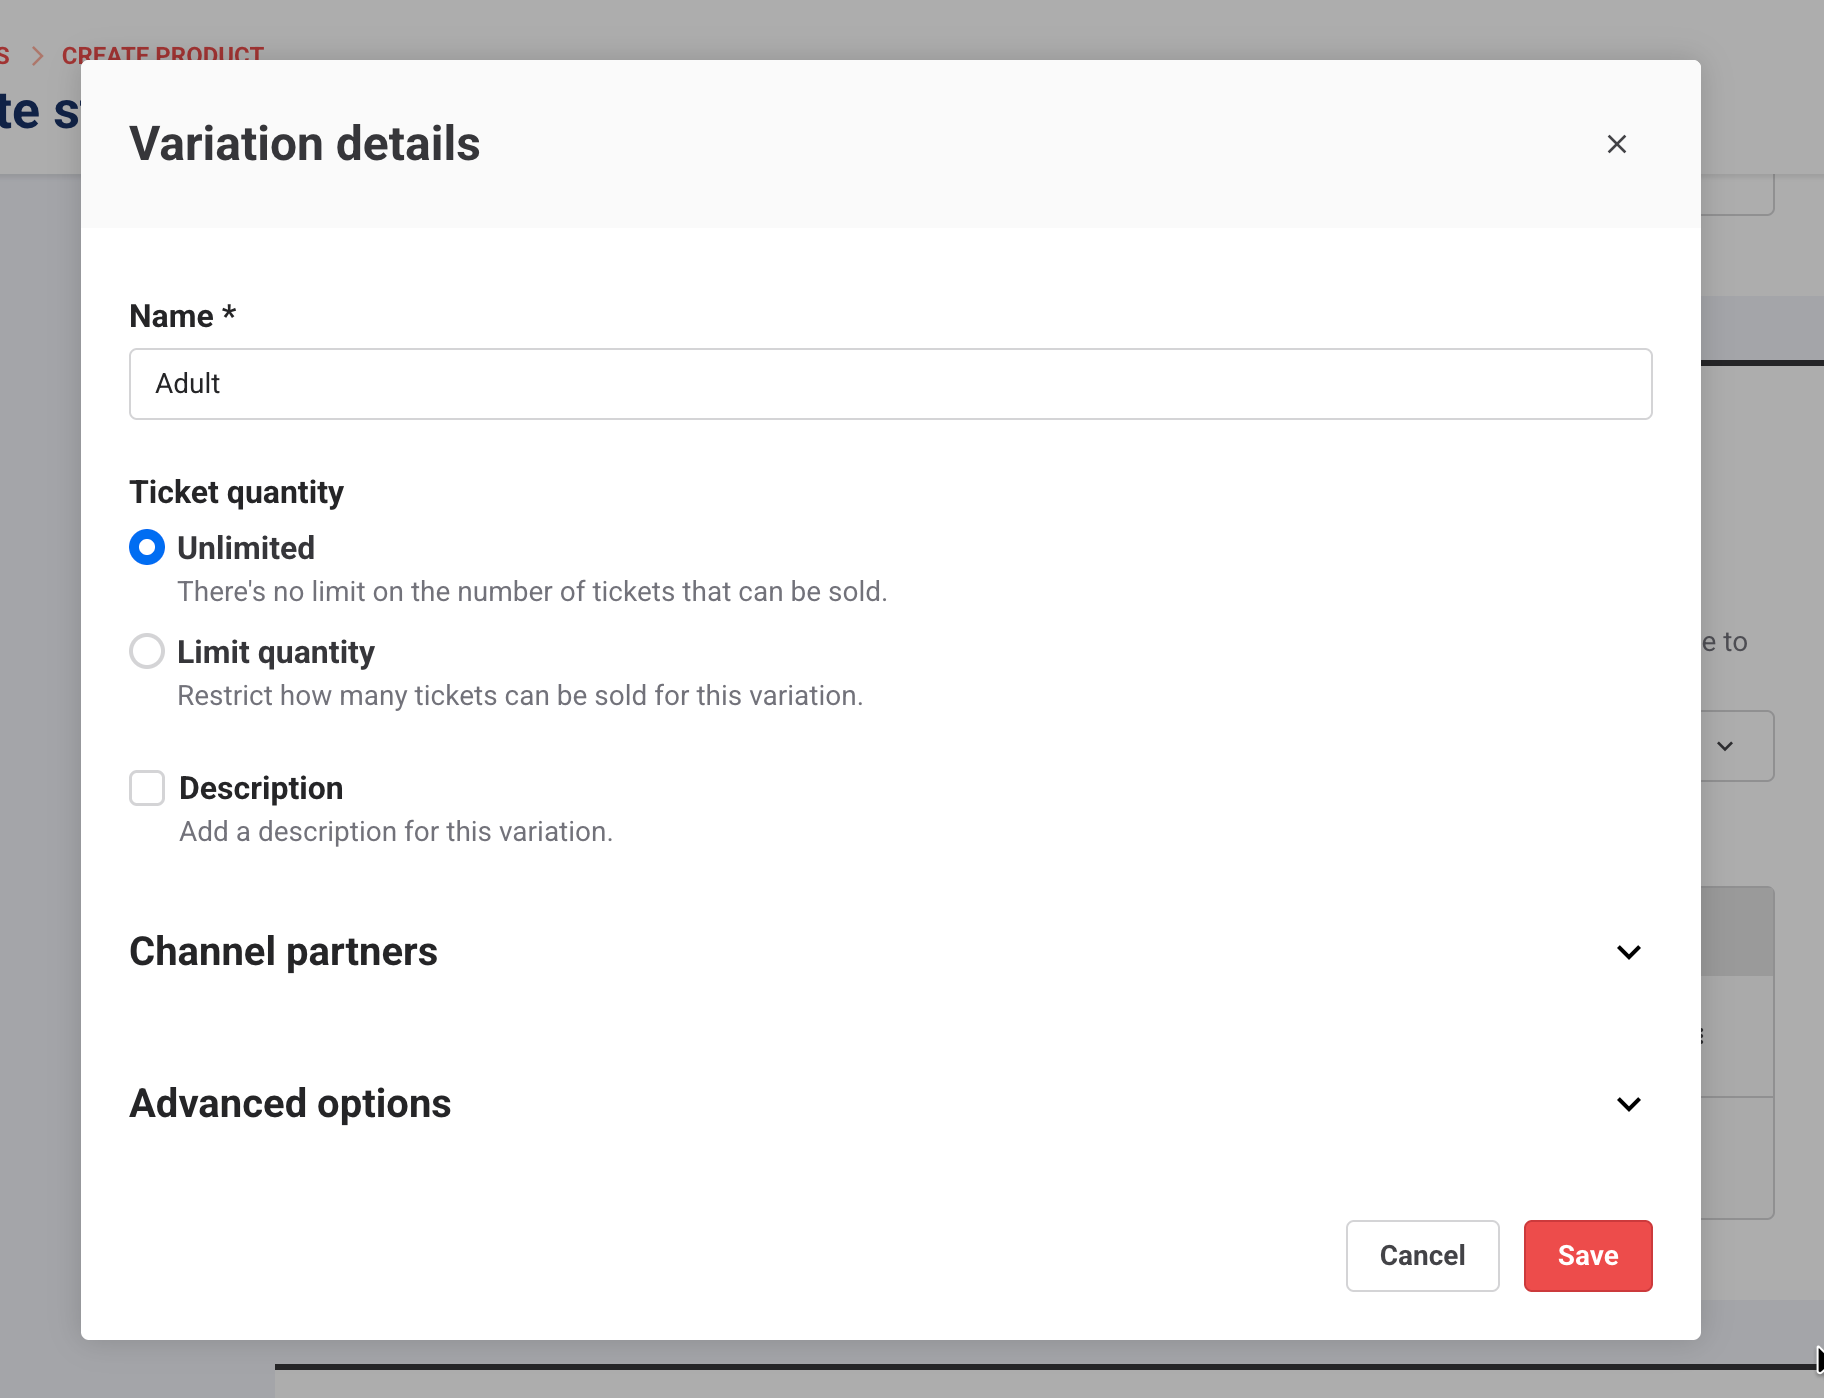
Make the price tax inclusive
Select Advanced options.
Scroll to Tax override and select Override tax.
Select Tax inclusive, then select the tax rate.
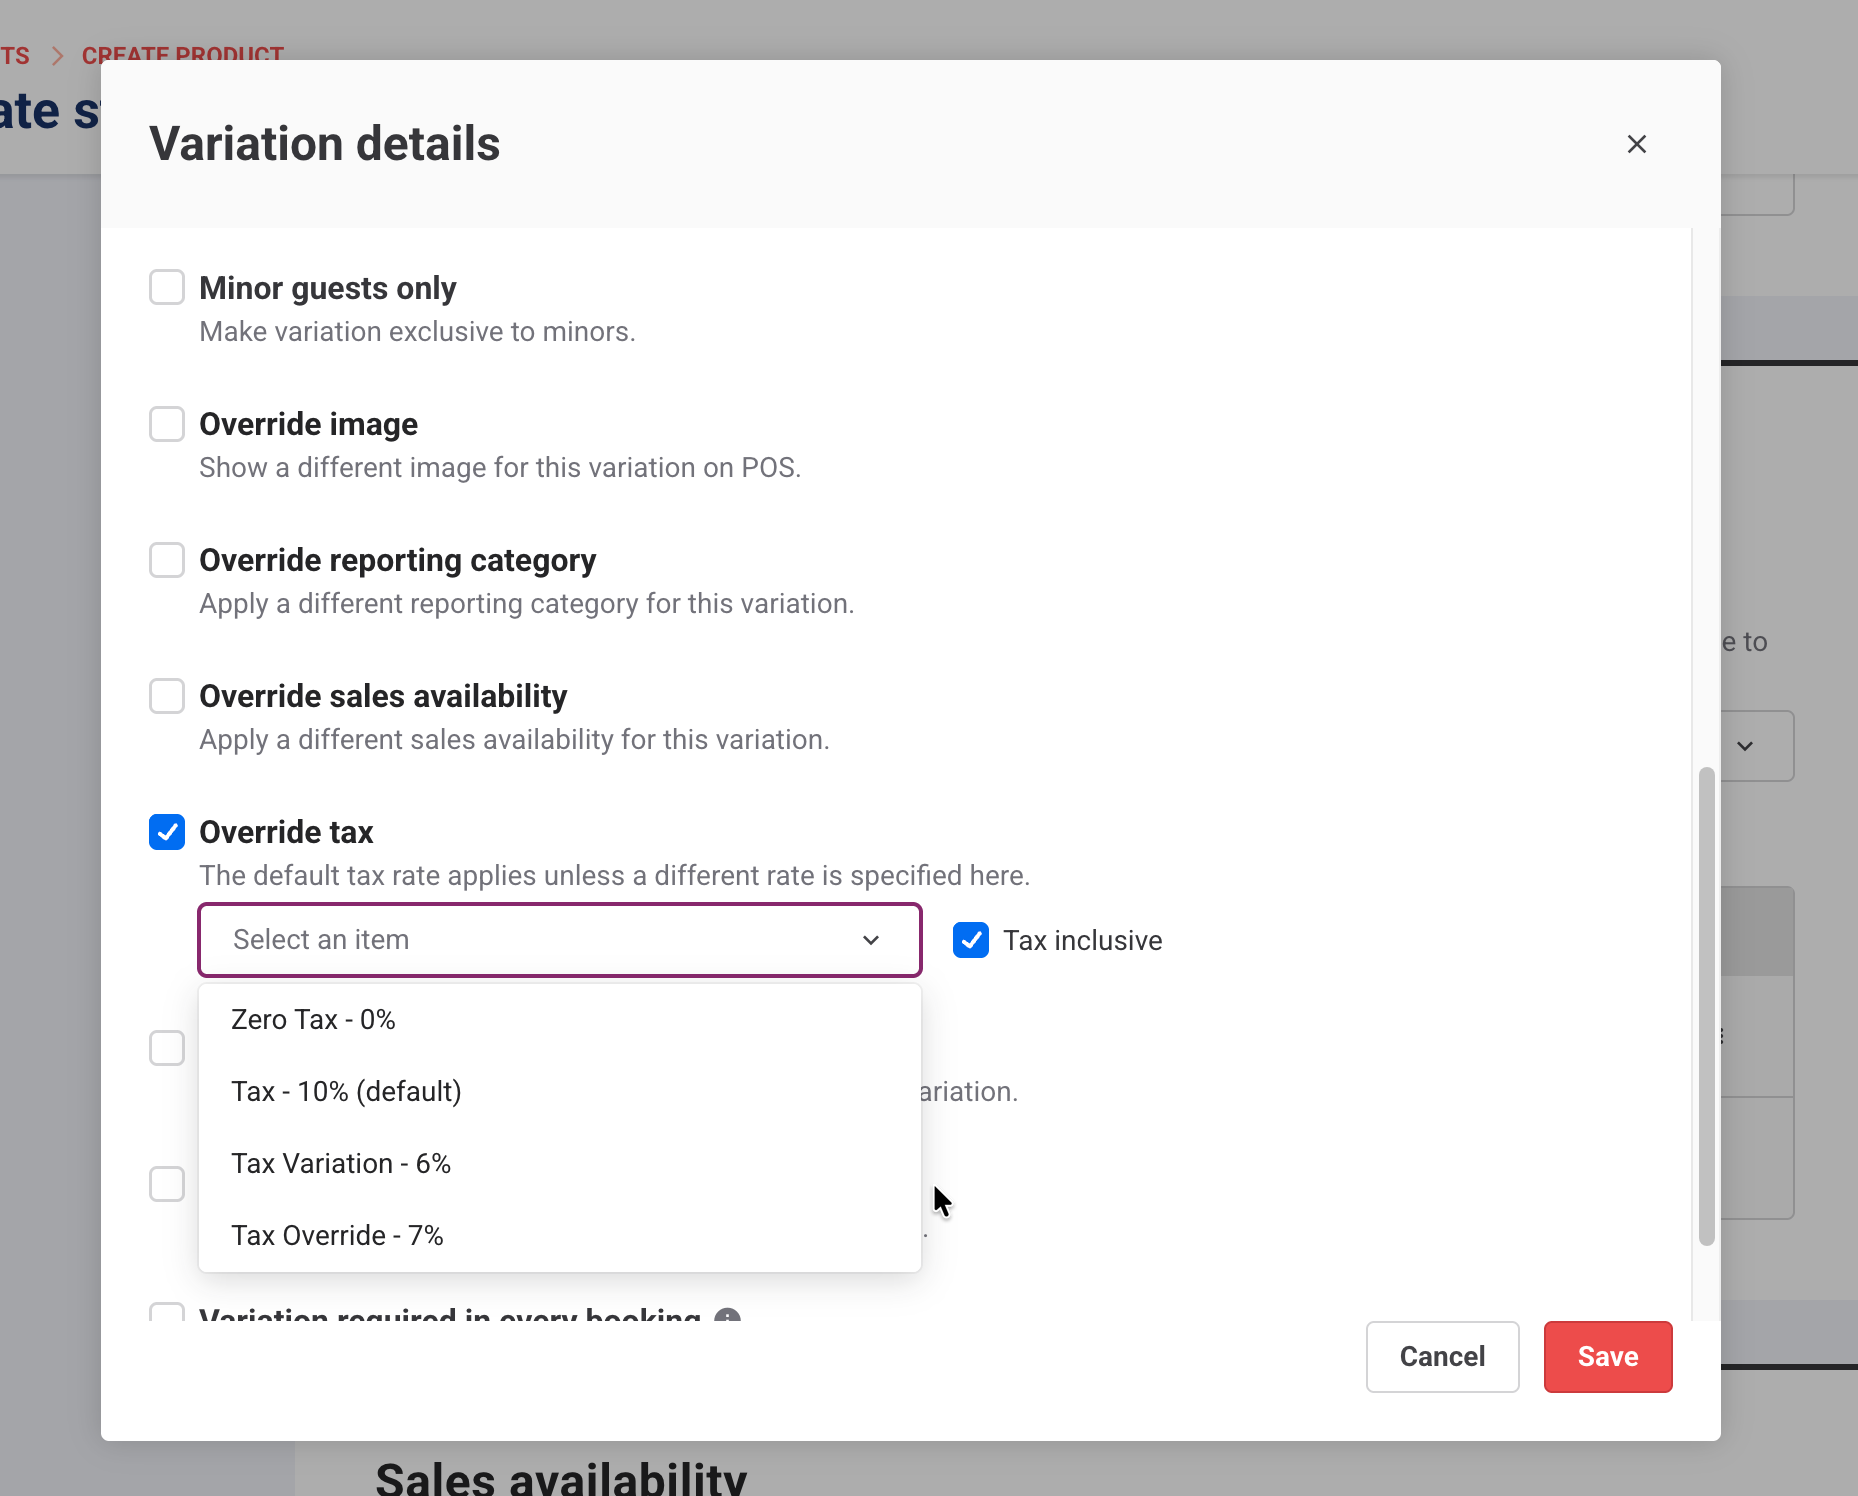
Turn on Sell, set prices and choose a Reseller Type
Select Item is sold through channel partners.
Can’t see it? Check that at least one OTA is activated and that you have the Can access external service settings permission.For each OTA you want to sell the variation through, turn on Sell.
Enter the OTA’s Sale, Revenue and RRP prices (see What to enter for each price in this guide).
Under Reseller Type, select the type that matches the variation (eg Adult), so guests see the right ticket on the OTA.
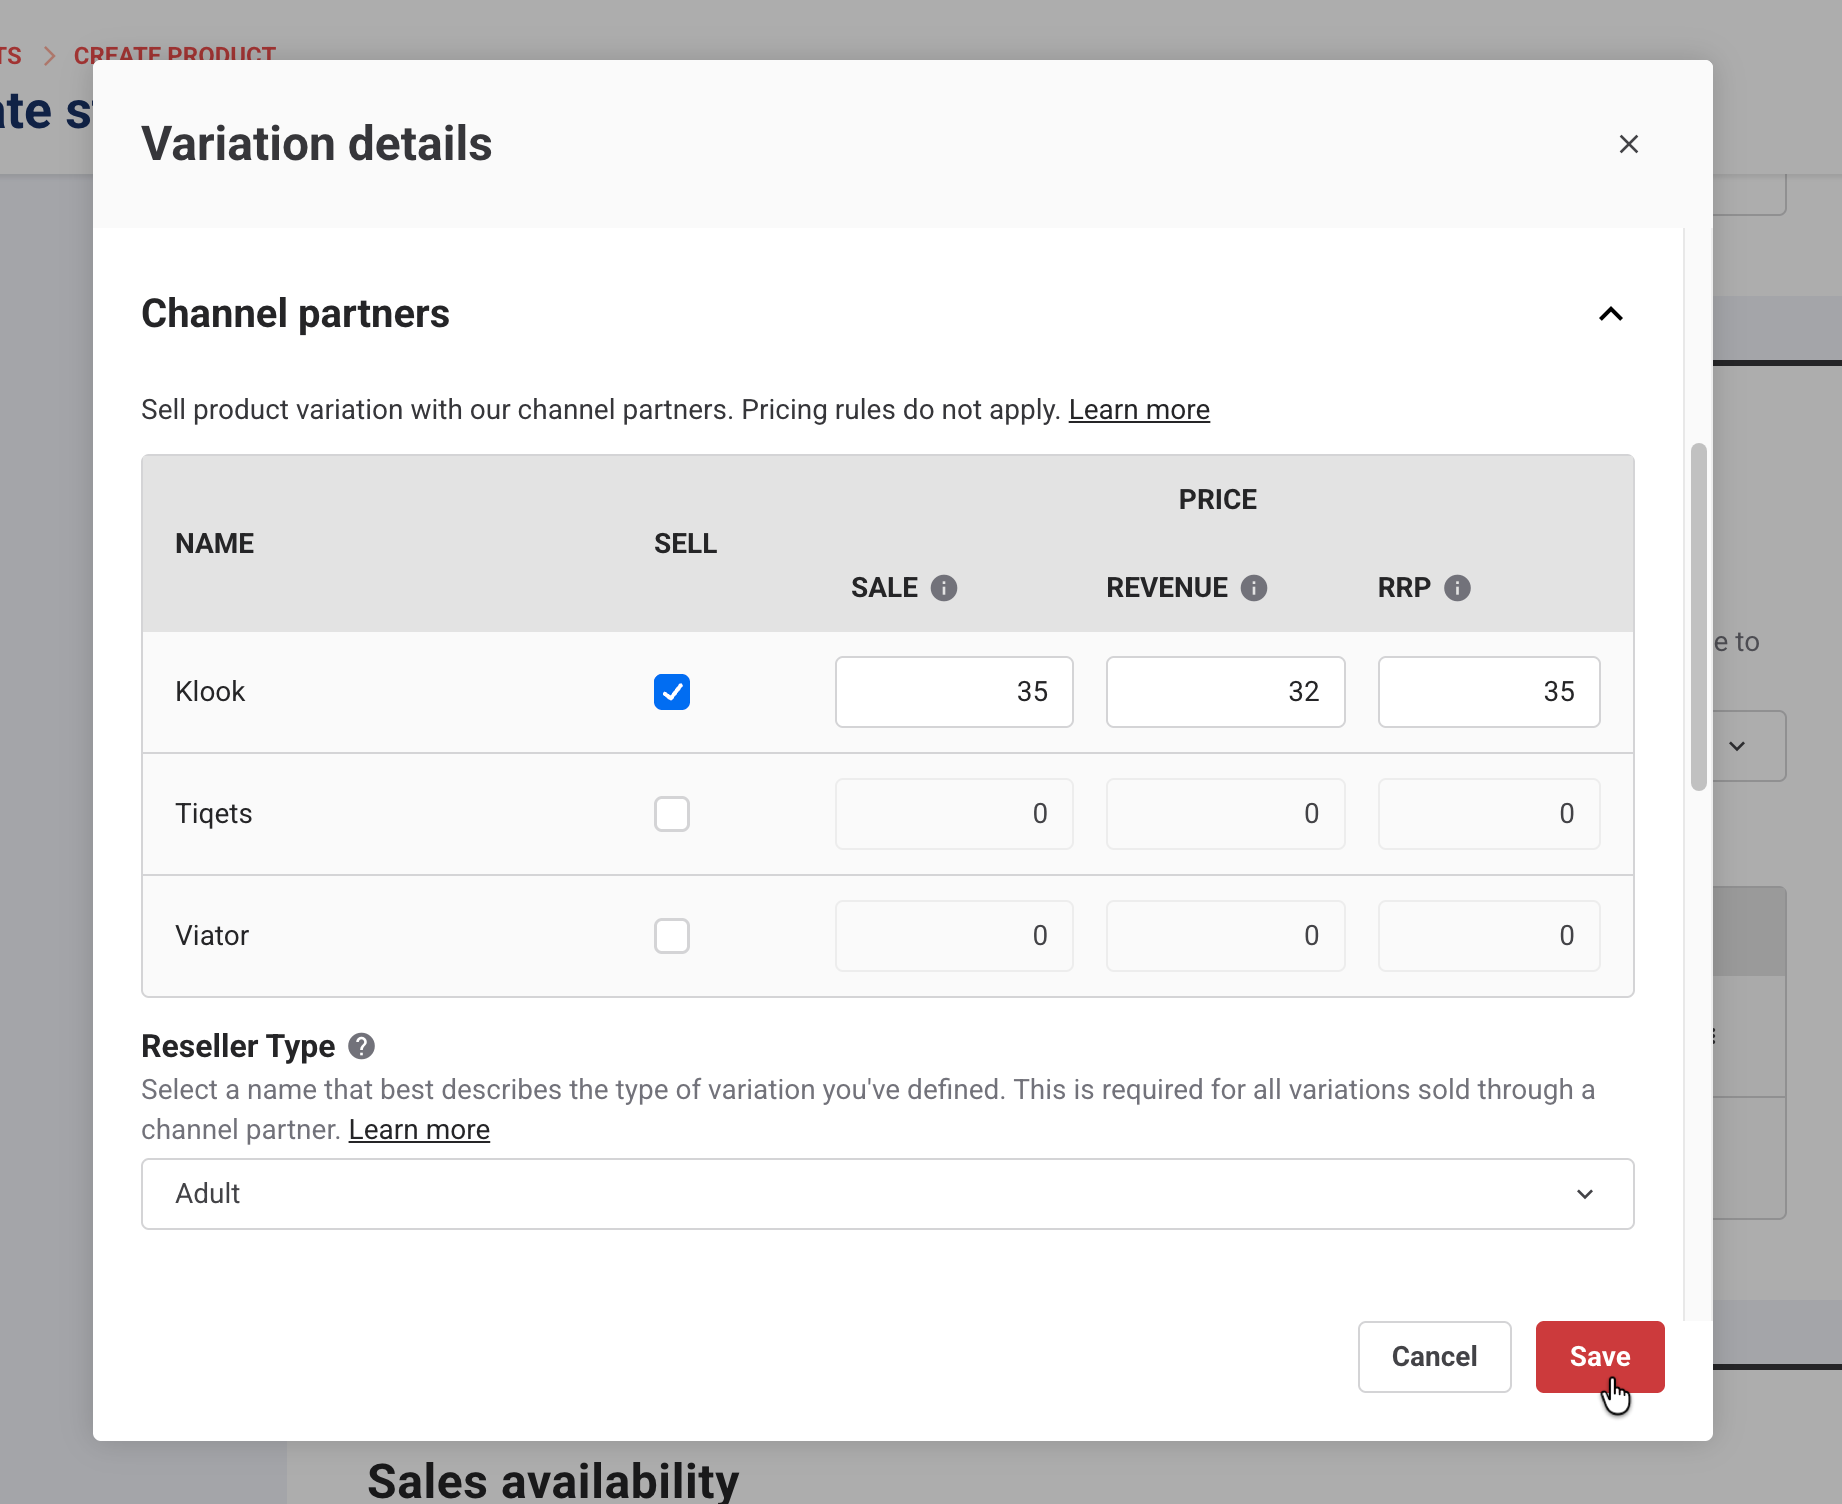
Save
Select Save for the variation.
Repeat for each variation you want to sell, then select Save for the product.
Tax inclusive and your checkout price
This only matters if you sell the same product in your own checkout and on OTAs. If the product is only for OTA sales, you can skip it.
Turning on Tax inclusive changes the variation’s own price, which is what guests pay in your checkout. That price now includes tax, so guests would pay less than before. Raise it by the tax amount so they pay the same total. Your OTA prices are set separately and don’t change.
For example, if your checkout price was $30 plus 10% tax ($33 in total), change it to $33.
What to enter for each price
In the OTA’s row in the channel partners table, enter three prices, all with tax included:
Price | What to enter |
|---|---|
Sale | The price agreed with the OTA, which the OTA’s commission and your payout are based on. It’s usually what the guest pays |
Revenue | The Sale price minus the OTA’s commission: what you expect to receive |
RRP (optional) | Your full price before any discount (eg the price on your website). Some OTAs show it crossed out next to the Sale price (strike-through pricing), but only when it’s higher than the Sale price. If your OTA price is the same as your full price, you can enter the same amount or leave it blank: there’s no discount to show either way. Viator and GetYourGuide don’t use this field. |
For example, a ticket that costs $35 on your website and sells for $30 on an OTA that takes 20% has a Sale price of $30, a Revenue price of $24 and an RRP of $35.
Reseller Type rules
Each Reseller Type can be used once per product, so types used by other variations are grayed out. Viator and GetYourGuide also gray out the types they don’t accept once you turn on Sell for them (see What differs by OTA in this guide). A new OTA variation won’t save without a Reseller Type.
Saving the product sends each variation’s prices and Reseller Type to the OTAs you turned on. Changes can take up to an hour to show on the OTA’s site.
Step 4: Send the OTA what it needs to map your products
Mapping connects each OTA listing to a ROLLER product. The OTA then sells from your live availability, and its bookings come straight into ROLLER.
For most OTAs, provide them with the API key you copied in Step 1.
The OTA then maps the ROLLER products you’ve configured for its OTA to its listings, including pricing, product and variation settings and reseller types.
Each OTA manages its own listing content (eg photos and descriptions) in its portal, and takes questions about mapping.
Open your OTA for who to send the key to and anything else it needs.
Viator (and Tripadvisor)
Send your API key through the chat in the Viator supplier portal.
Add the photos and descriptions you want guests to see in the Viator supplier portal. Your Viator listing also appears on Tripadvisor.
GetYourGuide
GetYourGuide doesn’t use an API key. Instead, it links each listing to your ROLLER products using your Supplier ID and a Product id for each product.
1. Save your Supplier ID in ROLLER
Your Supplier ID identifies your venue in GetYourGuide. Find it in your GetYourGuide supplier portal, or ask GetYourGuide support.
From Venue Manager, go to Settings > Channel management > Online Travel Agents.
Find GetYourGuide and select Settings.
Select Unlock to edit.
Enter your Supplier ID and select Save.
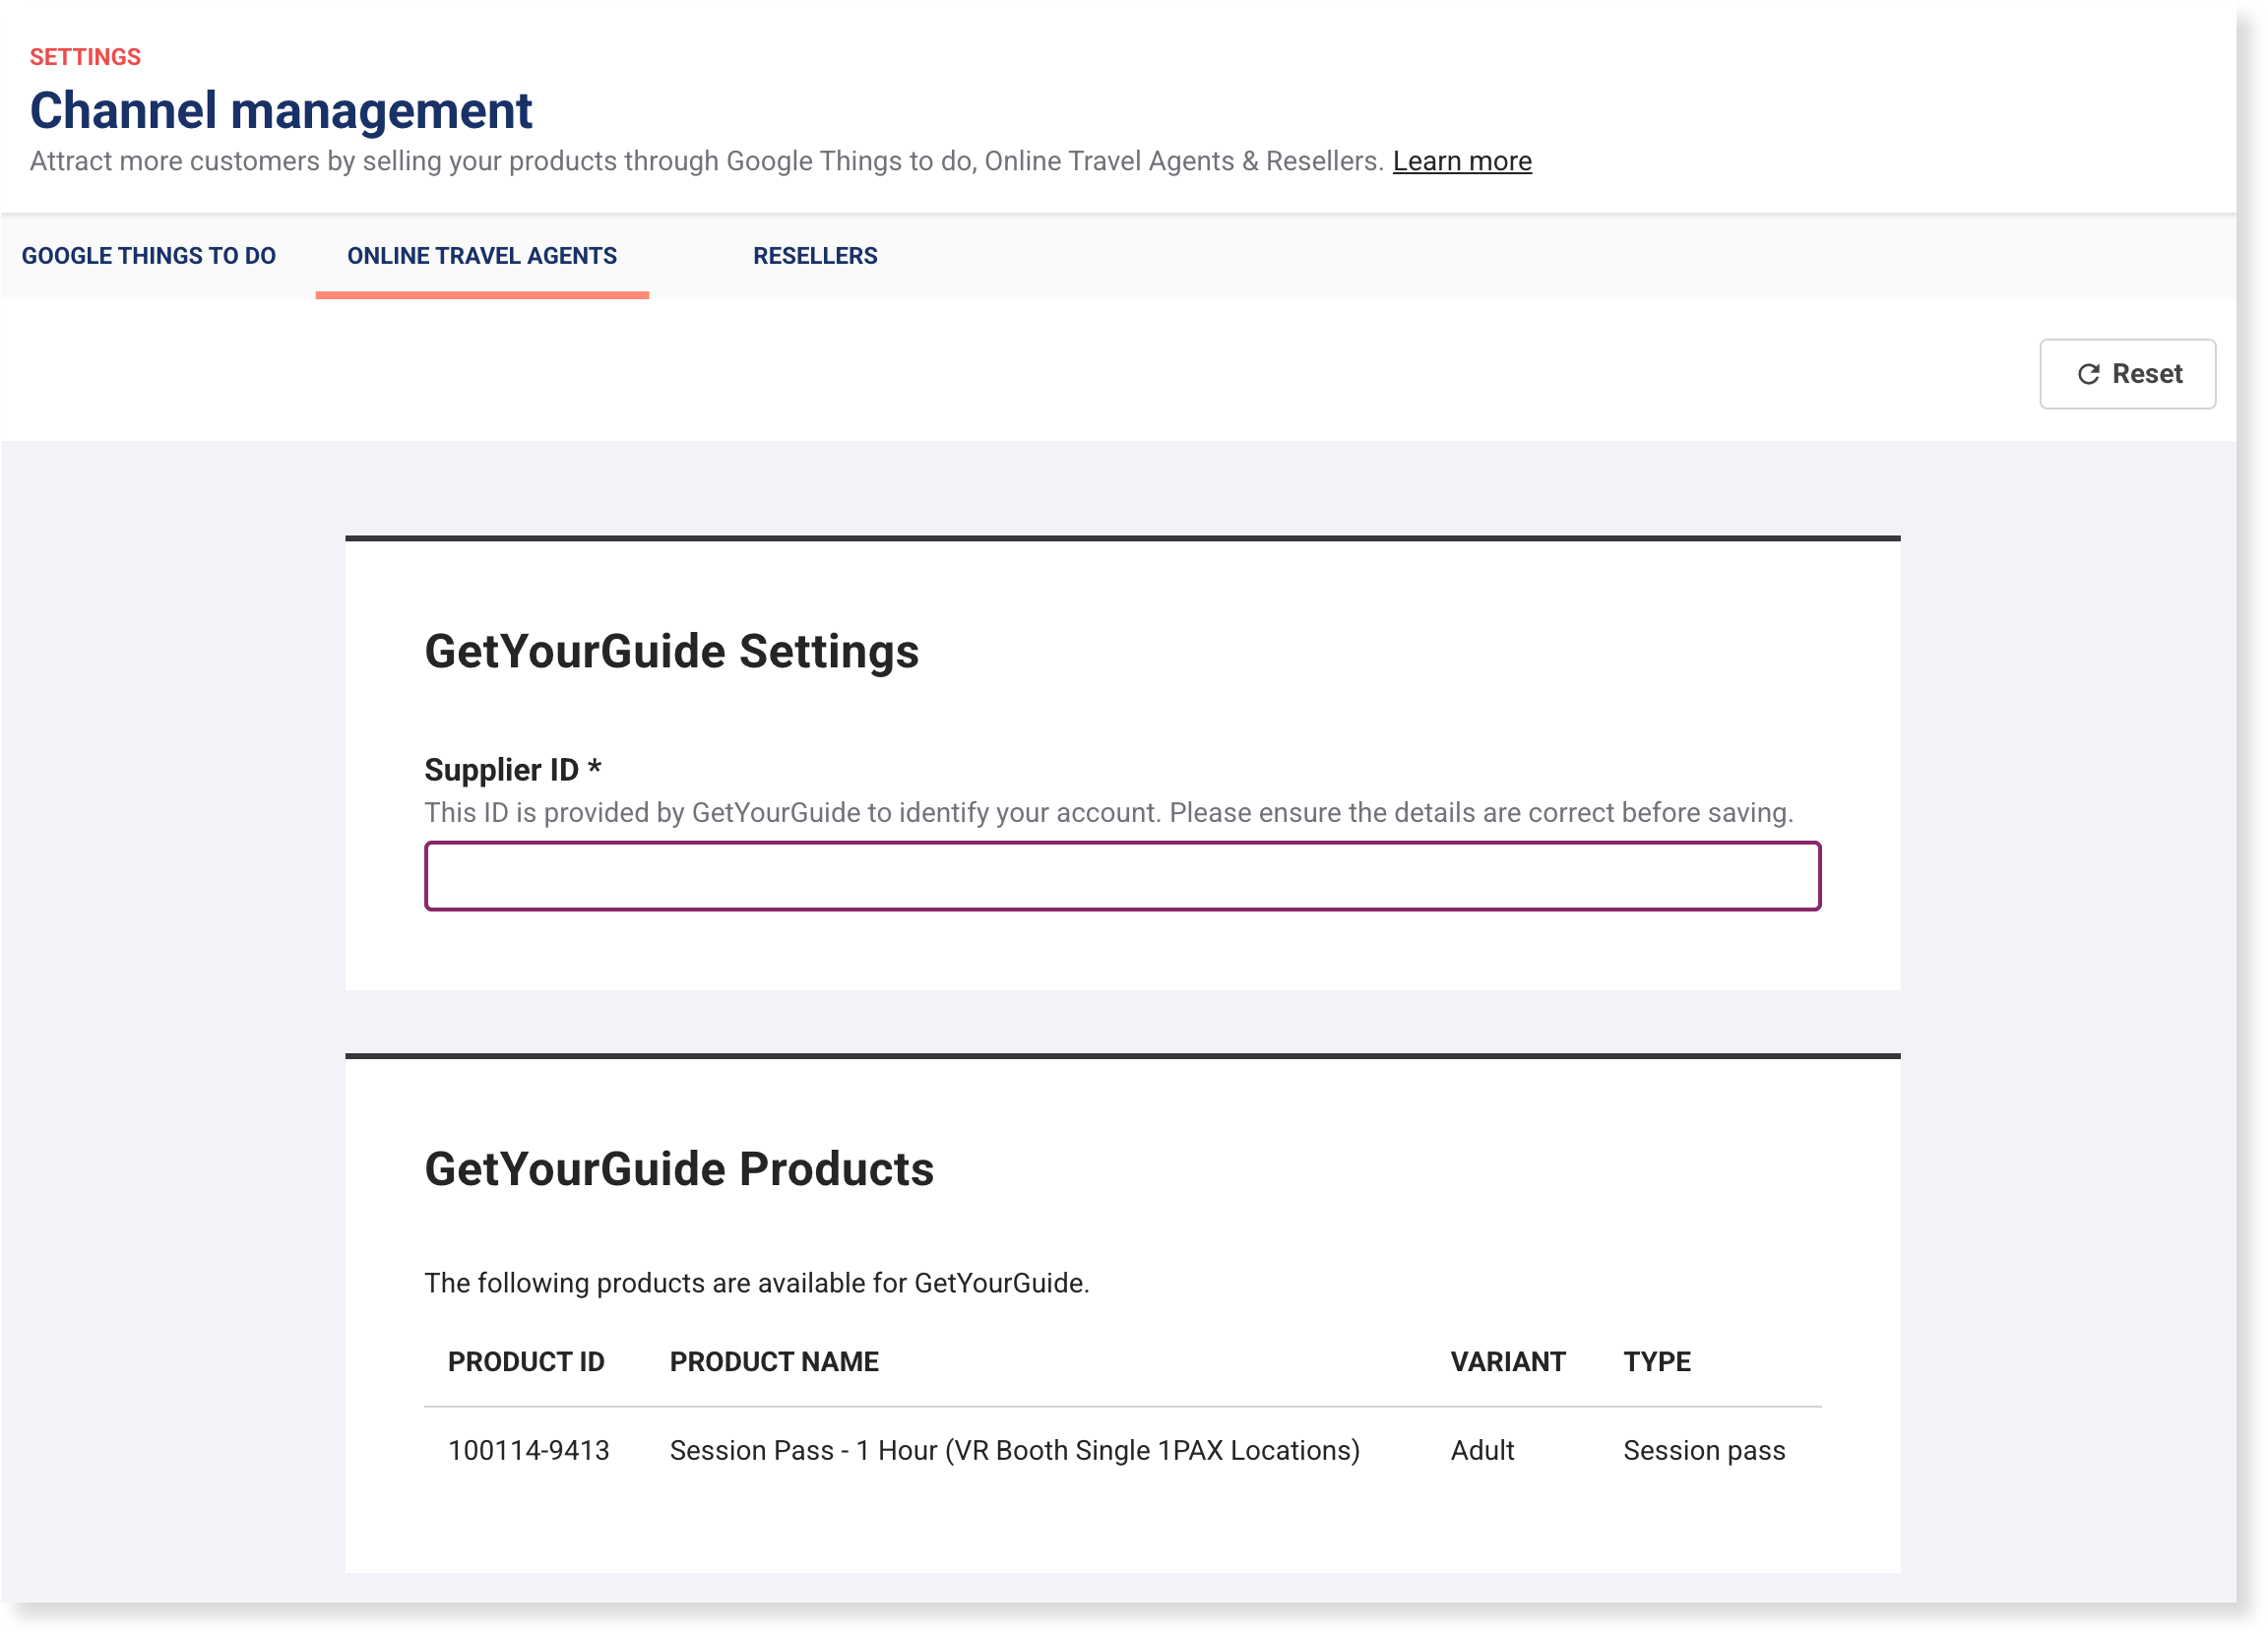
2. Copy your Product ids
On the same Settings page, the GetYourGuide Products panel lists each product and variation you sell through GetYourGuide, with its Product id (eg 27166-1840680).
A product shows there once Sell for GetYourGuide is on in at least one of its variations (Step 3).
The Product id already starts with your venue ID (eg 27166), so copy it as shown.
3. Map your products
Before you map, check that each product has a Description in ROLLER. GetYourGuide uses it as the product description, and a product without one shows “No product description available”. Add the photos you want guests to see in the GetYourGuide supplier portal.
Map each product in the GetYourGuide supplier portal using self-mapping, or send your Product ids to GetYourGuide support and ask them to map your products.
Mapping can fail if a product doesn’t have availability for the next 3 months. For a session pass, check its schedule runs for at least the next 3 months (Products > Schedules). Then submit the mapping request again.
Tiqets
Email your API key to suppliers@tiqets.com, with the photos and descriptions you want guests to see. Tiqets then maps your products.
Every Tiqets booking is linked to the Tiqets company record in ROLLER. By default, Tiqets doesn’t share guest details, so the booking holder is a generic guest (order@tiqets.com). To see each guest’s name, email, phone, country and postcode in ROLLER, ask your Tiqets account manager to turn on unmasked guest records.
Klook
Send your API key through the Klook merchant portal or Klook support.
Add the photos and descriptions you want guests to see in the Klook merchant portal.
Trip.com
Send your API key through the Trip.com vendor platform.
Give Trip.com the photos and descriptions you want guests to see when it maps your products.
Headout
Send your API key through the Headout Hub help center. You manage your listing in Headout Hub.
Step 5: Make a test booking
A test booking shows that bookings, reports and cancellations flow between the OTA and ROLLER before guests start booking. Not every OTA lets you make one. If yours doesn't, check the first real booking when it comes in.
Check your products show correctly on the OTA's site.
Make a test booking on the OTA's site, or wait for the first real booking.
Check the booking shows in ROLLER with the right details.
From Venue Manager, go to Reports > All reports and check the booking shows in Booking Item Sales by channel partner and Product sales by channel partner.
Cancel the test booking on the OTA's site and check the cancellation shows in ROLLER.
To check what each OTA owes you against ROLLER, see the guide Report on and reconcile OTA bookings.
What differs by OTA
Most of the setup is the same for every OTA. Check this table before you set up your variations, so you enter only what each OTA uses.
Setting | Where in ROLLER | Most OTAs | Exceptions |
|---|---|---|---|
Connection | Settings > Channel management > Online Travel Agents (see Step 1) | You send the OTA the API key ROLLER shows when you activate it (Step 1) | GetYourGuide: you save your Supplier ID in ROLLER and map each product with its Product id (Step 4) |
Reseller Type options | Variation details > Channel partners (see Step 3) | All 10 types: Adult, Youth, Child, Infant, Family, Senior, Student, Military, Other and Traveler | Viator: Adult, Youth, Child, Senior and Infant only. GetYourGuide: all except Other |
RRP | Variation details > Channel partners (see Step 3) | Some OTAs show it crossed out next to the Sale price | Viator and GetYourGuide don’t use it. You can leave it blank |
Description | The product’s Content section | Not used | GetYourGuide: used as the product description. If it’s blank, GetYourGuide shows “No product description available” |
Group passes | The product’s Name and the variation’s Reseller Type | Put the group size in the product name | For GetYourGuide, create a separate product for each group size. In each one, turn on Sell for GetYourGuide in one variation only, and set its Reseller Type to Family. Viator sells individual tickets only (Adult, Youth, Child, Infant and Senior), so group passes don't sell there. |
Availability needed to map | Products > Schedules (session pass) | No minimum | GetYourGuide: at least 3 months |
Purchase limits | The variation's advanced options (Min. purchase and Max. purchase) | ROLLER sends them to the OTA | Viator: not sent, so Viator doesn't apply them |
A group pass sells as one ticket for the whole group. The OTA gets every ticket ID for its confirmation email, but the guest gets one ticket. Name the product so guests know what they’re buying. For example: 1 Hour Jump (1 ticket for a family of 4).
GetYourGuide only shows a group pass when the guest chooses that exact party size, so a product for 4 doesn’t show when a guest chooses 5. Create a product for each group size you want to sell.
Add another OTA or product later
Your products are already set up for OTAs, so adding an OTA or a product only repeats the steps that change:
Add another OTA: create a supplier account with it, then work through Step 1, Step 3 (turn on Sell for the new OTA in each variation), Step 4 and Step 5 in this guide.
Sell another product: work through Step 2 and Step 3, then ask each OTA to map the new product.
Change what an OTA charges: change that OTA's Sale price in the variation.