Multi-passes (eg 5-visit jump packs) let you sell bundles of session passes that guests can use over time. Instead of purchasing a single ticket each visit, guests can buy a pack upfront to redeem across multiple bookings.
This creates a flexible option positioned between casual single visits and a membership commitment, helping to drive repeat visitation.
This feature is by request only. To switch it on for your venue please contact your Customer Success Manager, or ROLLER Support.
Before you start
Make sure that you:
Have a session pass product set up (eg. 60-minute jump session) to include in the pack.
Determine how many visits to include in each pack (eg. 5 or 10).
Decide the pricing strategy for the packs (eg. discounted bundle price).
Decide how long the pass should be valid (eg. 12 months).
How it works
A guest purchases a multi-pass online, at POS or through Venue Manager.
The guest’s booking holder details (email address) link the multi-pass to the guest.
A guest books a session online, or staff sell a session at POS or through Venue Manager.
If the guest has a valid multi-pass, it applies to eligible sessions in the cart.
Visits are automatically covered by the pass and deducted from the multi-pass.
The guest (or venue staff) track remaining visits and expiry in online accounts, POS or Venue Manager.
Create a multi-pass product
To create a multi-pass product, follow the steps below.
From Venue Manager, go to Products > Create product.
Select Multi-pass.
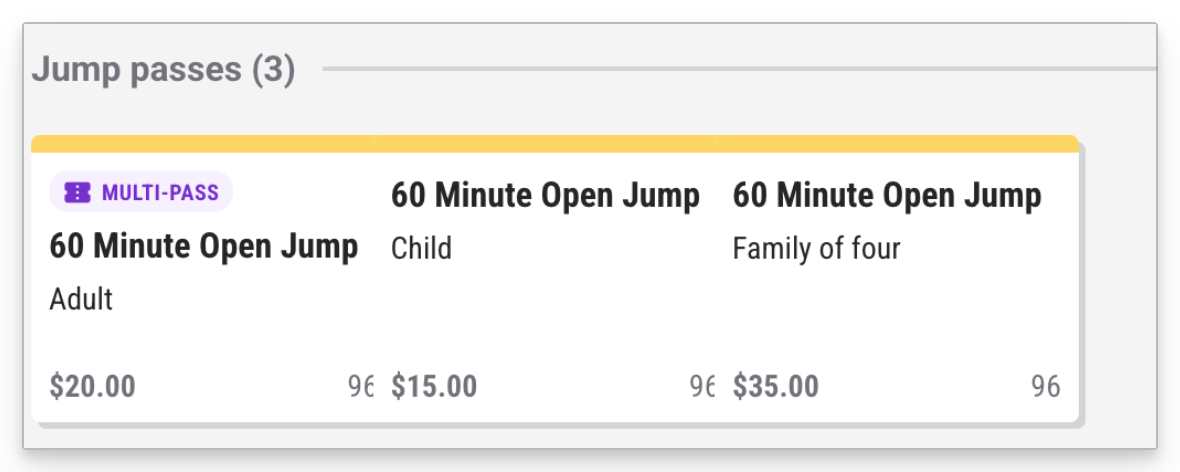
In Content, add a name, description, upload an image and add any tags. For example, a 5-visit jump pack product.
In Multi-pass details, set Quantity for the number of sessions a guest can redeem with the pass. You can’t change this after you save the product.
Add one or more variations to the multi-pass product to offer different options and prices. For example, you can create adult and child variations for a 5-Visit Jump Pack and set a price for each variation, which can offer better value than single visits.
For the placeholder General Admission variation, select the options menu (3 dots), then Edit.
Update the placeholder name to what you want.
In Products, select the product variation you want to include. You can include one session pass product variation.
Enter the price for the multi-pass variation.
(Optional) Add a description to show in online checkouts for the multi-pass.
Select Save.
Select Create variation to add any more multi-pass variations.
In the Availability section, set when the multi-pass is available to sell. Select Ongoing to set the multi-pass available for sale from a start date or restrict to a selected Date range.
Enter a Valid period to set how long the pass is available to use from the purchase date.
Select Save.
To see this process in action, select the hotspots in the interactive demo below.
Add multi-pass products to sales channels
Once you’ve created your multi-pass, add it to your online checkout and POS so you can start selling it.
To add multi-pass products to your online checkout, see the steps in the Products section, in the guide Create your online checkout.
To add multi-pass products to POS templates, see the steps in the Create your menus and add products section, in the guide Create your POS templates.
Once added to an online checkout and POS menu, check to make sure that the products are showing up ready to sell.
Sell a multi-pass product
Sell multi-pass products to guests online, at POS or through Venue Manager.
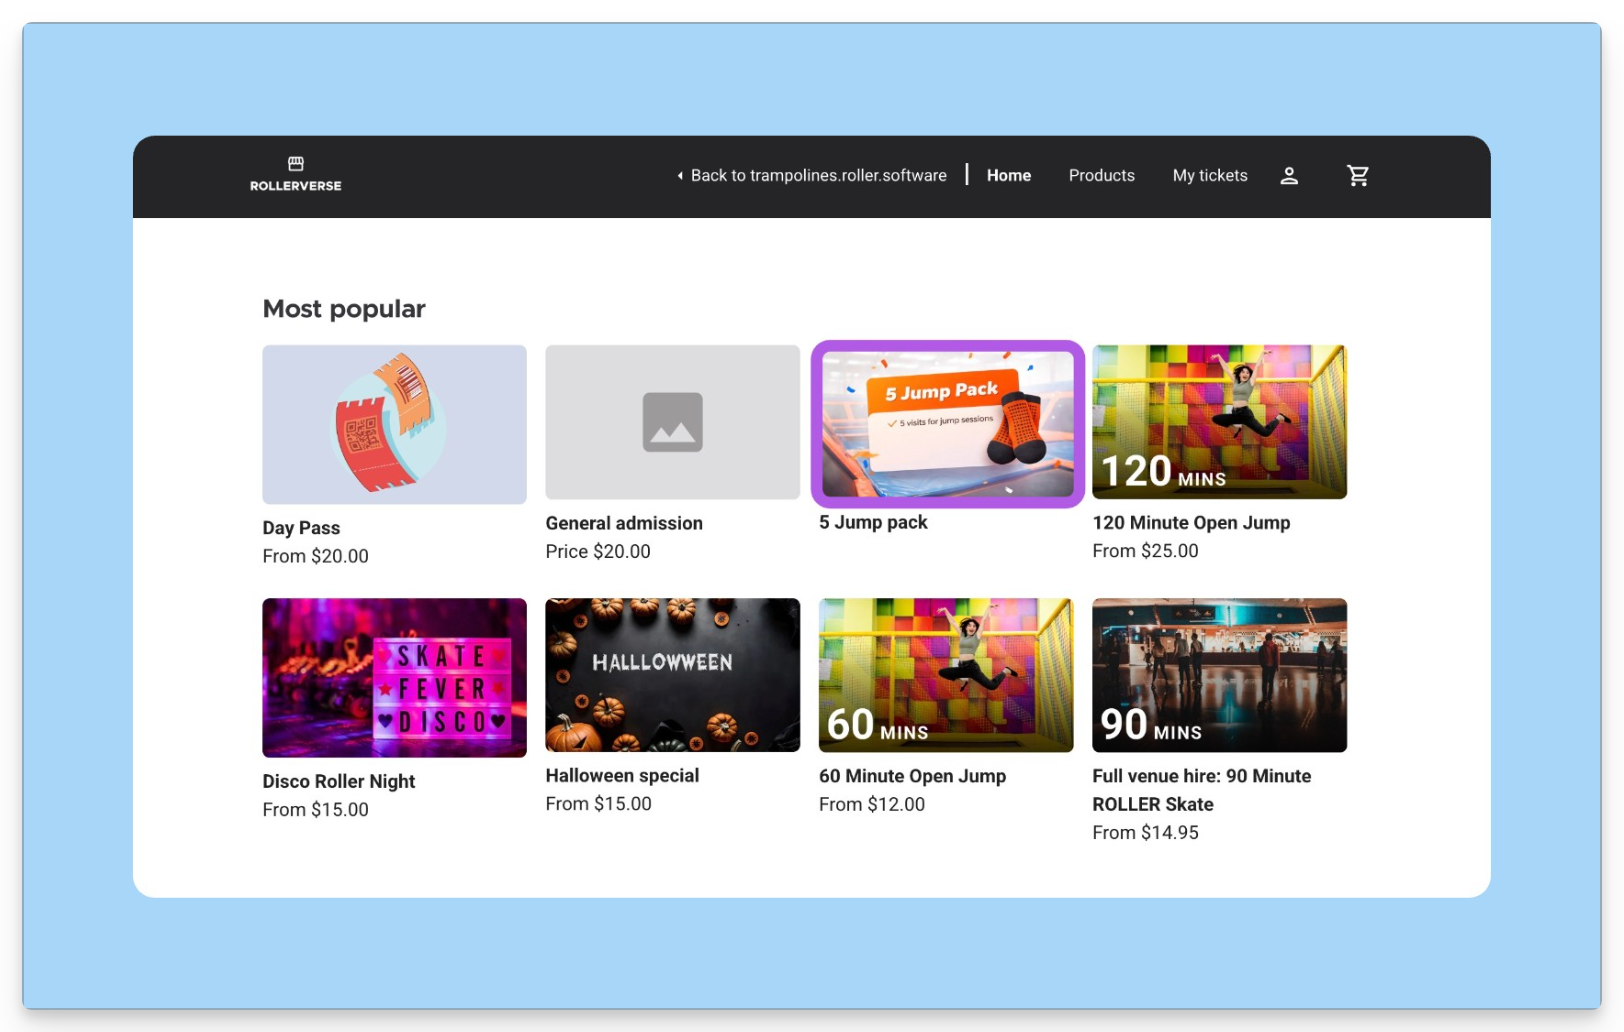
Guests can purchase a multi-pass product through the online checkout.
The guest adds the multi-pass product to their cart, such as a 5-Visit Jump Pack.
The guest enters their details during checkout and completes payment.
After the purchase is completed, ROLLER sends a confirmation email to the email address the guest entered at checkout.
The multi-pass is linked to that email address.
The guest uses that same email address to create an online account or log in to an existing account.
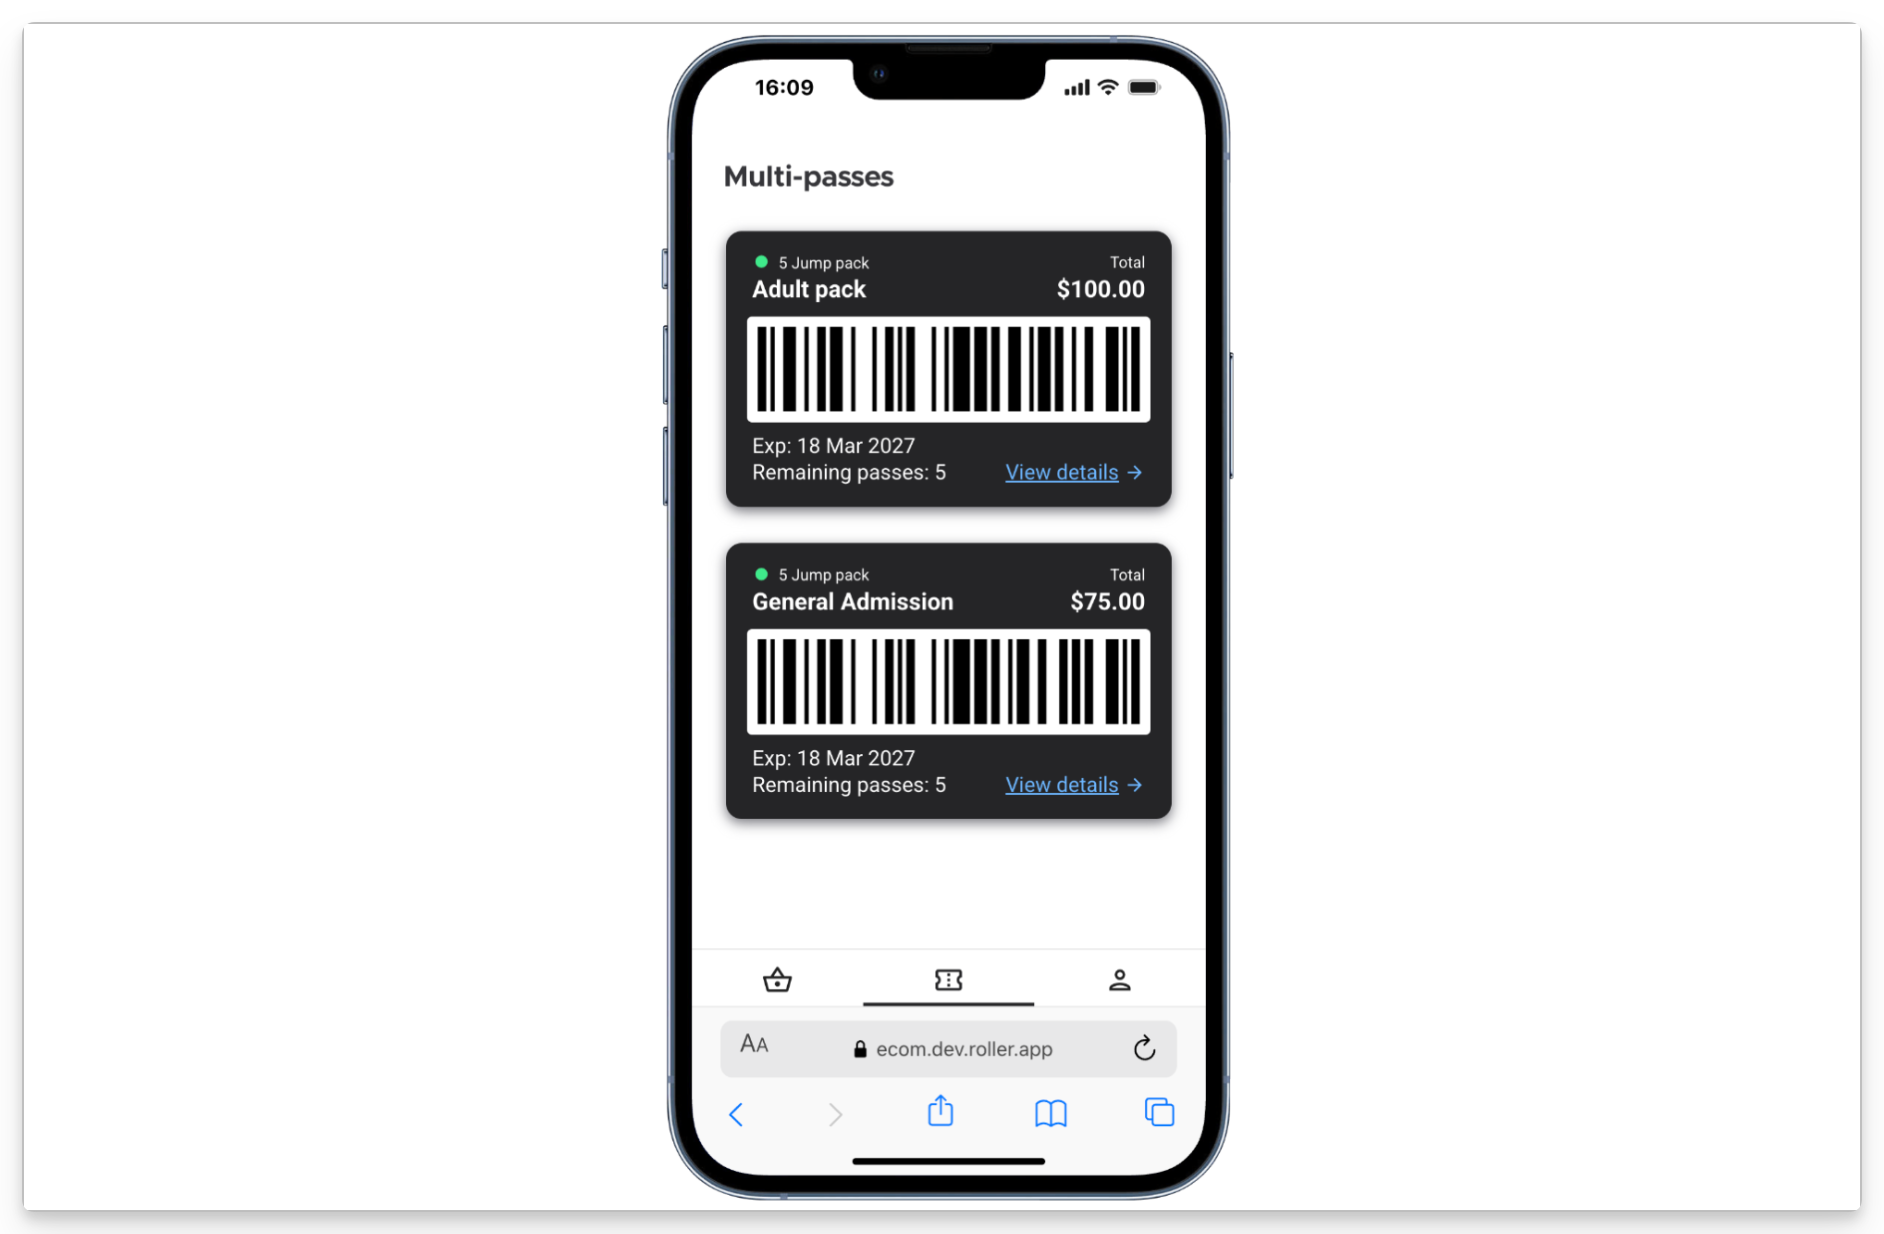
Once logged in, the guest can manage their multi-pass from their online account.
Sell a multi-pass product in venue at POS:
Add the multi-pass product to the cart.
Select Add booking holder details to add the booking holder name and email address. This is required when purchasing a multi-pass at POS.
The guest will receive an email confirmation at the address entered in the booking details confirming this purchase.
The multi-pass is now connected to the guest’s email address where they can create or log in to their online account to manage the pass.
Sell a multi-pass product from Venue Manager:
Go to Bookings > Create booking.
Add the booking holder details, including email address. A booking holder name and email address is required when selling a multi-pass from Venue Manager.
Search for and select the multi-pass product.
Select the multi-pass variation the guest wants to purchase and enter the quantity.
Add items to the booking and reserve and take payment as normal.
Redeem a multi-pass product
Guests might want to redeem some or all of their multi-pass right after they have purchased it, or at a later date online or in venue.
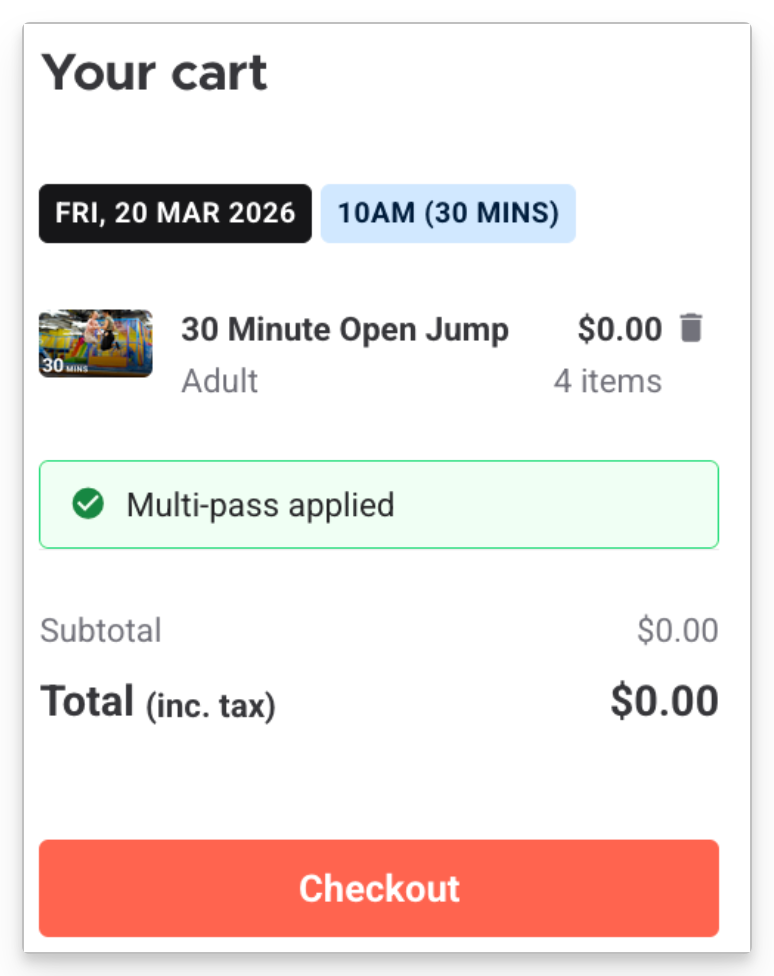
Multi-passes are applied on an all-or-nothing basis. When a pass is redeemed, it automatically covers all eligible sessions in the booking and guests and staff can’t choose specific sessions to apply it to. If the pass isn’t applied, none of the sessions will be covered.
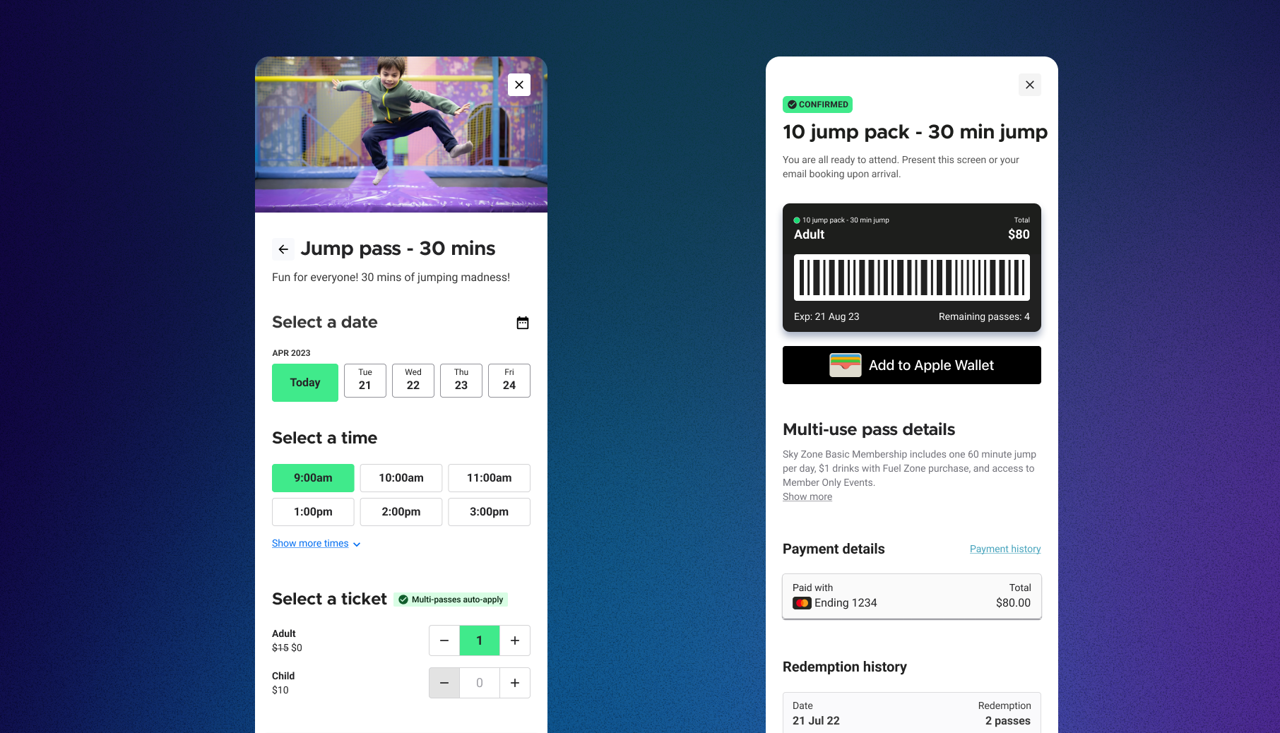
Guests can book and redeem multi-pass session(s) online:
Guests select a product variation included in the multi-pass and add it to the cart (eg 30 min jump pass).
If the guest is logged in to their online account, when the items are added to the cart the multi-pass applies automatically to any sessions included in the multi-pass.
The guest selects Checkout and in the discount section, selects Redeem now.
When prompted, the guest selects multi-pass from the list, then Continue.
If the guest is not logged in, they are prompted to log in to their online account. Once login is complete the multi-pass automatically applies to the items in their cart.
If there are other items in the cart, they complete the payment process. Otherwise, they finalize the booking without payment. Once the purchase is complete, the sessions are deducted from the multi-pass count.
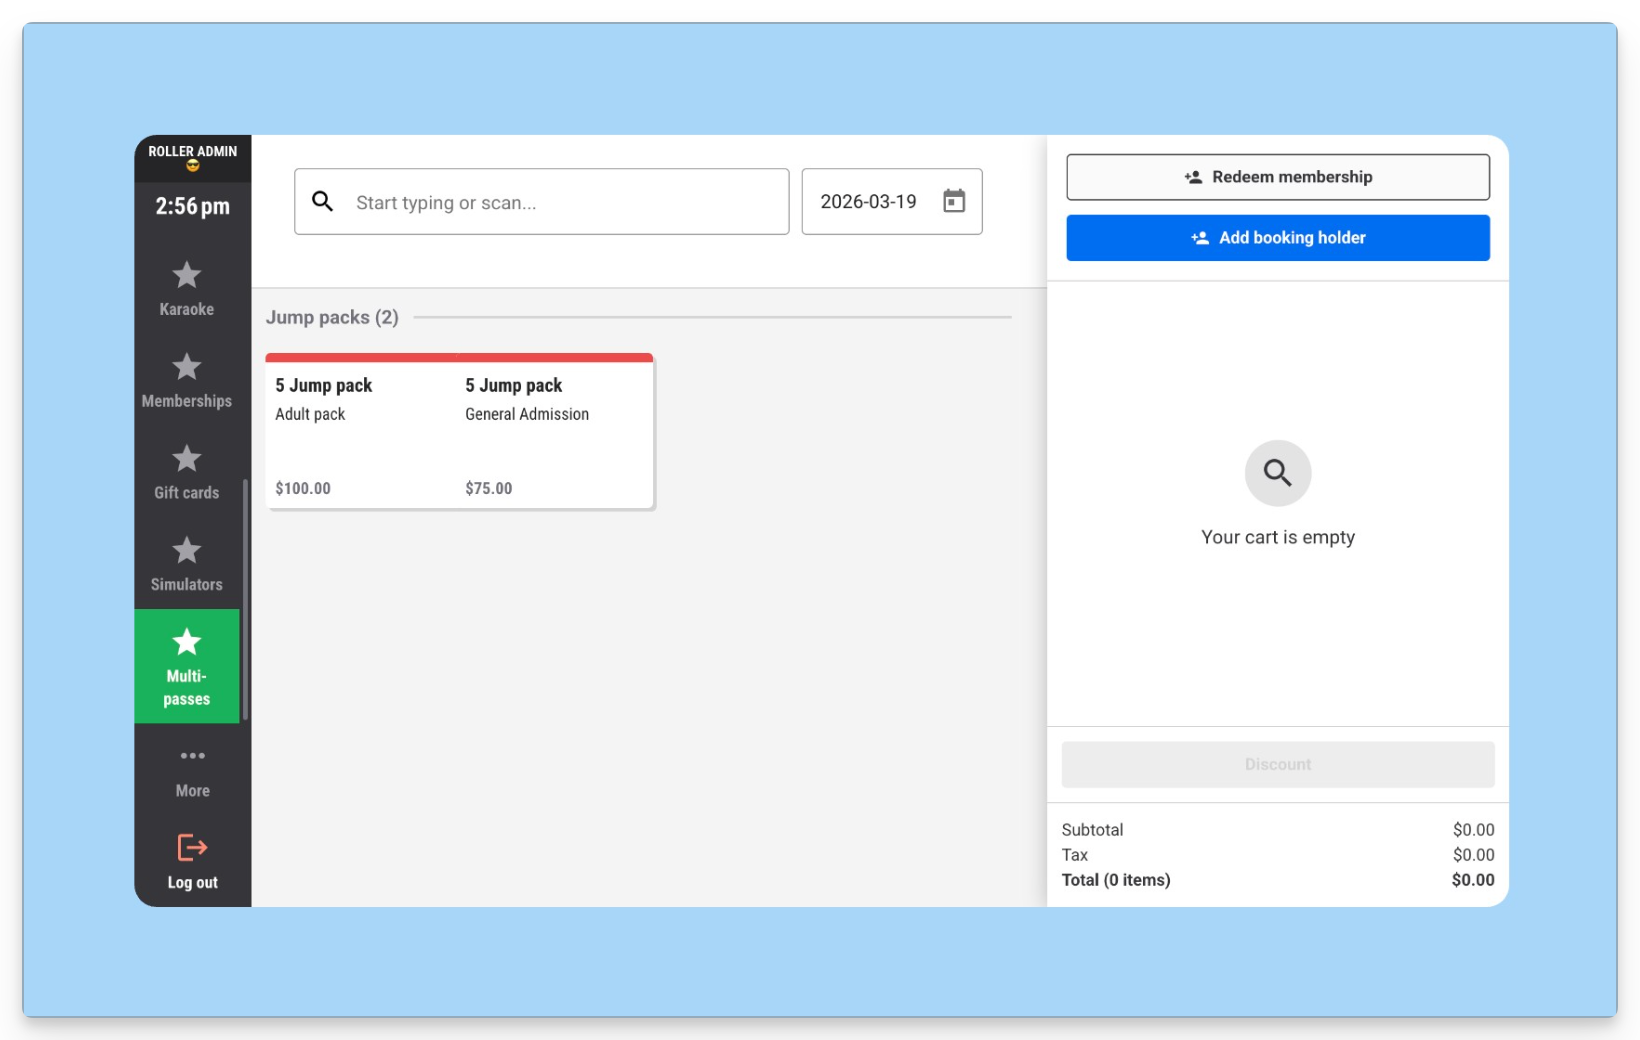
Make a booking and redeem a multi-pass at POS:
Start at any product menu screen in POS and select Add booking holder.
Search for the multi-pass booking holder, ensure that their name and email address is correct. Select Apply.
Now, go to the menu in POS that contains the eligible passes for the multi-pass. If the session is covered by the multi-pass there’s a ‘multi-pass’ indicator on the tile.
Add the session(s) to the cart. The multi-pass will automatically apply to the eligible session(s) in the cart.
Select Pay total. This will be $0 if there are no other items in the cart, other than the sessions covered by the multi-pass.
If a guest also has a membership, applying the multi-use pass will remove any membership discounts and vice versa.
Create a booking and redeem a multi-pass through Venue Manager:
Go to Bookings > Create booking.
Enter the booking holder details using the same email address the guest used when purchasing the multi-pass.
Select Add booking holder.
Search for and select the included session pass product.
Select how many session pass variations.
Add the items to the booking.
Reserve/hold the booking.
The multi-pass will automatically apply to the eligible session(s) in the cart. This will be $0 if there are no other items in the cart other than the sessions covered by the multi-pass.
To track pass In the Guests tab in Venue Manager,
View multi-pass products in online accounts
Guests can login to their online account, or sign up for an online account using the email address attached to the booking details used when purchasing the multi-pass.
The guest can view the pass, remaining visits and the expiry date in their online account. In a future release they will also be able to see their redemption history.
To learn more, see the guide Sign in and use online accounts.
FAQs
Do guests need an account to use their multi-pass?
Yes. Guests must log in to their online account to use their multi-pass online. If they’re not logged in, they’ll be prompted to log in when they try to redeem it.
Can guests choose which sessions to apply the multi-pass to?
No. Multi-passes are applied on an all-or-nothing basis. If the pass is selected, it will automatically cover all eligible sessions in the booking.
What happens if the booking total is $0?
This means the multi-pass has fully covered the booking. This is expected and no payment is required.
Can a guest use their multi-pass straight after purchasing?
Yes. Guests can use their multi-pass immediately after purchase, in a new booking.
Can multi-passes be shared between guests?
Multi-passes are linked to a single guest account and cannot be shared. Although, a guest can purchase tickets on behalf of multiple guests using their account.
What happens if a guest has both a membership and a multi-pass?
Guests can choose which benefit to use, but only one benefit can be applied per booking.
What happens if a guest has more than one multi-pass?
ROLLER will automatically use the pass that expires soonest.
Why can’t I see the multi-pass when trying to redeem it?
Check that:
The guest is logged in (online) or added as the booking holder (POS or Venue Manager).
The guest has an active multi-pass.
The sessions in the cart are included in the multi-pass.
Can I remove a multi-pass from a booking?
Yes. You can remove the multi-pass from the booking and the session prices will return to normal.
Can I refund a booking that used a multi-pass?
Yes. Refunding a booking will return the sessions back to the guest’s multi-pass instead of refunding money.
What happens if a multi-pass expires?
Any unused sessions will no longer be available once the pass expires. Guests can purchase a new multi-pass to continue.
Can multi-passes be used with all products?
No, they currently only work with session pass products.