HQ venue permissions let you control what your venues can create or change, helping you maintain consistency across all venues. You can also create custom permissions groups to simplify venue management — updates apply automatically to all venues assigned to a custom group.
This guide shows you how to create and manage venue permissions in your HQ account.
HQ subscription
Available for all HQ venues. To get started, contact your customer success manager or the support team.
How it works
System venue permission groups: Every HQ includes two built-in groups you can’t change:
All permissions (all permissions enabled)
No permissions (no permissions enabled)
Custom venue permission groups: Create your own groups for different venue types (eg franchise vs owner-operated).
Default venue permission group: Choose which group is applied to all new venues by default.
For a list of all HQ venue permissions, refer to the guide HQ venue permissions by feature.
View and manage venue permissions
From HQ Venue Manager, go to Venues > Permissions.
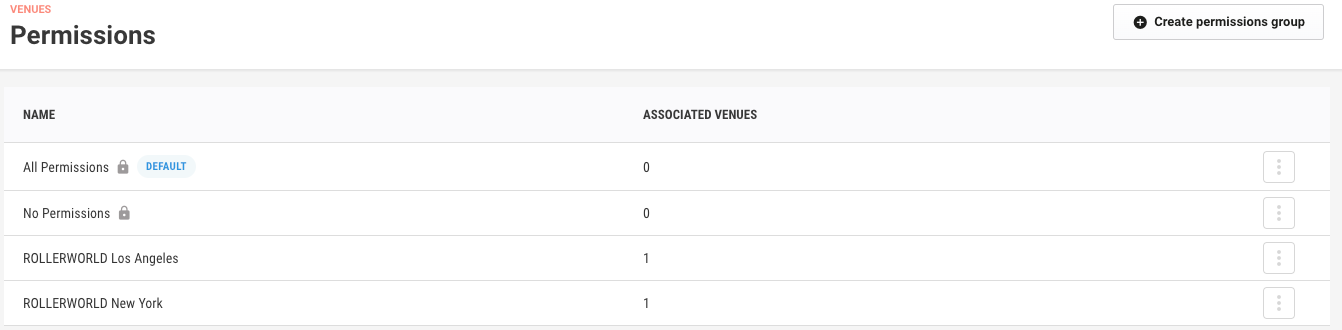
A list of all groups appears, showing:
The two system groups (marked with a lock icon)
Any custom groups you’ve created
The current default group
The number of venues assigned to each group
Create or duplicate a permissions group
You can build a new permissions group from scratch or duplicate an existing one to save time.
From HQ Venue Manager, go to Venues > Permissions.
Select Create permissions group (or use the options menu (3 dots) › Duplicate).
Enter a descriptive name (eg Cannot edit products).
Select the permissions you want to allow.
Save and assign the group to venues.
Only one permissions group can be assigned to a venue.
Assign or change groups
Assign to a venue
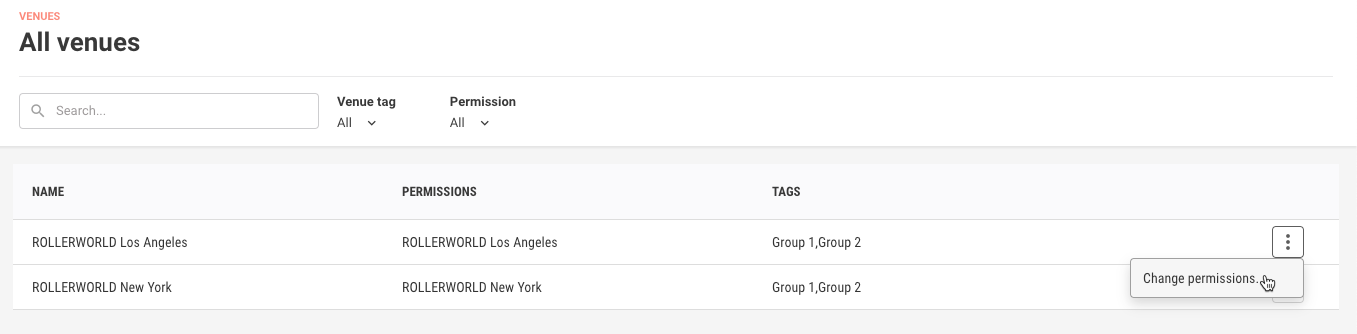
From HQ Venue Manager, go to Venues > All venues.
Open the options menu (⋮) for the venue, then select Change permissions.
Select a group and confirm.
Change the default group
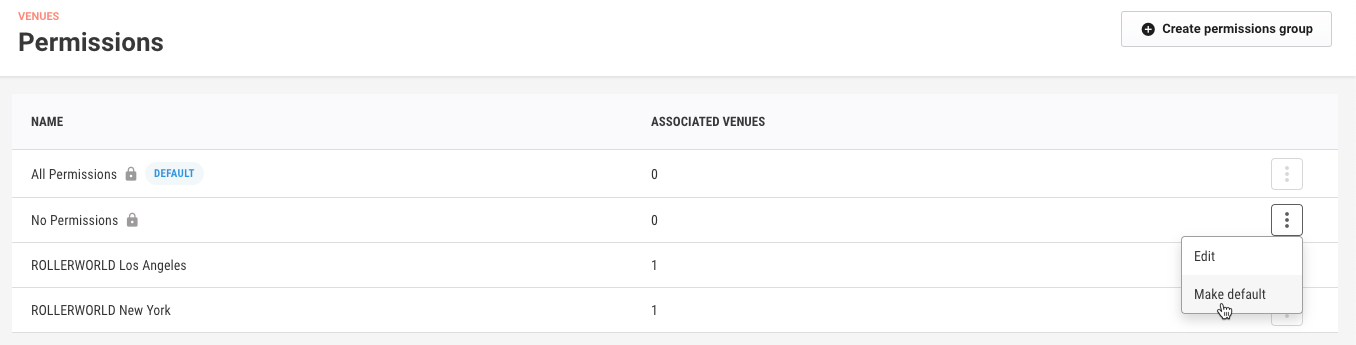
From HQ Venue Manager, go to Venues > Permissions.
Open the options menu (⋮) for the group you want to set as default.
Select Make default.
Edit a group
You can edit any custom group you’ve created.
You can’t edit the two system groups.
Any changes you make automatically apply to all venues assigned to that group.
Steps
From HQ Venue Manager, go to Venues > Permissions.
Open the options menu (⋮) for the group.
Select Edit, adjust the permissions and save.