With HQ staff management, you create staff once in your HQ account, assign them a role and give them access to one or more venues. Their sign-in details and permissions automatically apply everywhere, saving time and keeping access consistent.
HQ subscription
Available for all HQ venues. Contact your customer success manager or the support team to get started.
How it works
Create staff once in HQ — add details, assign a role, and choose venues.
Assign roles — use system roles (default) or HQ-managed custom roles you create.
Control access — select the venues or staff groups each person can sign in to.
Update centrally — updates made in HQ automatically apply to all assigned venues.
For example, add a new POS operator in HQ, give them access to 3 venues in one location, and they can sign in with the same account everywhere.
You can also share HQ-managed custom roles with your managed venues. This allows you to create staff roles with modified permissions and share them across all your venues. Learn more about HQ-managed roles
Roles and permissions
When you add staff in HQ, you must assign them a role:
System roles (default, can’t be edited)
Administrator — full access to everything
Manager — access to most areas, excluding some security/reporting
Booking agent — manages bookings and accesses POS
POS operator — access to POS only
Dashboard — view dashboard insights only
Custom roles
Create HQ-managed custom roles by tailoring permissions to your business needs. These can be shared with managed venues, ensuring consistent access across all locations.
Create staff members in HQ
The permission Can access staff settings is required to create and edit staff member accounts. Only the administrator system role has this permission enabled by default.
In your HQ account, from Venue Manager, go to Settings > Staff > Add a staff member.
Enter the staff details.
Choose a system role (with default permissions) or a HQ-managed custom role (with permissions you’ve tailored to your business needs).
Select the venue/s the staff member can have access to or select from staff groups.
Select a default venue for the staff member.
Send Save and send invite to save the staff record and email an invite to sign in.
Edit staff member accounts in HQ
To update details, change roles or adjust venue access:
In your HQ account, from Venue Manager, go to Settings > Staff.
Find the staff member you wish to edit and select the options menu (⋮) next to their name.
Select Edit and update the staff member's details, role or venue access.
Select Save to apply the changes.
Updates made in HQ automatically apply to all managed venues the staff member has access to.
View staff members in managed venues
Managed venues can view all staff member accounts, including those created in HQ.
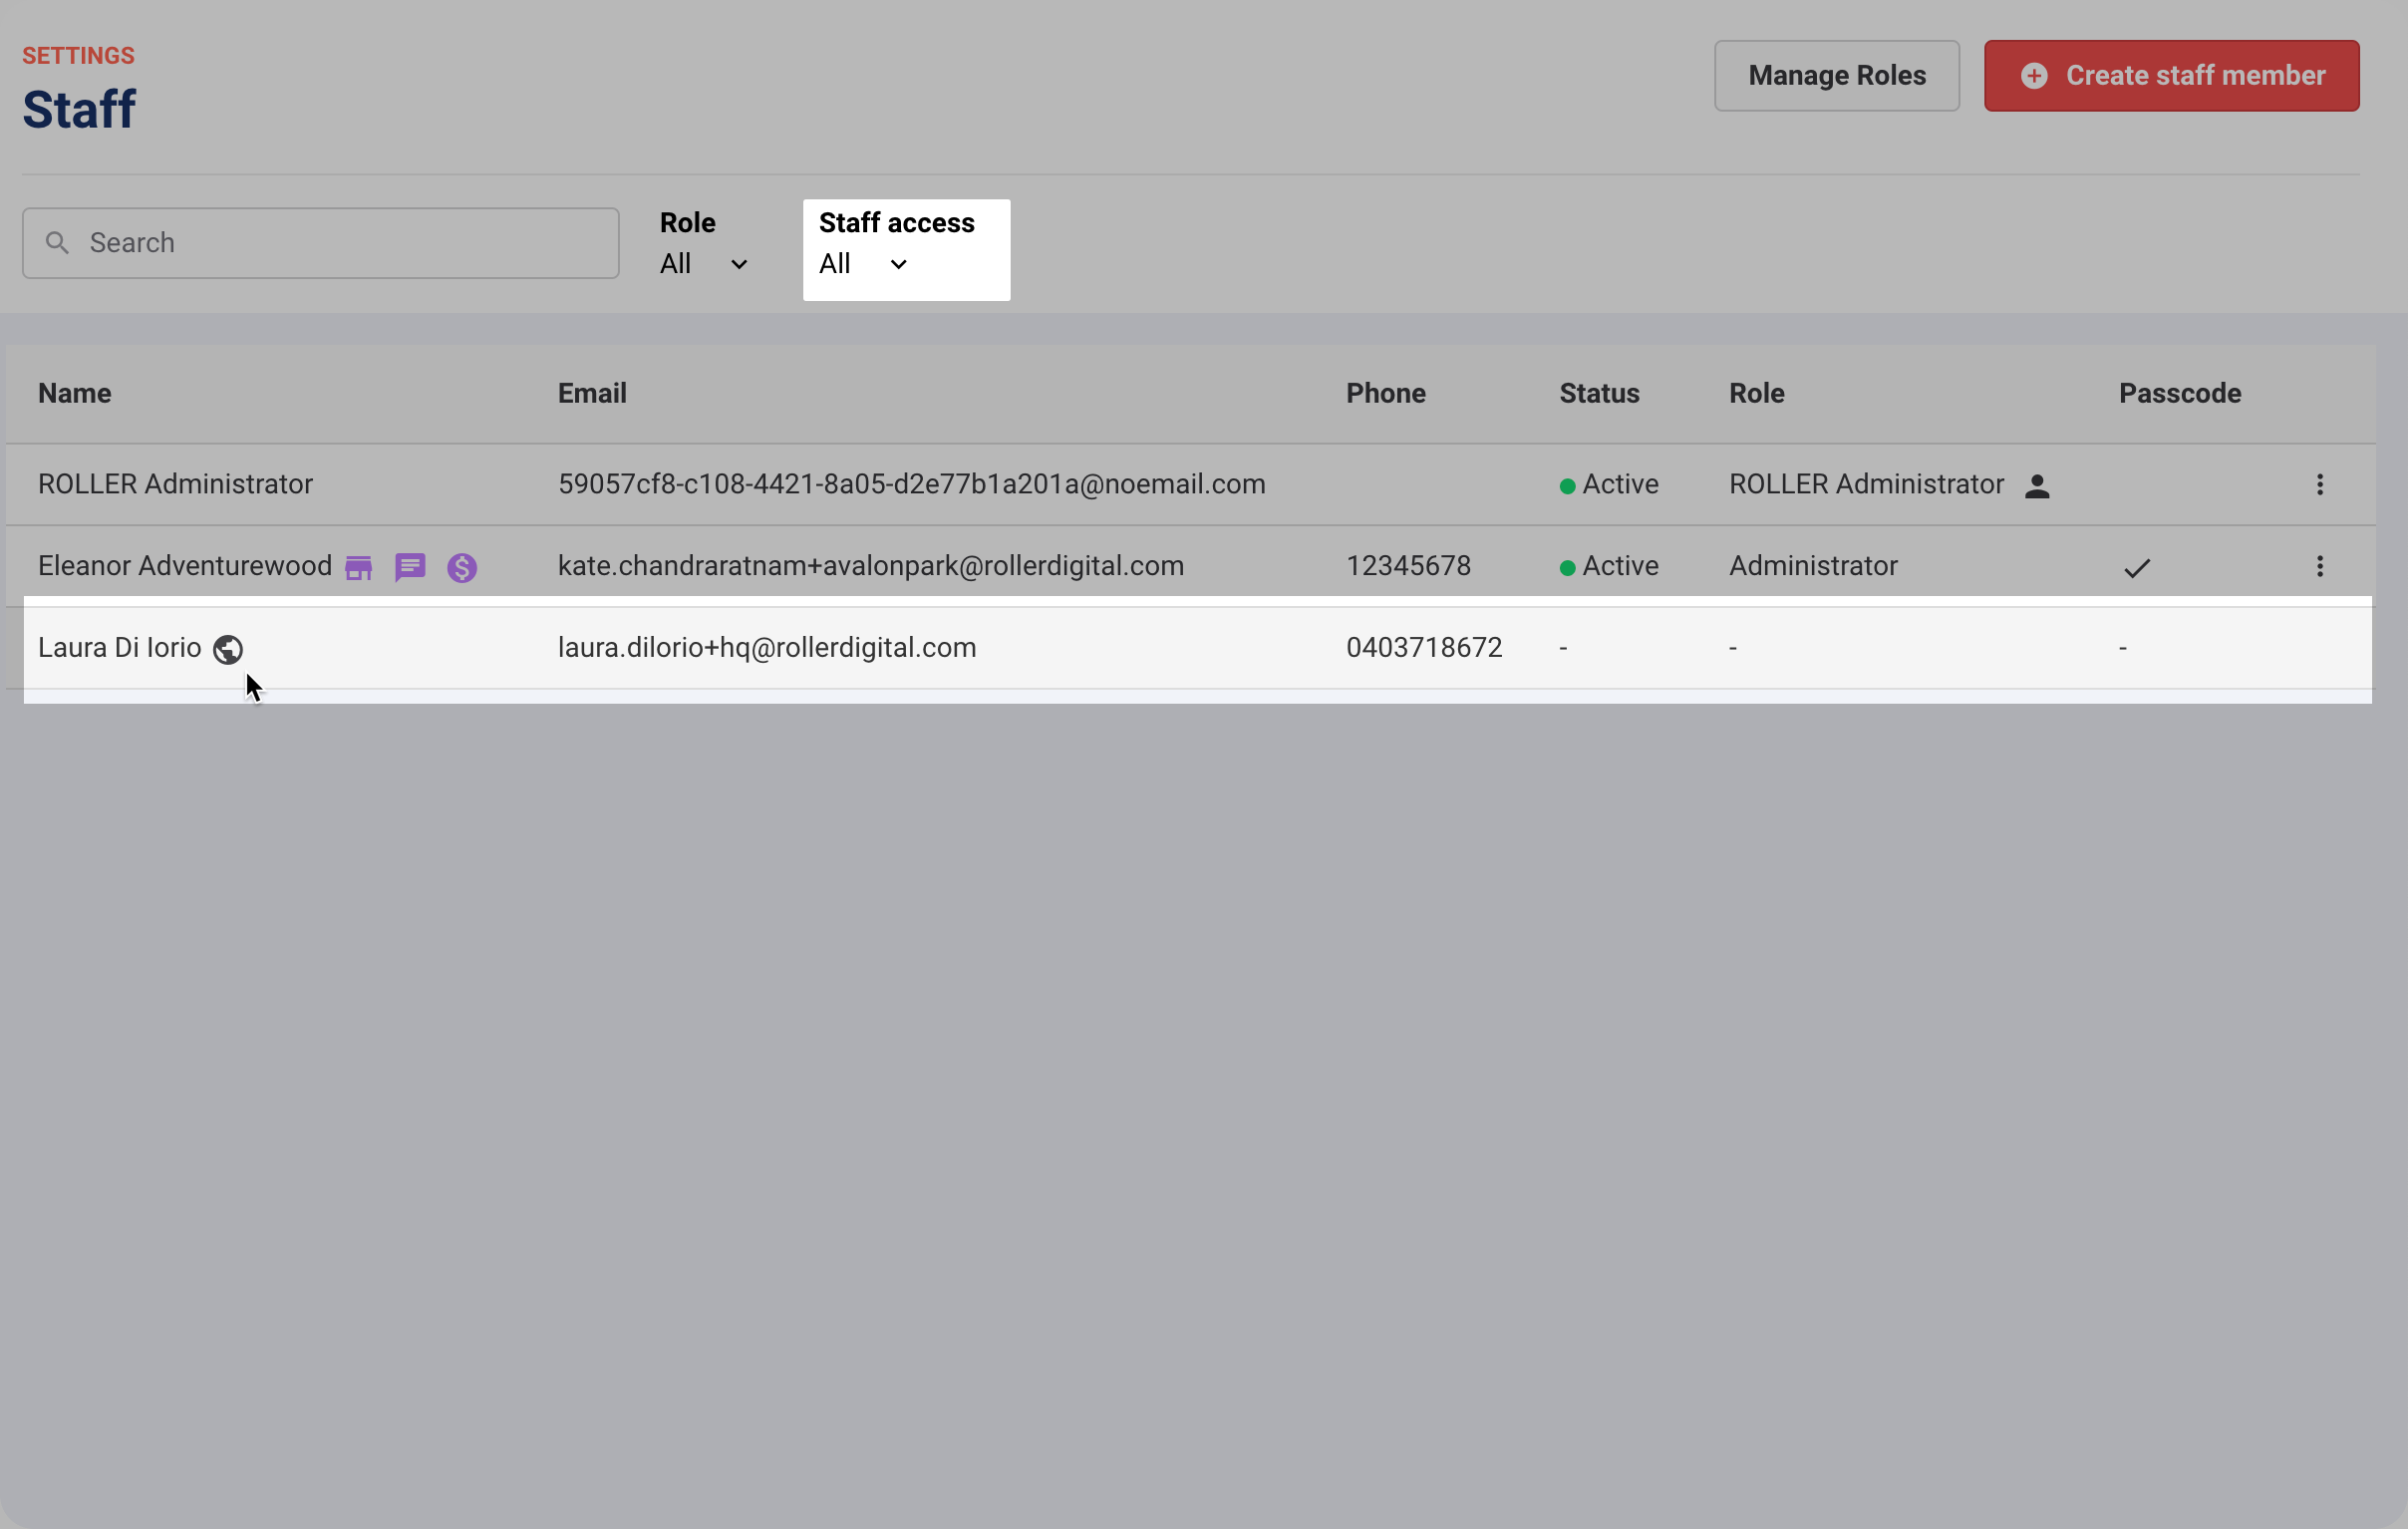
HQ-created staff are marked with a globe icon in the staff list.
Staff with permission to edit staff settings can only edit details for staff they created locally. HQ staff can only be edited at HQ.
Staff in managed venues with the Can access staff settings permission can create and edit staff members within their own venue. The administrator system role has this permission enabled by default. However, they can only view staff members assigned from HQ and cannot edit their details.
To view staff created by HQ within a managed venue:
In the managed venue, from Venue Manager, go to Settings > Staff > All staff.
By default, all staff created by the managed venue will appear in the list.
Use the Staff access filter to view all staff including those assigned to the venue from HQ.
A globe icon will appear next to the names of staff added from HQ, indicating they likely work for HQ across multiple venues.
Restrict role assignment to HQ-approved roles
To prevent venues from creating and assigning their own custom roles:
Disable the permission Can assign managed venue custom roles.
This ensures venues can only use roles created and approved in HQ.
By default, Administrators can assign custom roles. To restrict this, create a custom HQ role with the permission disabled.
Learn more about role permissions in ROLLER
Switch between your HQ account and managed venues
From Venue Manager, select your account icon (person icon) at the bottom of the main menu.
Select Switch venue.
Choose the venue you want to access — it opens immediately.
Learn more about how to switch between the venues you have access to.