As we wrap up an incredible year, we’re excited to unveil the final 2024 release, packed with updates to finish strong and set the stage for a stellar 2025! 🎉 This month's update is all about making operations run more smoothly and boosting sales.
Here's a quick overview:
Streamlined POS navigation with folders to simplify menu navigation, reduce transaction times and keep your menus organized.
Easier split payments at POS for a flexible, fair way for groups to divide bills for unpaid tabs including more than one stock product, improving the payment experience.
HQ checkouts for consistent, centralized online checkout management across venues, saving time while allowing venue-level branding.
More flexible Buy and Get discounts to mix products such as tickets and merchandise into targeted, high-impact promotions.
Improved rescheduling at POS to make booking adjustments easier for your team and guests.
Read on for the details!
For minor updates and platform fixes, refer to our changelog.
Streamline your POS menus with folders
Plan: Available on all plans
Preview: From 26 November in ROLLER Playground
Target release date: 3 December
For venues with restaurants or bars, having to scroll through a long list of stock products to find what you want at POS is time consuming and inefficient, resulting in slower service and impacting the guest experience.
But now, streamline your POS menus with folders. Folders make it easier for you to find what you want, reducing the time it takes to put through a purchase, resulting in a better guest experience.
A well-organized POS with folders keeps the interface less cluttered, especially if you have a large list of stock, making it easier for staff to use without getting overwhelmed.
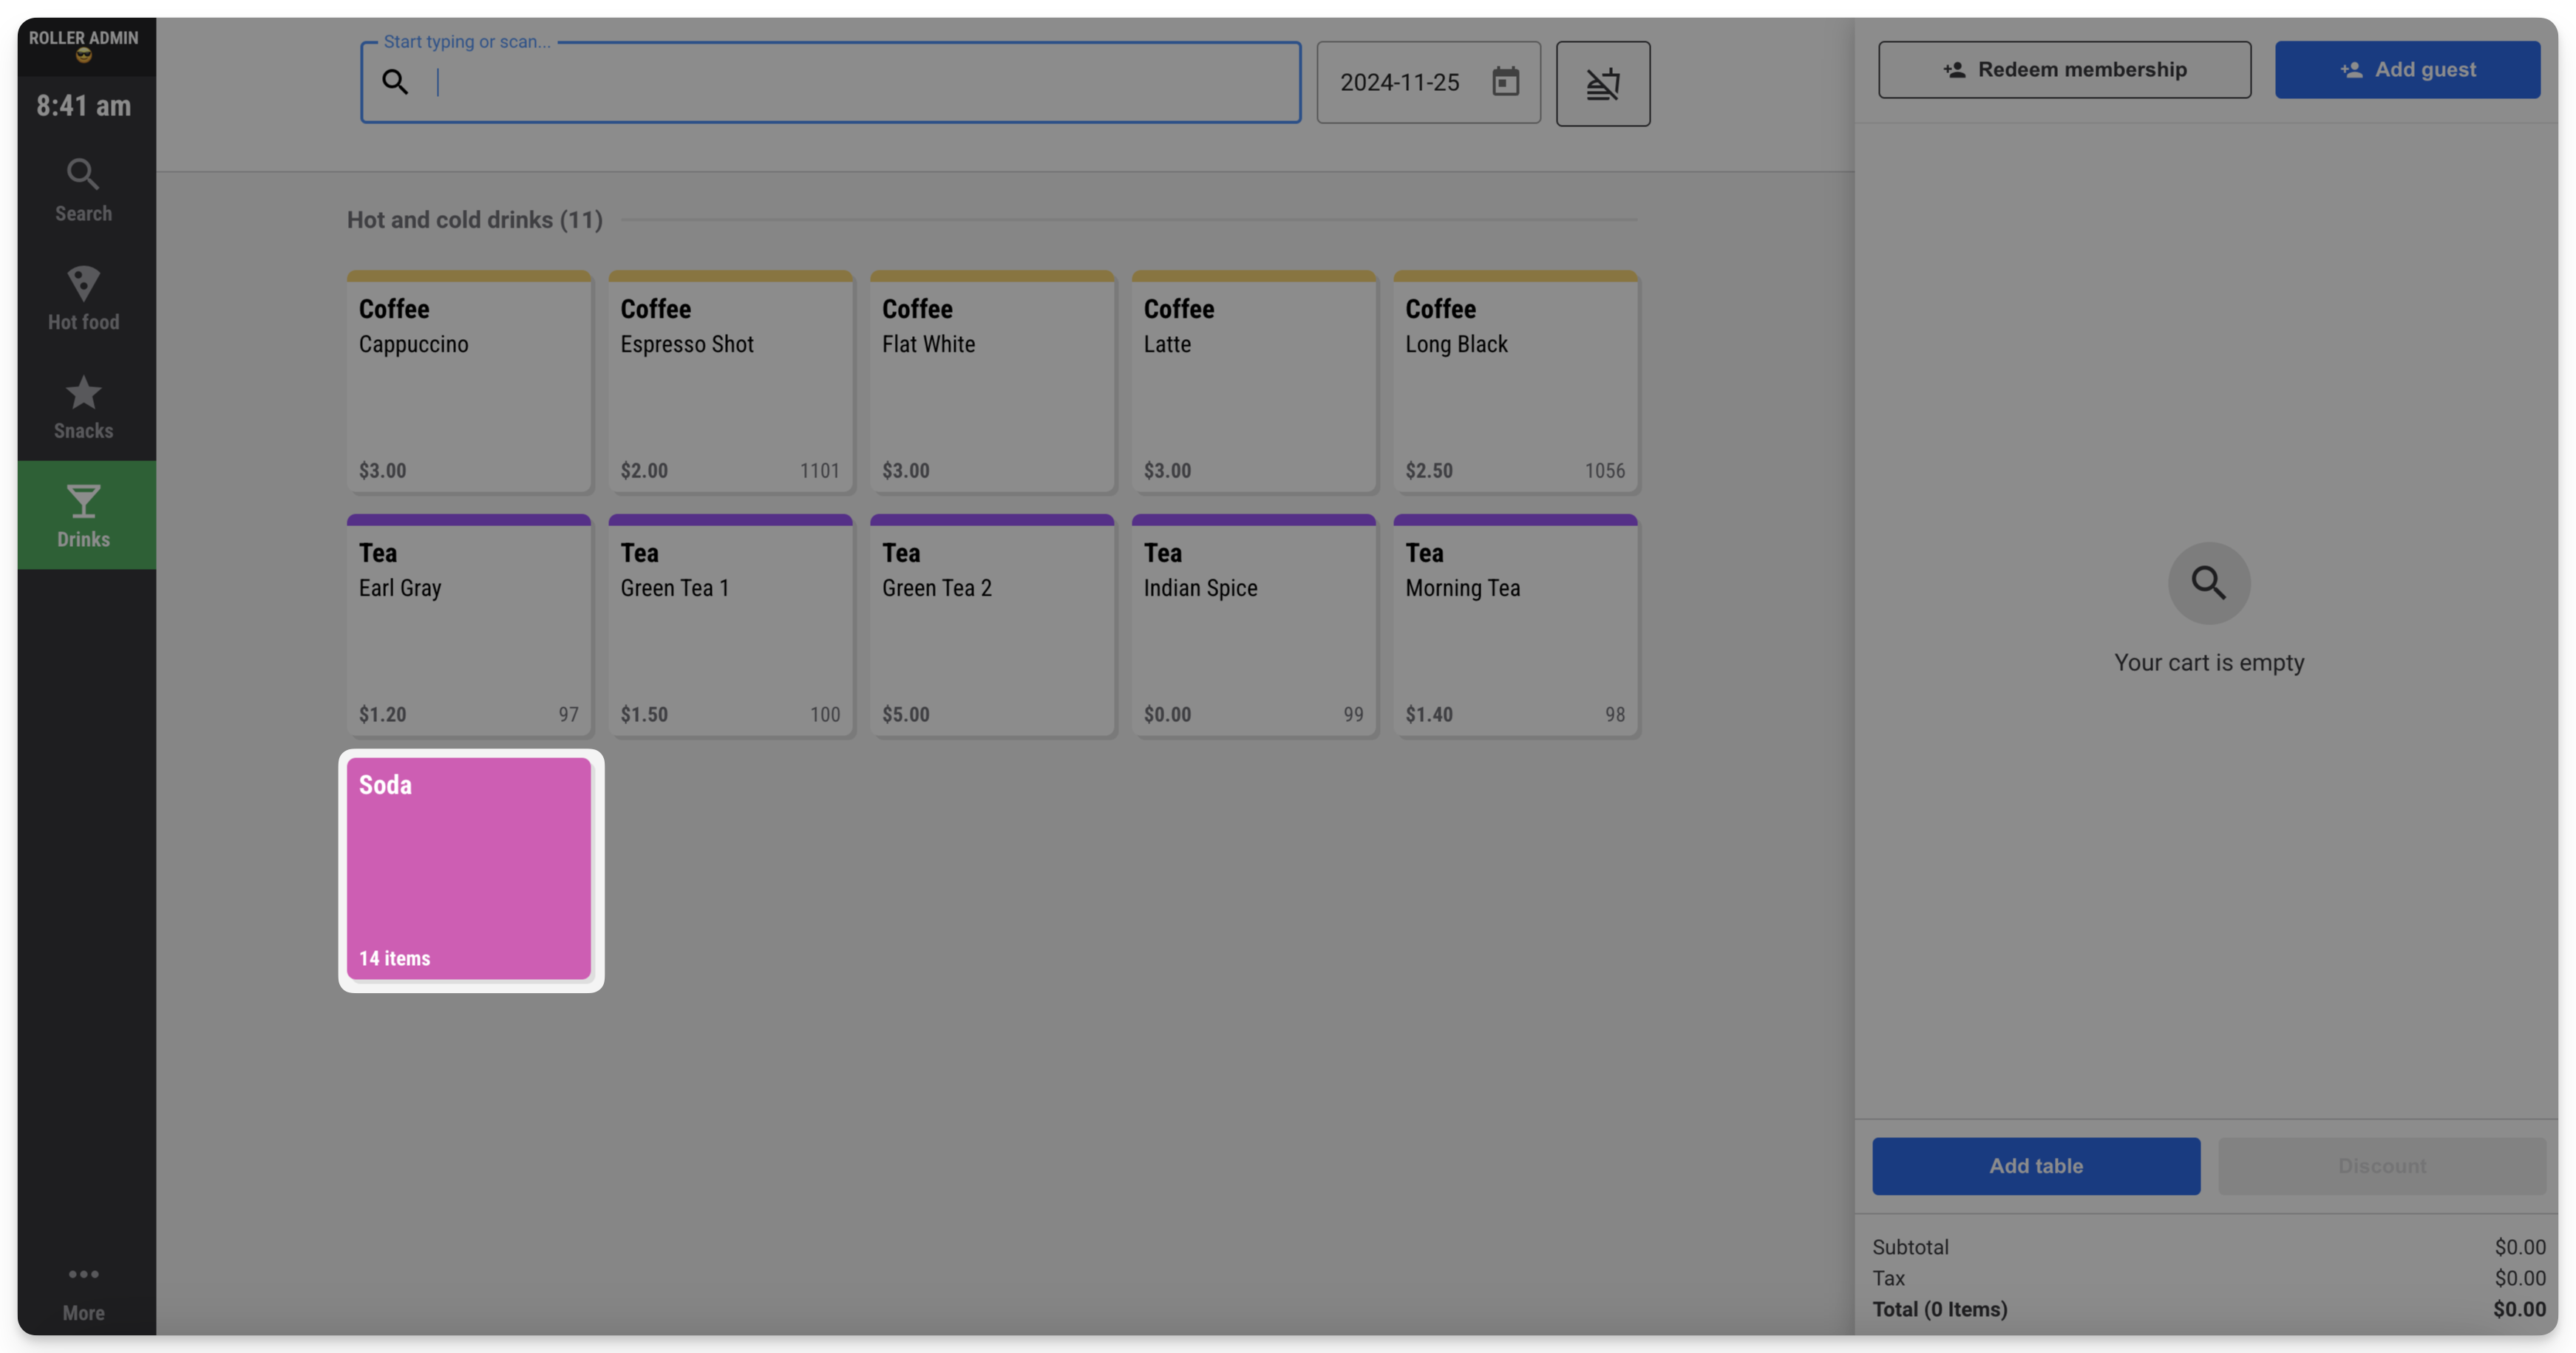
To create POS folders, follow these steps.
From Venue Manager, go to Apps > Point of Sale.
Select Devices (for standalone setups) or Templates (for updating multiple devices at once). Then, select the device or template you want to add a POS folder to.
Select Unlock to edit menus in the top right.
Select the menu you want to add the folder to and then select Add folder.
Give your folder a Name and choose a Tile color for the folder.
Then, add your products to the folder. You can choose to select your products by Specific tag or by choosing Specific products.
We recommend selecting products by tag because product tags reduce the administrative burden of manually managing and updating your POS folders. When you add or remove a tag from a product, it’s automatically added or removed from your POS folder too — no need to make manual updates!Select your tags or products and then select Apply.
Once you’ve chosen all the products you want to add, select Add folder.
POS folders can only be used to group stock products.
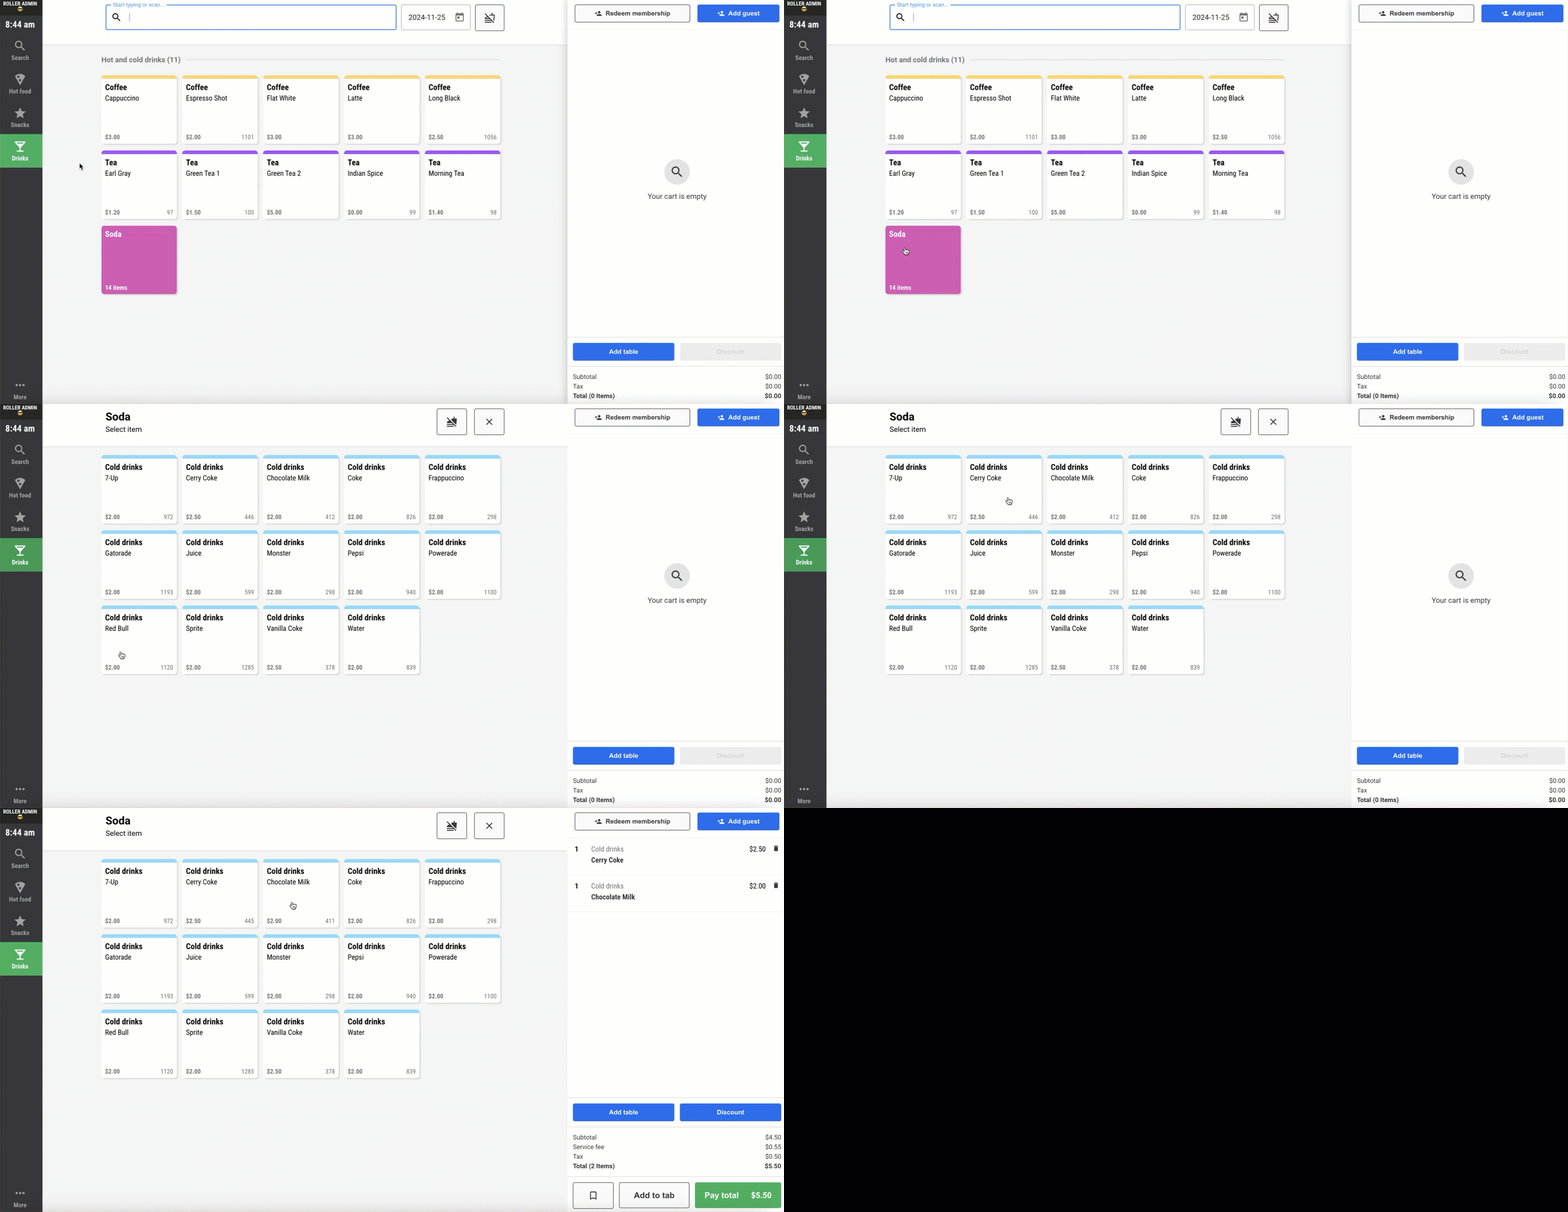
At POS, when you want to add a stock product in a folder to the cart, simply select the folder, find the stock product and add it to the cart.
Learn more
To learn more about POS menus, read the guide Create and manage POS menus.
Offer easier split payments at POS
Plan: Available on all plans
Preview: From 26 November in ROLLER Playground
Target release date: 3 December
Offering easier split payments at POS enhances the guest experience by providing a convenient, fair and flexible way for groups to settle their outstanding bills. This feature simplifies the payment process, reducing friction for both guests and staff.
If you have an unpaid tab or an unpaid booking at POS, which includes more than one stock item, you can use the split payments feature. Follow the steps below.
Search for and select the unpaid booking or the unpaid tab.
From the bottom of the POS screen, next to Total owing, select the options menu (3 dots).
Select Split payments from the list.
Then, select which stock items the guest will pay for and select Pay. Go through the payment flow as usual.
To take another payment, select Take another payment and follow step 4 again. You can continue to do this until all stock items in the booking have been paid for.
When the booking has been paid, select Done to complete the transaction and close out the tab or unpaid booking.
Only stock products and stock-only packages will display for you to split. An unpaid tab or booking must have more than one stock item included for split payments to be an option.
Learn more
To learn more about split payments at POS, read the guide Take split payments at POS.
Consistent online experience for all your venues with HQ checkouts
Plan: Available on all plans
Preview: Not available on playground to preview prior to release
Target release date: 3 December
This feature is now out of beta!
Running a successful venue comes with its challenges, and those challenges are multiplied when you manage a group of venues. For example, when updating your checkouts one small change, like adding a new product, can result in hours of work as you make that change across each of your managed venues. Until now!
With HQ checkouts, you can build your checkouts in one, centralized place and publish your changes to all your managed venues with just a few simple clicks! This saves you time, reduces your administrative load and creates a consistent checkout experience across each of your venues.
When using HQ checkouts, HQ-managed venues have the flexibility to customize the appearance and branding of a HQ checkout they’ve added to their venue, without de-linking from the original HQ checkout.
To walk through how to create a HQ checkout, watch the video below.
Learn more
To learn more about HQ checkouts, read the guide Create and manage HQ checkouts.
Give your guests more value with upgraded Buy and Get discounts
Plan: Available on all plans
Preview: From 26 November in ROLLER Playground
Target release date: 3 December
Previously, Buy and Get discounts were limited to a single product type, like “Buy two Adult Jump Passes, get one Adult Jump Pass free.”
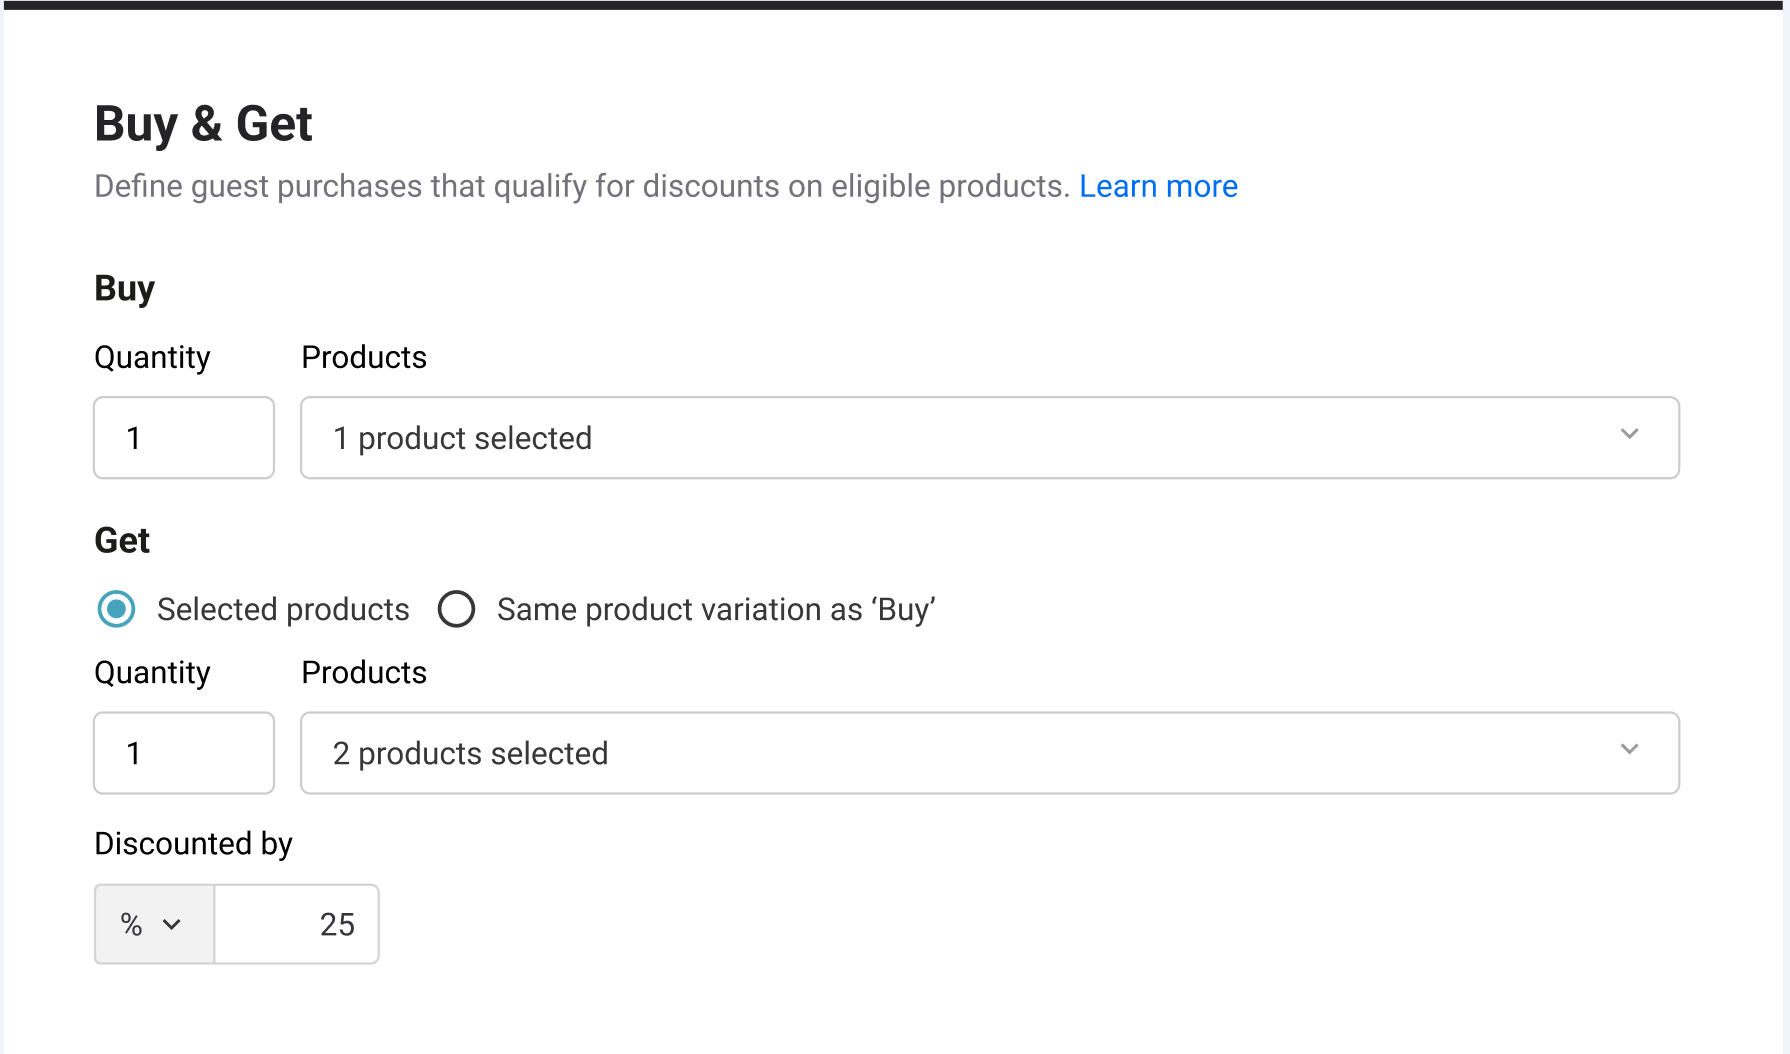
Now, you can mix and match products to create customized deals! For example, “Buy two Adult Jump Passes, get 50% off Jump Socks.” This flexibility lets you bundle products to delight guests, boost sales, and keep them coming back!
To customize a Buy and Get discount, you’ll:
Choose the Buy Products: Select the products guests need to purchase to qualify for the discount.
Choose the Get Products: Select the products they’ll receive as part of the offer.
Set the Discount Type: Pick the type of discount you want to offer:
Percentage off
Dollar amount off
Free product (100% discount)
Learn more
To learn more, refer to the guide Create a discount code.
Easily reschedule session and standard passes at POS
Plan: Available on all plans
Preview: From 26 November in ROLLER Playground
Target release date: 3 December
We know that guest's plans can change in an instant, which is why we've improved our reschedule feature at POS! Now, you can reschedule standard and session passes without needing to delete the original tickets.
And, we’ve made it easier to find the Reschedule option by putting it right on the booking information screen.
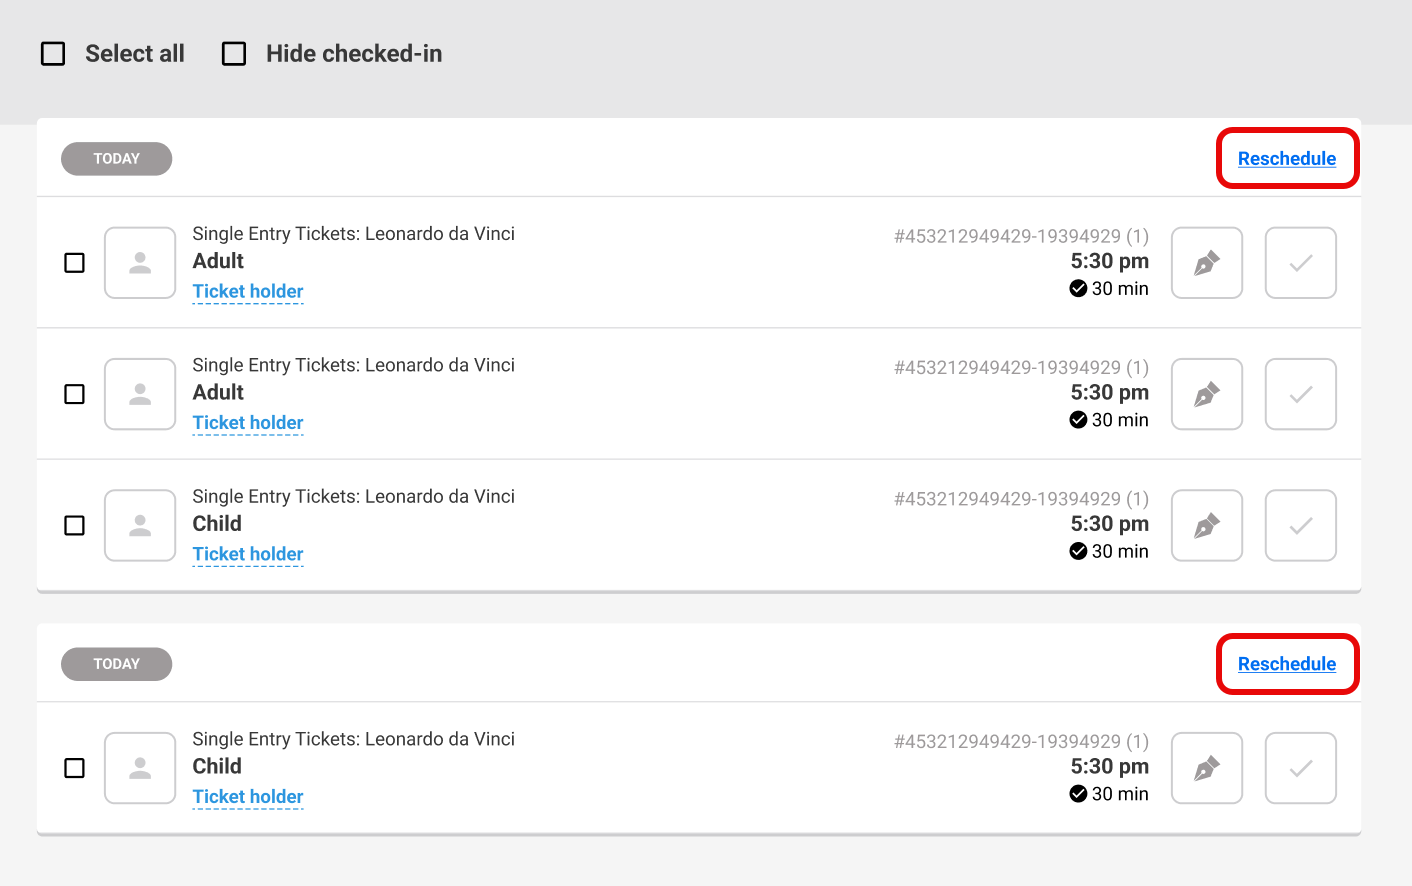
How to reschedule at POS:
With the booking open at POS, select Reschedule.
Select the items you’d like to reschedule, then choose Reschedule.
On the calendar, choose the date to reschedule to. For session passes, you’ll also select a new session time.
Finally, select Confirm. ROLLER moves all booking details, including any signed waivers to the new booking time.
Keep in mind, redeemed standard and session passes can’t be rescheduled. You’ll need to unredeem them first and then adjust the booking as needed.
Learn more
To learn more, refer to the guide Reschedule bookings at POS.
Other news
From enabling SMS messages in French or German to enhancing online checkouts with clearer advance dates, we’re focused on improving clarity and communication. Plus, new functionality like sending orders to your KDS before payment and capturing zip codes at online checkout helps streamline workflows, reduce fees and boost revenue potential. Read on to learn more!
New Analytics dashboard: Gift card product sales dashboard
How many gift card sales am I making each day? Which channel is bringing in the most gift card sales? The gift card product sales insights dashboard makes it easy to answer questions like these. It shows how many new gift card item sales you're making across your sales channels, daily patterns and your top gift card variations. By tapping into these insights, you can adjust pricing, update product descriptions and launch targeted promotions to make the most of high-demand seasons such as the festive season. Learn more
Connect with your guests in their language with SMS translation
Previously, SMS messages sent from ROLLER were only available in English. Now, you can send booking agreement requests, payment links and other messages in French or German, giving your guests clear and personalized communication. Contact ROLLER Support to get help updating the language your venue's communications are sent in.
Display advance dates in online checkouts
The online checkout is more intuitive than ever with advance sales displaying clearly when a guest selects a product that has availability starting on a future date. This is great for new venues who want to start selling tickets in anticipation of opening, venues who run advance sales or event ticketing.
Send orders to your KDS without taking payment first
As part of ROLLER’s ongoing enhancements to tabs, you can now send orders through to your KDS devices without guests having to pay first.
For venues using the Fresh KDS integration, this means you can now take full advantage of the benefits of using tabs, like a better guest experience for larger groups and higher spend per guest.
Postcode/Zip code data capture embedded into progressive checkouts
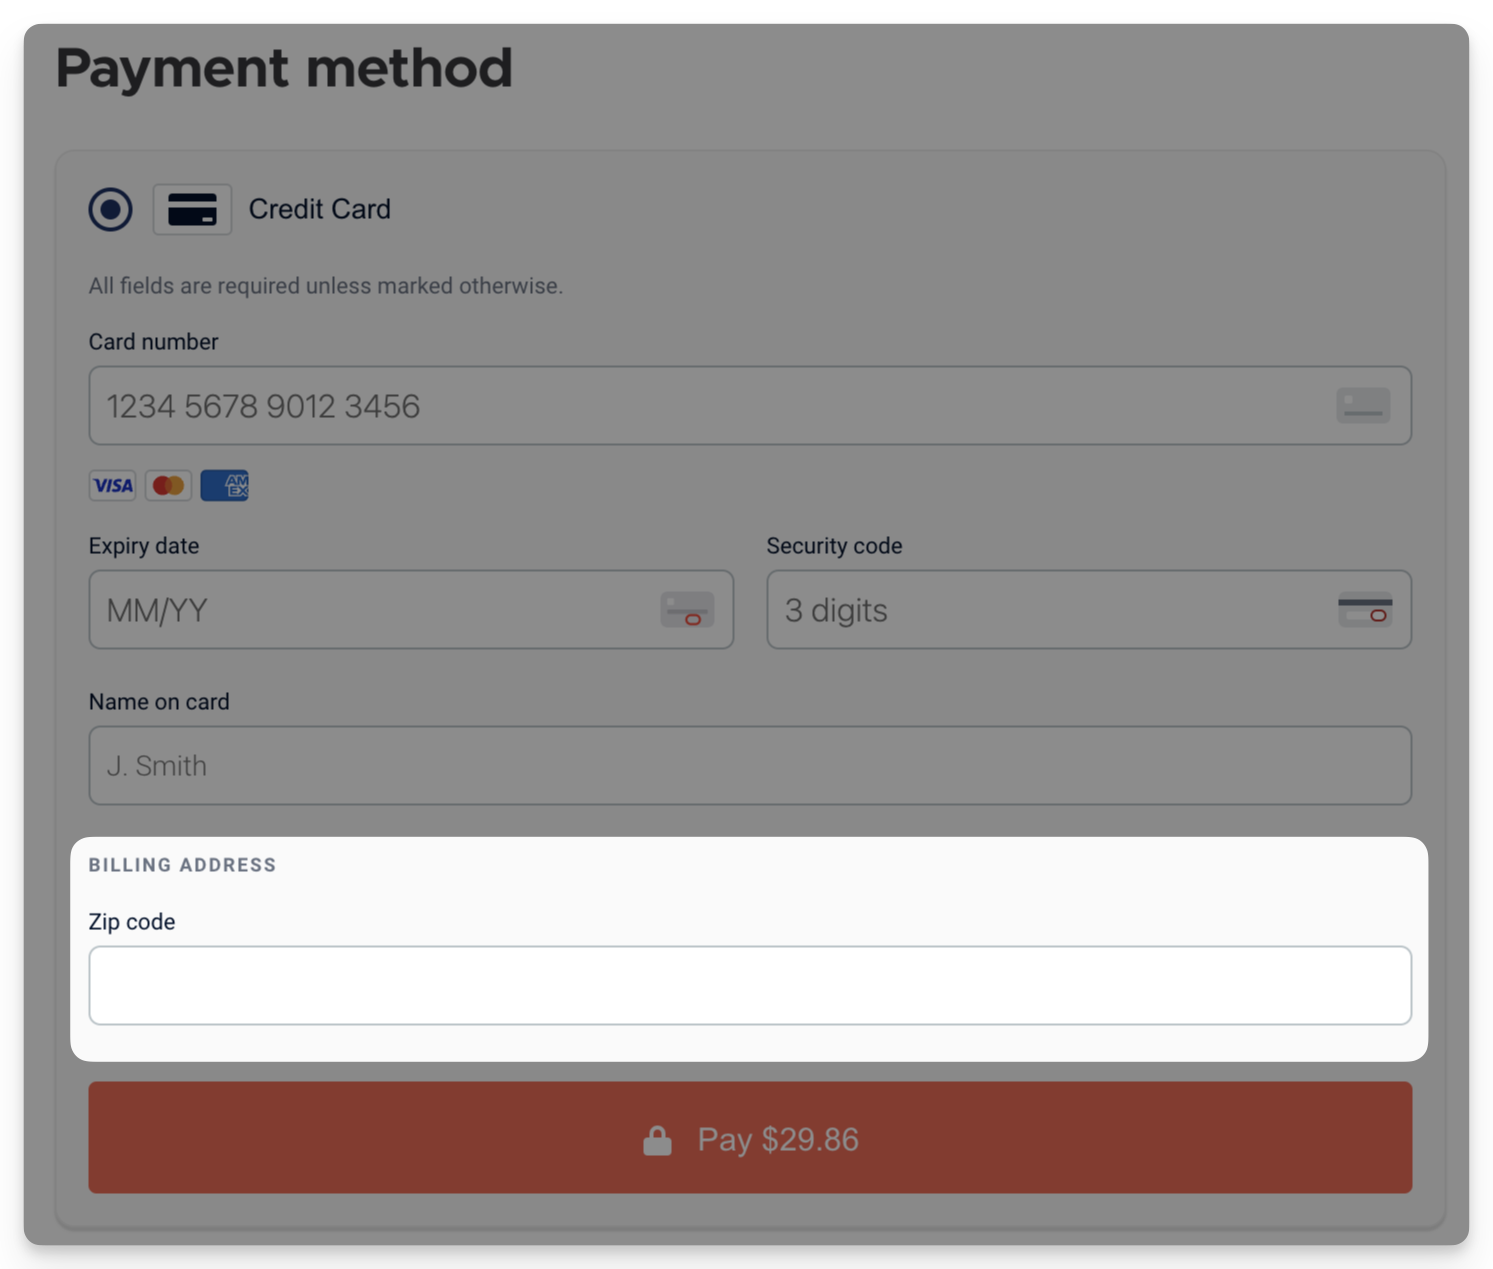
For all ROLLER Payments customers, we’re making an update to how guests complete their payment information on progressive checkouts. Guests will now be prompted to add their postcode/area code/zip code information. This will result in fewer fees being charged to you and an increase in authorization rates.