Guest segmentation lets you group your guest data in ROLLER based on similar characteristics and behaviors. Use segments to fine-tune your marketing campaigns, and to restrict discount codes so they're only redeemable by specific guests (eg VIPs, members or local guests).
This guide shows you how to set up rules to filter guests into specific groups.
After you've created your guest segments, you can use an email marketing platform to send guests personalized email campaigns and automated messages. To do this, you can either connect ROLLER with Campaign Monitor or import the segment list into the email marketing platform you like to use.
If you operate multiple venues from HQ and want to define segments once across your group instead of repeating them in every managed venue, see Set up guest segments at HQ for the HQ workflow.
Pro feature
Create targeted marketing campaigns and automations with guest segmentation. To unlock guest segments with a Pro plan or above, contact your customer success manager or the support team to upgrade.
For more information on how to allow guests to subscribe to marketing communications in ROLLER, refer to the guide Subscriber opt-in.
Before getting started
What do you want to achieve by creating the guest segment? Here are some examples:
Upcoming booking reminders
Special offers for loyal members
Exclusive birthday discounts for guests
Bringing back expired or canceled members
Membership renewal incentives
Targeted marketing for guests in local or regional areas
Promoting new products, memberships or experiences based on previous purchases
Engaging guests who gave a high overall score ratings, are VIPs and big spenders
Create a dynamic date rule segment
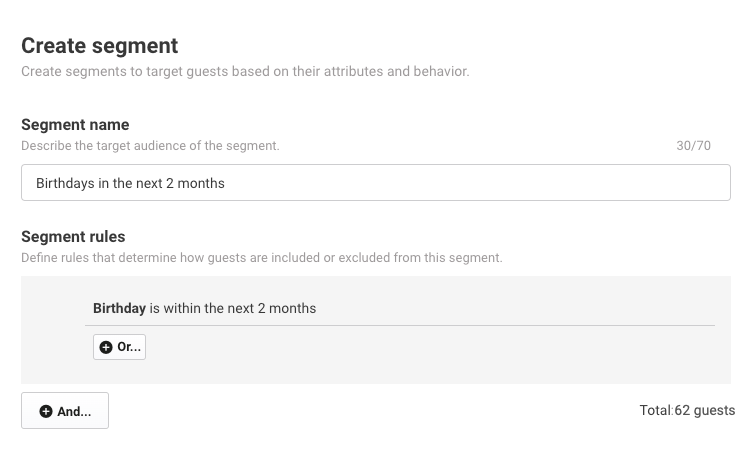
Example segment: Guests with upcoming birthdays in the next two months.
This segment can be created using one simple rule. As each day passes, the segment automatically includes new guests whose birthdays fall within the two-month period, and it will remove guests whose birthdays have already passed.
From Venue Manager, go to Guests > Segmentation > Create segment.
Name your segment to identify your target audience (eg Birthdays in the next two months).
Select Add to choose the rules for who to include or exclude.
Select the Birthday attribute to filter guests based on their annual birthday, regardless of the year they were born.
From the additional filter options, select Is within the next.
Enter the value 2 and select Months as the time range (in the next two months).
Select Add rule.
Select Save.
Combine two or more rules
You can combine different rules to more precisely segment your guests. When you combine segmentation rules, pay attention to "and" and "or" logic. You can create guest segments who meet any of your individual rules (using "or") or must meet all of them together (using "and").
Term | Meaning | Example | Description |
|---|---|---|---|
Or | "Or" logic creates a segment where guests only need to meet one of your rules to be included | Members who have an active status OR members who are pending activation | If a guest meets any of the rules (members who have an active status OR who are pending activation), they will be part of the segment.
|
And | "And" logic creates a segment where guests must meet all your rules to be included | All members who have an active status AND have visited your venue in the last month | If a guest meets both rules (active members + visited within the last 30 days), they will be part of the segment.
|
Create a segment using OR logic
Example segment: Local guests OR recent bookings (last 30 days) to encourage both these groups to return again during the summer season with a summer special.
From Venue Manager, go to Guests > Segmentation > Create segment.
Name the segment, such as "Local area guests OR recent visitors".
Choose Add to specify rules for who to include or exclude.
Select the Postcode (zip code) attribute.
Select the Starts with option to simplify the number of rules you need for postcodes/zip codes within a local or regional area.
For example, you can enter "94" to include all postcodes starting with "94", then select Enter on your keyboard.
If you wish to expand the area, enter the common characters that another zip code area you want to target starts with (eg "95"). Select Enter on your keyboard.
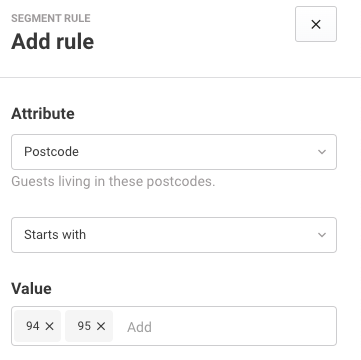
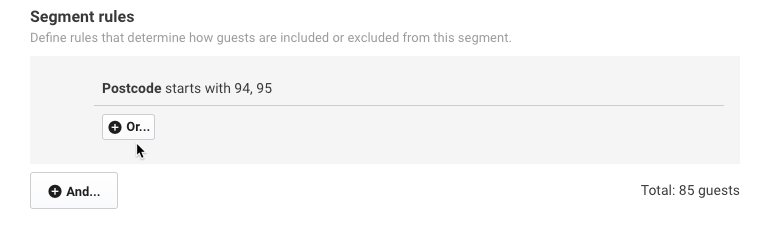
Select Add rule at the bottom of the panel. The segment will include all guests in ROLLER who have postcodes or zip codes starting with "94" or starting with "95".
To make the second rule, choose Or because we want to include guests who meet any of the rules.
Select the Last visit date attribute.
Select the option Is within the last.
Enter the value 30, then select Days in the time range (last 30 days).
Select Add rule.
Save your segment.
You now have a list of guests that includes guests from any of your rules: Any guests from the local area or any guests who visited in the last 30 days. This list will continuously update to include guests who meet either of the rules or exclude guests who no longer meet the rules.
Create a segment using AND logic
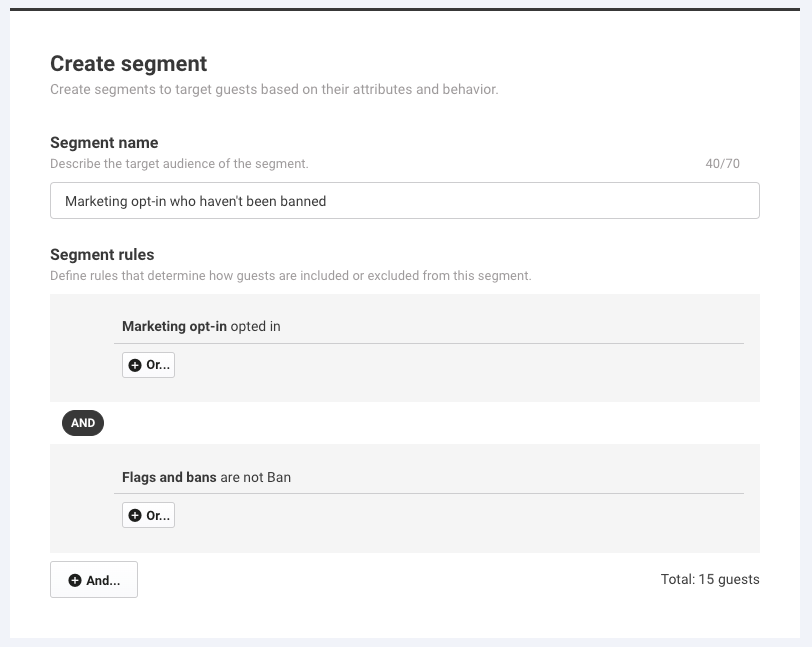
Example segment: Marketing opt-in guests who haven't been banned.
From Venue Manager, go to Guests > Segmentation > Create segment.
Name the segment, such as "All opt-in guests who haven't been banned".
Select Add to specify rules for who to include or exclude.
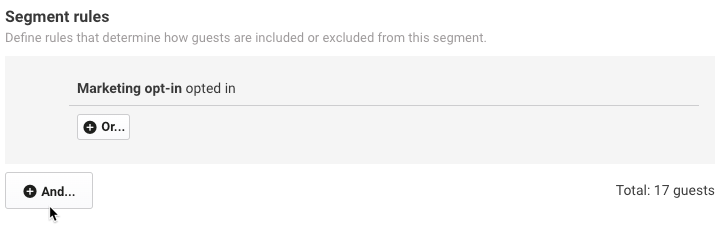
Select the attribute Marketing opt-in.
Select the option Opted in.
Select Add rule.
To make the second rule, choose And because we only want to include guests who meet both rules.
Select the attribute Flags and bans.
Select the option Are not.
Select the value Ban.
Select Add rule.
Save your segment.
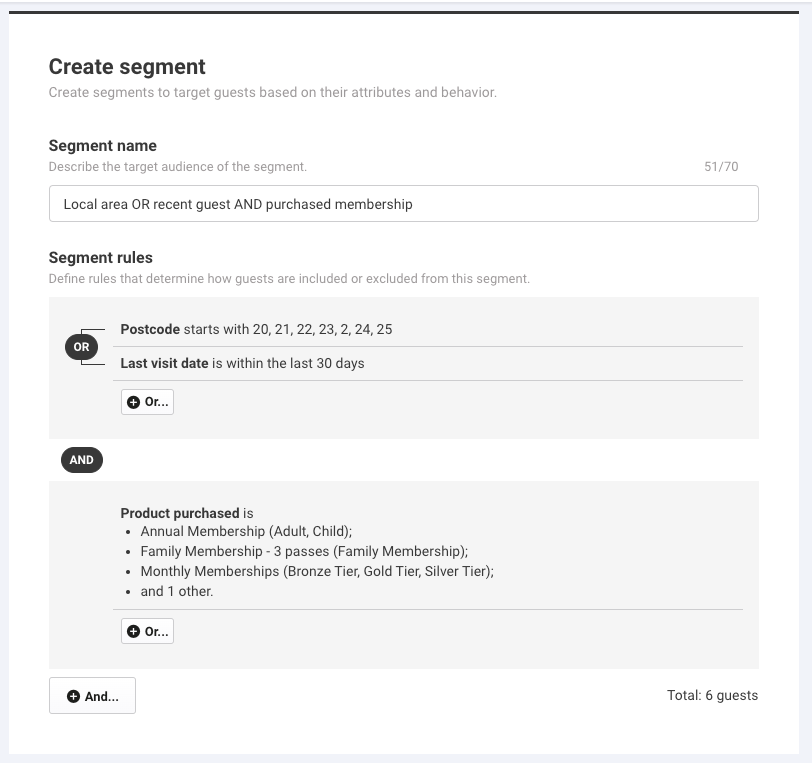
Combine "And" and "Or" Logic
You can can be creative and combine "and" and "or" logic to make even more specific segments.
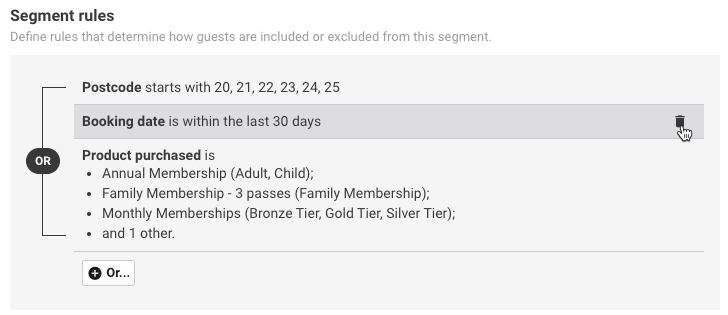
Delete a rule
Hover over a segment rule, then select the delete icon (trash can) to remove a rule.
Export your segment to CSV
You can export your guest segment to CSV, then upload the list to a marketing platform for your marketing campaigns and promotions. Within the export, you'll see the guest data that's been captured in ROLLER.
From Venue Manager, go to Guests > Segmentation > Segments.
For the segment you want to export, select Export to CSV.
Once exported, select the notification icon (bell) at the bottom of the left-side menu.
Select the download report icon.
If a waiver was signed for a minor when purchasing a product, the parent or guardian's first and last name captured during the signing process is included.
Your guests' Address, Suburb, City and State are included in the CSV export, however these fields aren't available as segment rule options.
Segmentation options
Review the list of rules and filters that you can use when creating segments.
Rule | Filters | Examples |
|---|---|---|
|
|
|
Postcode |
| Promotions to guests who live in the local or regional area. |
Product purchased | Is | Promotions to guests who bought a specific or multiple products |
| Only include guests who have opted in to marketing from ROLLER in your segment. | |
|
|
|
|
| |
|
| |
| Promotions to specific types of members | |
Booking status |
| Filter by booked or canceled guests |
|
|
Integrate with Campaign Monitor
If you want to use the ROLLER Campaign Monitor integration, refer to the guide Integrate ROLLER with Campaign Monitor to see how to link your segment to the corresponding list you've created in Campaign Monitor and begin syncing the data.
Manage your segments
From Venue Manager, go to Guests > Segmentation > Segments.
This page will display a grid view of all the segments you've created including segment name, integration type and total guests included in the segment.
For the segment you want, select the options menu (3 dots).
Choose from one of the following options.
Edit
Duplicate
Sync all integrations (sync to associated lists in Campaign Monitor)
Delete
Export to CSV
Use a segment to restrict a discount
You can limit a discount code so only guests in a selected segment can redeem it. This is useful for VIP-only deals, win-back offers, member-only pricing, or any promotion you want to keep targeted.
For the discount to apply, the guest needs to be identified at the time of purchase. In Venue Manager, this means staff complete the booking holder information; in online checkout, the guest fills in their own details.
To restrict a discount by segment, see Discount codes in ROLLER and the relevant per-type guide (eg Create a percentage discount code).