Sell faster over the counter to boost revenue and streamline the guest experience with ROLLER POS. Suggesting the add-ons that go with what a guest is buying (eg jump socks with a jump pass) gives them more from their visit and adds to each sale.
This guide shows you how to add items to a sale, apply discounts and take payment.
The video follows a sale at the counter, from building the order and applying a discount to checking waivers, taking payment and giving the guest a receipt.
Add items from your POS menus to a cart
When a guest orders at the counter, add their items from your POS menus.
From POS, use the menus on the left to find tickets, add-ons and stock. To find a product by name, use the search bar.
Select a product's tile to add it to the cart on the right.
If a stock or package product has modifiers or option sets, select the ones the guest wants. The cart updates with their choices.
[Optional] Select the date picker next to the search bar at the top of the screen to change to a future date and purchase tickets for other days in one transaction.
If barcode scanning is set up for your venue, you can also scan a stock item's barcode while you're on a POS menu tab to add it to the cart.
Sell party packages through your online checkout or in Venue Manager. They can't be added to a POS menu. To learn more about how to add stock and modifiers to the cart at POS, read the guide Sell stock products at POS.
Edit items in a cart
When a guest changes their mind, edit the item in the cart before you take payment.
From the cart (right-hand panel), select the item you wish to edit.
Change the Quantity to add or remove tickets. For a session pass with consecutive hours available, select a Duration. You can also add a note. Changes save automatically.
You can remove items from the cart by selecting the trash can icon.
If you wish to assign a value to the Custom ticket ID field (eg a wristband or access control pass) the field is clickable from the edit cart page. Select the field and assign a value next to the item.
Apply discount codes or custom discounts
Apply a guest's discount before you take payment, so they're charged the right price. A custom discount takes a dollar amount or percentage off when you need to sort something out for a guest.
If discount codes (all plans) and custom discounts (Pro and above) are enabled in each POS device's settings, you can apply them during purchases. For custom discounts (Pro and above), you can also require a manager POS PIN for staff to apply them.
After adding items to the cart in POS, select Discount and choose between Codes or Custom. If you're on a Lite plan, you can only apply discount codes you've already created (from Venue Manager, go to Products > Discount codes).
Apply a discount code
After adding items to the cart, select Discount.
Codes is selected by default.
Scan the discount code or start typing it in. If you've marked discounts as favorites, they're listed below the search field, so you can select one without typing.
Select Apply.
Repeat steps 1-4 to add multiple discount codes.
Remember, you can only apply discounts that have been configured for an item in the cart. To learn more about configuring discount codes from Venue Manager, read the guide Discount codes in ROLLER.
Add a custom discount
Select Custom.
Select $ or %.
Enter the discount amount, then select Apply.
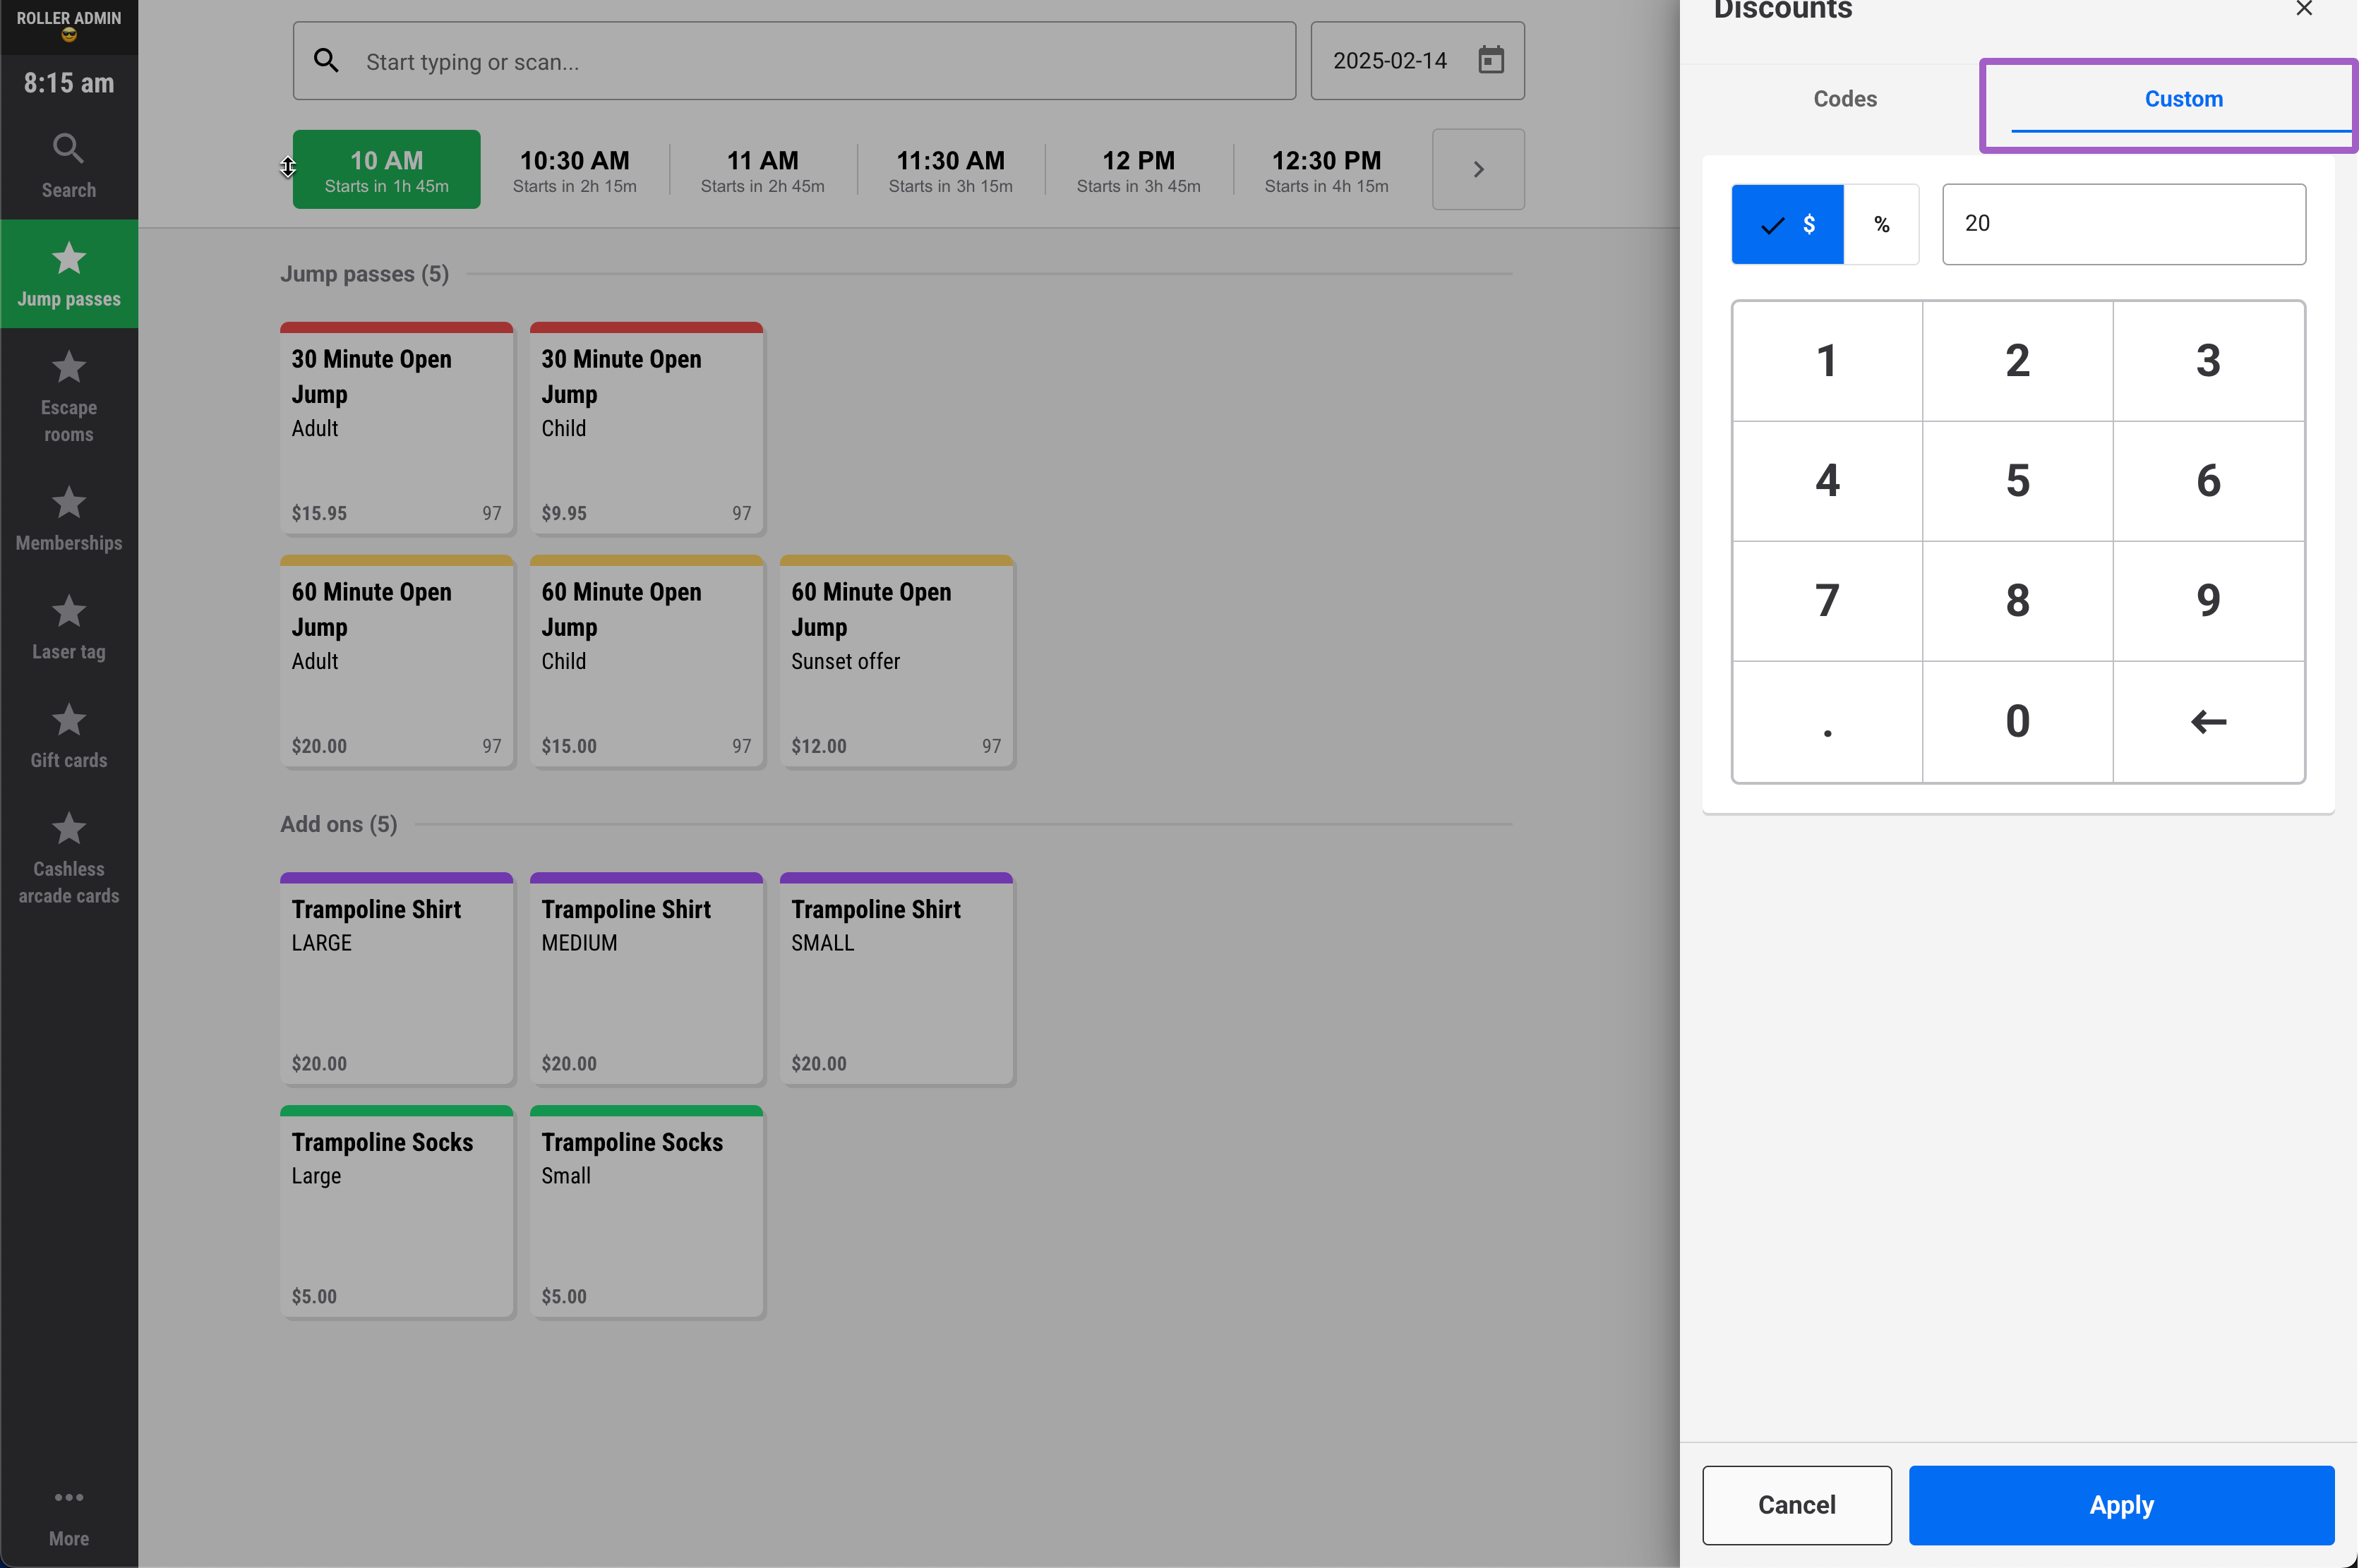
Custom discounts and the ability to favorite discounts at POS are available on Pro plans and above.
Remove a discount
In the cart totals, select Discount to list the discounts applied, then select the delete icon next to the one you want to remove.
Redeem membership discounts at POS
Redeem a member's membership before you add their items, and their discounts apply as each item goes into the cart. Select Redeem benefits at the top of the cart, then find the member by name or membership ID.
To redeem several memberships in one sale, or to look up a member's details, see the guide Redeem memberships at POS.
Park a sale while the guest steps away
If a guest needs to step away before paying (eg to sign a waiver or grab their wallet), park the sale and serve the next guest. When they're back, find it in Search on the Parked tab.
To learn more, see the guide Park bookings at POS.
Take payment
To take payment on a guest tab, see the guide Create and manage guest tabs at POS.
To take payment at POS, follow the steps below.
From the cart, select Pay total. If a ticket in the cart needs a waiver, the button shows Continue instead, so you can attach the waiver first.
POS shows which guests already have a signed waiver, matched by name or email. Attach any that are missing. You can't take payment until every waiver is signed.
[Optional] If the Booking holder details panel opens, add the guest's details, then select Save and pay (or Continue if a waiver is needed).
Select the guest's payment method.
Cash payments
Select Cash.
Select the amount the guest gave you (eg $50.00).
Or enter the cash you received in the amount field. To use the on-screen keypad, select Show keypad.
Select the pay button (eg Pay $25.00 Cash). POS shows any change to give the guest.
Card payments
Select Card. If your venue adds a card fee, POS shows it (eg Card fee ($0.50)) before you take payment.
Select the pay button (eg Pay $25.00 Card) and follow the prompts on your payment terminal.
If the card progress window closes before the terminal responds, wait until the Booking complete page shows.
Keep POS open until the terminal finishes the payment. Refreshing, closing or leaving POS can interrupt the payment or charge the guest twice. To cancel a card payment, cancel it on the terminal, not by refreshing POS.
Gift card payments
Select Gift card.
Scan or enter the gift card number, then select Tender.
Select the pay button (eg Pay $25.00 Gift card).
If the gift card doesn't cover the total, the button shows Partial payment instead. Take the rest with another method, as in Take payment with more than one method below.
Complimentary payments
If your device accepts complimentary payments, select Complimentary, enter the POS PIN when asked, then select Complete complimentary booking. You can't select Complimentary once you've taken a part payment on the sale.
Wallet payments
Select Wallet.
Scan or enter the wallet number and select Tender.
Select the pay button (eg Pay $25.00 Wallet).
If the wallet doesn't cover the total, the button shows Partial payment instead. Take the rest with another method, as in Take payment with more than one method below.
Groupon payments
The Groupon payment method only records the voucher ID against the sale. ROLLER doesn’t check the voucher with Groupon or mark it as redeemed there, so check and redeem it in Groupon first (eg in the Groupon app). This is separate from the ROLLER + Groupon integration, where guests book on Groupon and the booking comes into ROLLER.
Take each Groupon voucher as its own sale, with only the items that voucher covers in the cart. Don’t add items the guest is paying for another way (eg cash).
Add the items the voucher covers to the cart, then select Pay total.
Select Groupon.
If the Confirm the Groupon items pop-up appears, check the cart holds only Groupon items, then select Confirm. To change the cart, select Edit booking.
Scan or enter the voucher ID (9 to 12 characters), then select Tender.
Check the amount, then select the pay button (eg Pay $25.00 Groupon).
Take payment with more than one method
When a guest pays part by card and the rest in cash or with a gift card, take each payment in turn.
To split the bill by the items each guest pays for, see the guide Take split payments at POS.
Select the first payment method and enter the amount to take with it.
Select Partial payment. The button shows the amount (eg Partial payment ($20.00)). POS saves the booking and shows the Still owing page.
Select Take another payment. The booking opens, ready for the next payment.
Select the next payment method and take the rest of the amount.
Repeat until nothing is owing.
If you have the auto print receipt device setting turned on, a receipt is going to be automatically printed after each payment. Read more about POS device settings.
Take a deposit or part payment
Take part of the total now and leave the rest for the guest to pay later.
Select the payment method and enter the amount to take now.
Select Partial payment.
On the Still owing page, select Start new sale. The booking is saved with the rest still owing.
If your device prints tickets automatically after a sale, they don't print until the booking is fully paid.
To take the rest of the payment later, see the guide Take payments on existing bookings at POS.
Finish the sale
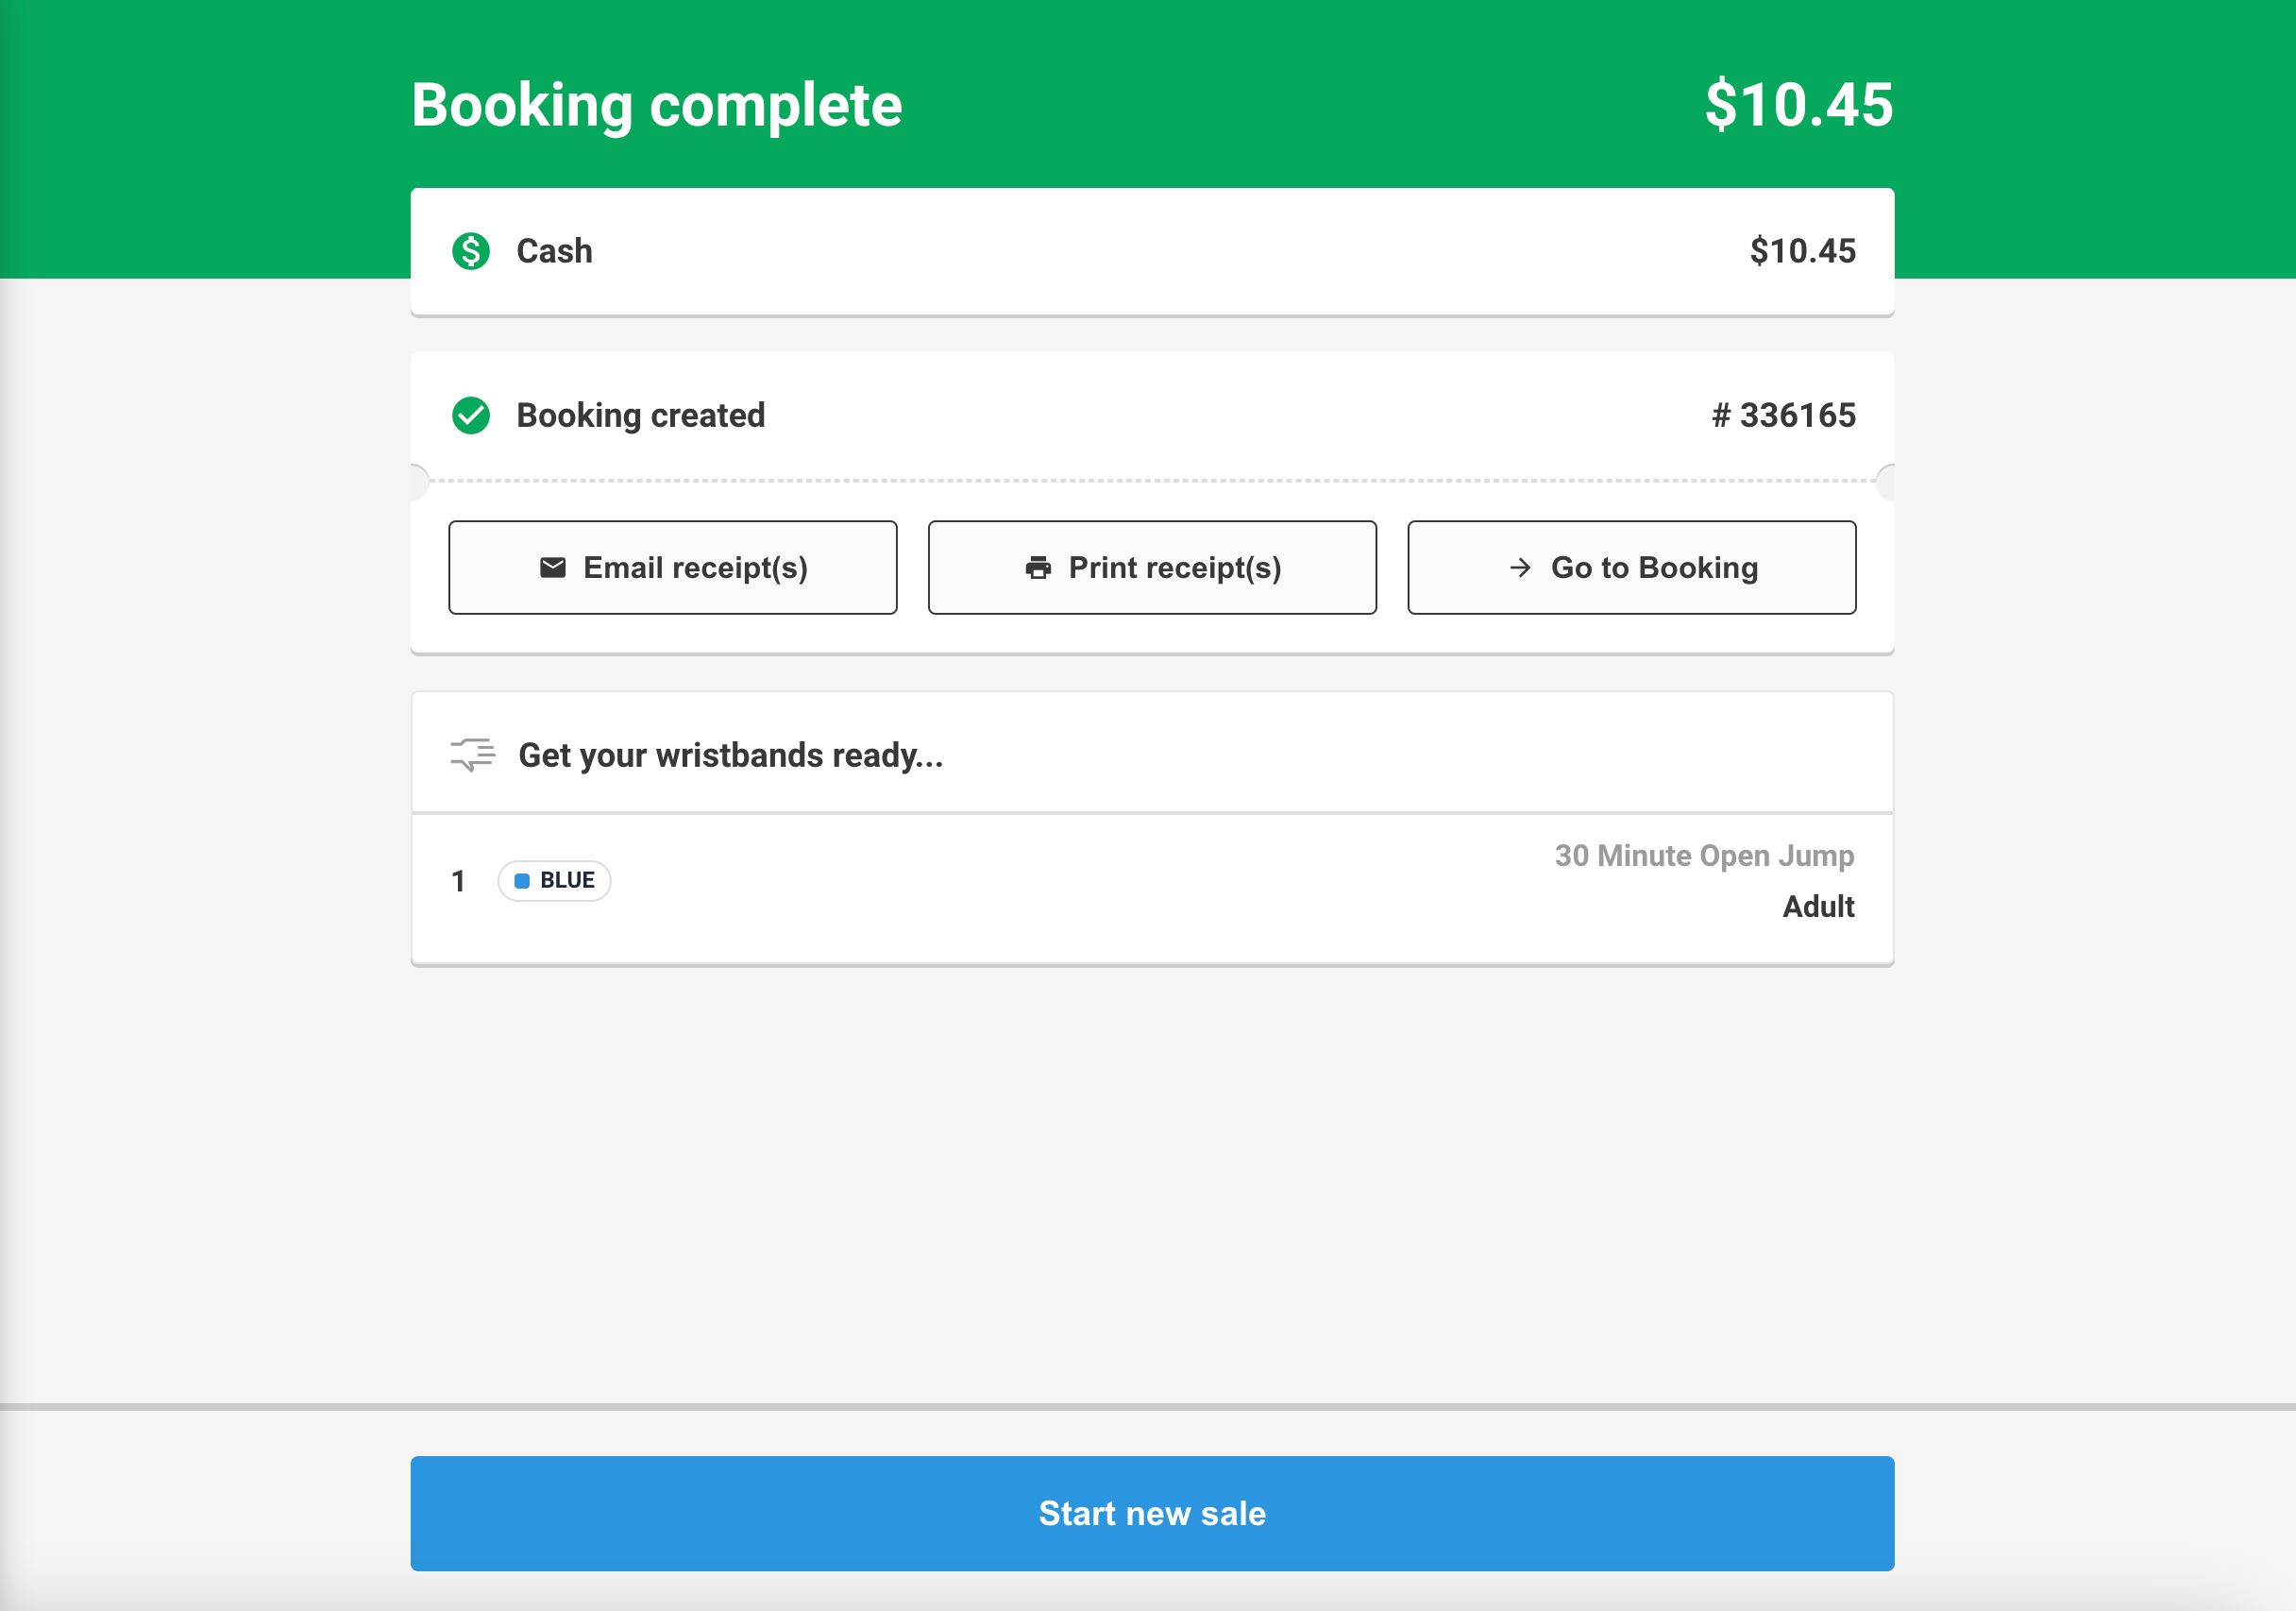
When the payment goes through, POS shows the Booking complete page.
Give the guest their receipt: select Print receipt(s), or if emailing receipts is turned on for your venue, select Email receipt(s) and enter their email address. Then select Start new sale to clear the cart for the next guest, or Go to booking to open the booking.
If your POS device prints receipts automatically, the receipt prints as soon as the payment goes through. If your venue allows reprints, the button then shows Reprint receipt(s).
For card payments, you can also print card receipts. These are records of the card transaction itself, separate from the guest’s receipt:
Print merchant card receipt: your venue’s copy, for your records
Print guest card receipt: the guest’s copy, showing what was charged to their card
To set up automatic printing or choose which printer receipts go to, see Manage individual POS device settings and Create your print stations for cloud printing.