Create branded ticket templates that give guests all the information they need for a smooth arrival. You can customize the PDF tickets guests open from the Print tickets button in their booking confirmation email, and the tickets POS prints with cloud printing.
Emailed and printed tickets come in two formats: a master ticket for the whole booking, or itemized tickets with one for each pass. This guide shows you how to choose between them and customize each one.
Choose which template to edit
The Ticket templates page (Settings > Design > Ticket templates) lists four templates: two for emailed tickets and two for tickets POS prints with cloud printing. The Modified column on the Ticket templates page shows Unmodified for any template you haven't changed.
Each template changes one kind of ticket. Editing one doesn't change the other three. The emailed tickets are PDFs guests download from links in their booking confirmation email. Their templates apply whether your venue prints with cloud printing or ROLLER Connect.
Template | Changes |
|---|---|
Master ticket | The emailed PDF for the whole booking, with one QR code that covers every guest. |
Itemized ticket | The emailed PDF with a page for each ticket in the booking, each with its own QR code. Most venues use itemized tickets. |
POS master ticket (cloud printing) | The ticket POS prints with cloud printing when staff choose a master ticket. It covers the tickets staff select, with one code for the booking. Staff can choose it when Print master tickets is turned on in POS device settings. |
POS itemized ticket (cloud printing) | The tickets POS prints with cloud printing, one for each pass, each with its own code. POS prints these by default. |
POS prints tickets with cloud printing or ROLLER Connect:
Cloud printing: you can customize the tickets it prints, using the POS master ticket and POS itemized ticket templates above (see Customize printed tickets at POS with cloud printing for more information). It also prints receipts and dockets.
ROLLER Connect, the legacy printing method: you can't customize the tickets it prints. It's also the only method that prints sticker and wristband tickets.
A POS device can use both, so you can print stickers and wristbands with ROLLER Connect and everything else with cloud printing (recommended if you require wristband printing). To compare the two methods or set up ticket printing at POS, see Set up printed, emailed and wallet tickets.
Customize emailed tickets
What each emailed ticket shows
The master ticket is one PDF for the whole booking. It shows:
Your venue logo and ticket instructions
The product name, booking holder, validity, purchase date, arrival time and booking reference
One QR code for the booking
The booking items, invoice and contact details
Your venue name and address
.png)
The itemized tickets are one PDF with a page for each ticket in the booking. Each page shows the same details as the master ticket for one ticket, with its number in the booking (eg Ticket 1 of 7), its own QR code and a booking reference that adds the ticket number (eg 111632769-384922420).
.png)
Choose which ticket guests get
If | Send |
|---|---|
Guests arrive at different times or scan in one by one (eg at entry gates), so each guest needs their own QR code. Or you sell recurring passes and want each class on its own page. | Itemized tickets |
One person holds the tickets for a group or family that arrives together. Or you sell recurring passes and want one ticket listing every class date and time. | Master ticket |
To choose master or itemized tickets, go to Settings > Design > Email templates and select Order confirmation. In the Settings tab, add Master ticket PDF or Itemized tickets PDF under Attachments. If you add both, guests get itemized tickets.
.png)
For the steps, see Set up emailed tickets in the guide Set up printed, emailed and wallet tickets.
Guests open the ticket you've set, master or itemized, from the Print tickets button. ROLLER sends the booking confirmation email automatically when a guest books through your online checkout. To send or resend it yourself, open the booking in Venue Manager, select the options menu (3 dots) at the top right, then select Send confirmation email. See Send an order confirmation email from the booking in Venue Manager.
.png)
Edit an emailed ticket template
Each emailed ticket template has these panels:
Panel | What you can change |
|---|---|
Header | The logo and ticket instructions (eg "Please present this ticket when you arrive"). |
Ticket detail | Show or hide the ticket count, booking holder, validity period, purchase date and arrival time, and change their labels. |
Booking detail | Show or hide booking items, product information and contact details. Add extra content such as your venue website or a message for guests. |
Footer | Show your venue's location and override the address format if needed. |
From Venue Manager:
Go to Settings > Design > Ticket templates.
Select Master ticket or Itemized ticket. Or select the options menu (3 dots) next to it, then select Edit template.
.png)
Select a panel on the left.
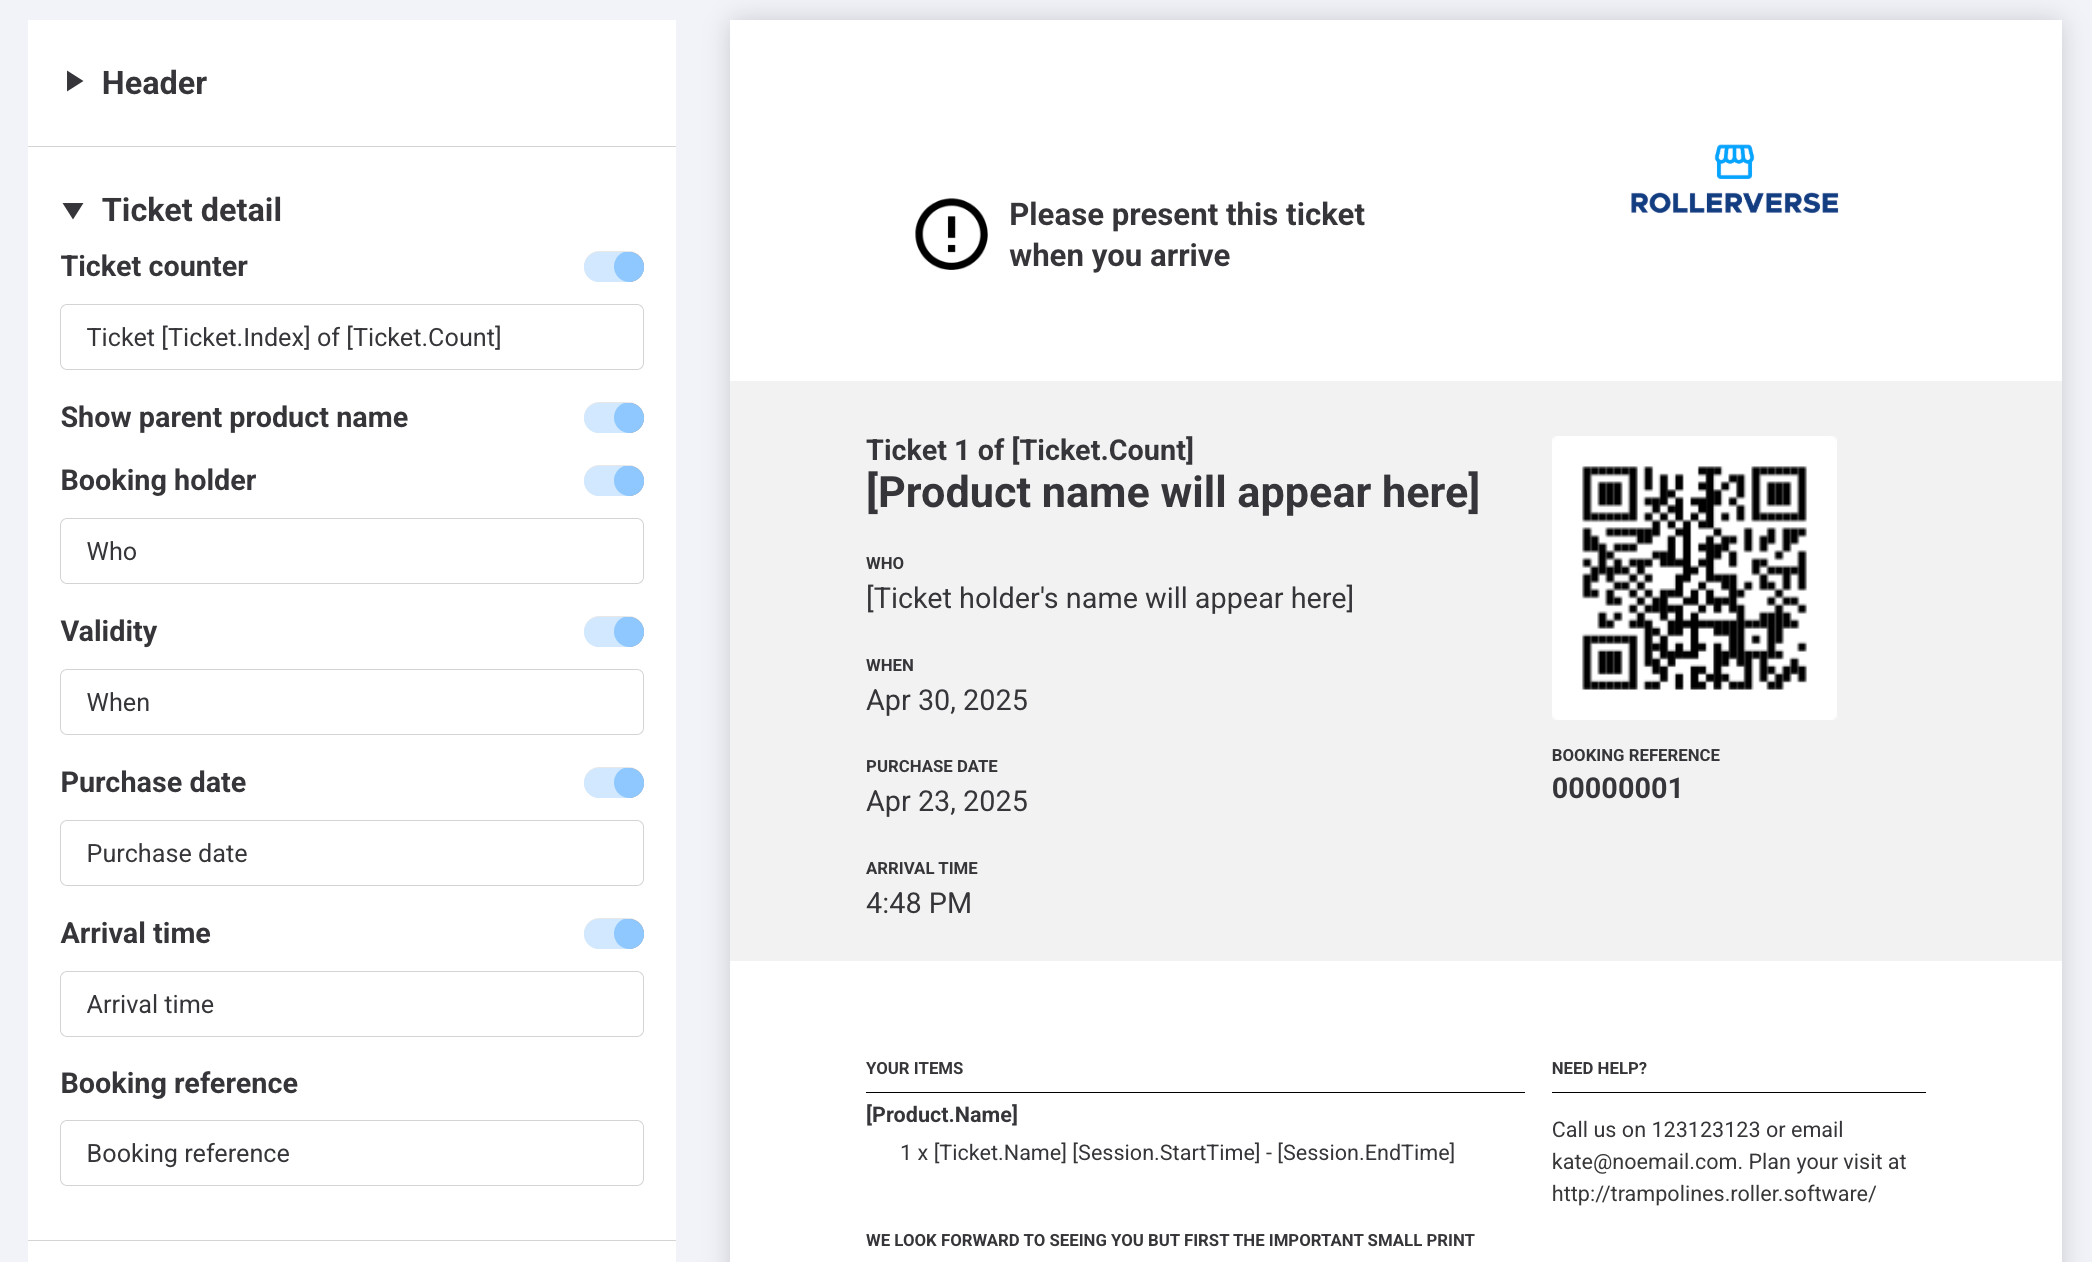
Turn individual items on or off to show or hide them.
Edit field titles and paragraph text, and insert variables such as [Booking.Reference] or [Venue.Email]. Variables fill in booking details for each guest (eg dates, contact details or guest names).
Use the toolbar to format text and add links.
Preview and publish your changes
Once you're happy with the updates:
Select Download ticket preview from the top right to view how the ticket will look to a guest.
Enter a valid booking ID to test the ticket.
Download the ticket and confirm you're happy with it.
Select Save to publish your changes.
Customize printed tickets at POS with cloud printing
These templates change what POS prints with cloud printing. You can edit these templates on any plan.
Each POS ticket template has these panels:
Panel | What you can change |
|---|---|
Header | Turn on Logo and select Upload file to add your logo. Turn Business name and Contact details on or off, and edit their text. They start with your venue's name, address, phone number and website from your venue settings. |
Order | The section title (YOUR ORDER by default). Turn Show item costs on or off to show or hide prices. Turn on Use QR code for ticket ID to print a QR code instead of the default barcode. |
GX Score survey link | Select Enable to print a guest survey prompt and QR code. |
Footer | Turn on Promotional image to add an image. Turn on Footer text and enter a message to print at the bottom of the ticket. |
From Venue Manager:
Go to Settings > Design > Ticket templates.
Select POS itemized ticket or POS master ticket. Or select the options menu (3 dots) next to it, then select Edit template.
.png)
Select a panel to open it, then change the fields you need.
Check the preview on the right, then select Save. To undo your changes instead, select Discard.
.png)
POS prints itemized tickets by default. With Print master tickets turned on in POS device settings, staff choose Itemized or Master each time a ticket prints. If you turn it on, customize the POS master ticket too. See Set up printed, emailed and wallet tickets.
For your logo and promotional image, use a file 512 pixels wide and no larger than 1 MB. Black and white images print most clearly. The same sizes apply to receipt templates. See the guide Customize receipt and ticket templates for cloud printing.
Print a test ticket from POS to check the layout on your printer.
Check what ROLLER Connect tickets show
ROLLER Connect prints from fixed templates, so you can't change what its tickets show.
Ticket type | Products | What prints |
|---|---|---|
Itemized | Session passes, standard passes and any other product that creates tickets (eg memberships) | Venue name, product name, ticket type (eg 1 x Adults), valid dates, ticket price, ticket number (booking number and ticket number, eg 111633469-384925607) and a QR code. |
Master | Any booking, when Print master tickets is on | Venue name, product name, ticket type and quantity (eg 3 x Adults), booking date, booking number and a QR code. |
Sticker | Session passes and party packages | Guest name from the waiver, product name, session date, session start and end time and the guest's age category. To learn more, see the guide ROLLER Connect: Sticker ticket printing fact sheet. |
Wristband | Session passes and party packages, including session passes in a package | Venue logo, guest name from the waiver, product name, session date, session start and end time and a QR code of the ticket number. To learn more, see the guide Wristband ticket printing based on end session times from POS. |
Here's a ROLLER Connect itemized ticket for one adult (left) and a master ticket for a booking of 3 adults (right).
.png)